Configuring Outbound mail setup with Microsoft client credentials
Step 1: Register an application in Microsoft Entra
- Sign in to the Microsoft Entra admin center Portal.
- Navigate to App registrations.
- Click New registration.
- Enter a name for your application (for example, "Mail OAuth Integration").
- Under Supported account types, select an option based on your needs:
- Accounts in this organizational directory only (Autologyx Test only - Single tenant).
- Accounts in any organizational directory (Any Microsoft Entra ID tenant - Multitenant).
- Click Register.
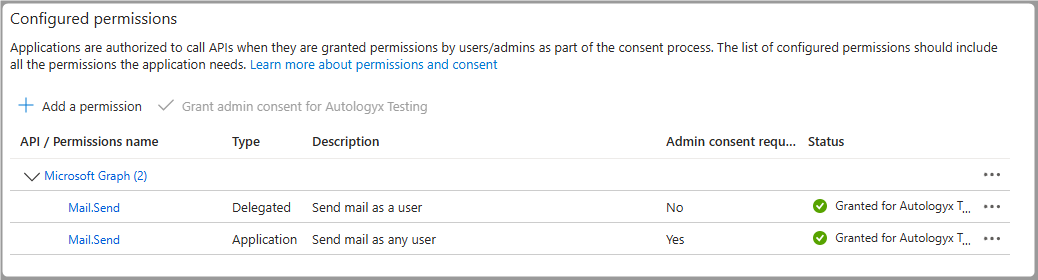
Step 2: Configure API permissions
In your registered application, go to API Permissions.
Click Add a permission > Microsoft Graph > Delegated permissions.
Select the following permission:
Mail.Send
Click Add permissions.
Click Add a permission > Microsoft Graph > Application permissions.
Select the following permission:
Mail.Send
Click Add permissions.
Click Grant admin consent for [Your Organization] to apply permissions.
Your app API permissions should look as below:
Step 3: Create a client secret
- Navigate to Certificates & secrets.
- Under Client secrets, click New client secret.
- Enter a description (for example, "Mail Integration Secret").
- Set the expiration period. Take note of the expiry date, as a new secret will have to be created when this one expires.
- Click Add and copy the generated secret.
- Important: This secret will only be displayed once. Store it securely.
Step 4: Assign an Exchange Online license
- Go to Microsoft 365 Admin Center and log in with an admin account.
- Find the e-mail for setting up your email in Catalyst:
- Navigate to Users > Active users.
- Search for an e-mail address (for example, "sample@outlook.com").
- Assign a license:
- Click on the user.
- Go to the Licenses and Apps tab.
- Look for Exchange Online (Plan 1 or Plan 2) or any Microsoft 365 license that includes Exchange.
- If the user does not have an Exchange Online license, assign one.
- Set the expiration period.
- Click Save changes and wait a few minutes for the changes to take effect.
Step 4: Retrieve the required information
Gather the following details:
- Tenant ID: Found under Microsoft Entra admin center > Overview.
- Client ID: Located in the App registration overview.
- Client Secret: Generated in Step 3.
- Scope:
https://graph.microsoft.com/.default
Step 5: Add OAuth configuration in Catalyst
- Go to Administration > Authentication objects.
- Click the Create button on an Authentication objects list.
- Select Microsoft oAuth 2.0 (Client Credentials flow) as the Provider.
- Fill in the required fields using the details from Step 4.
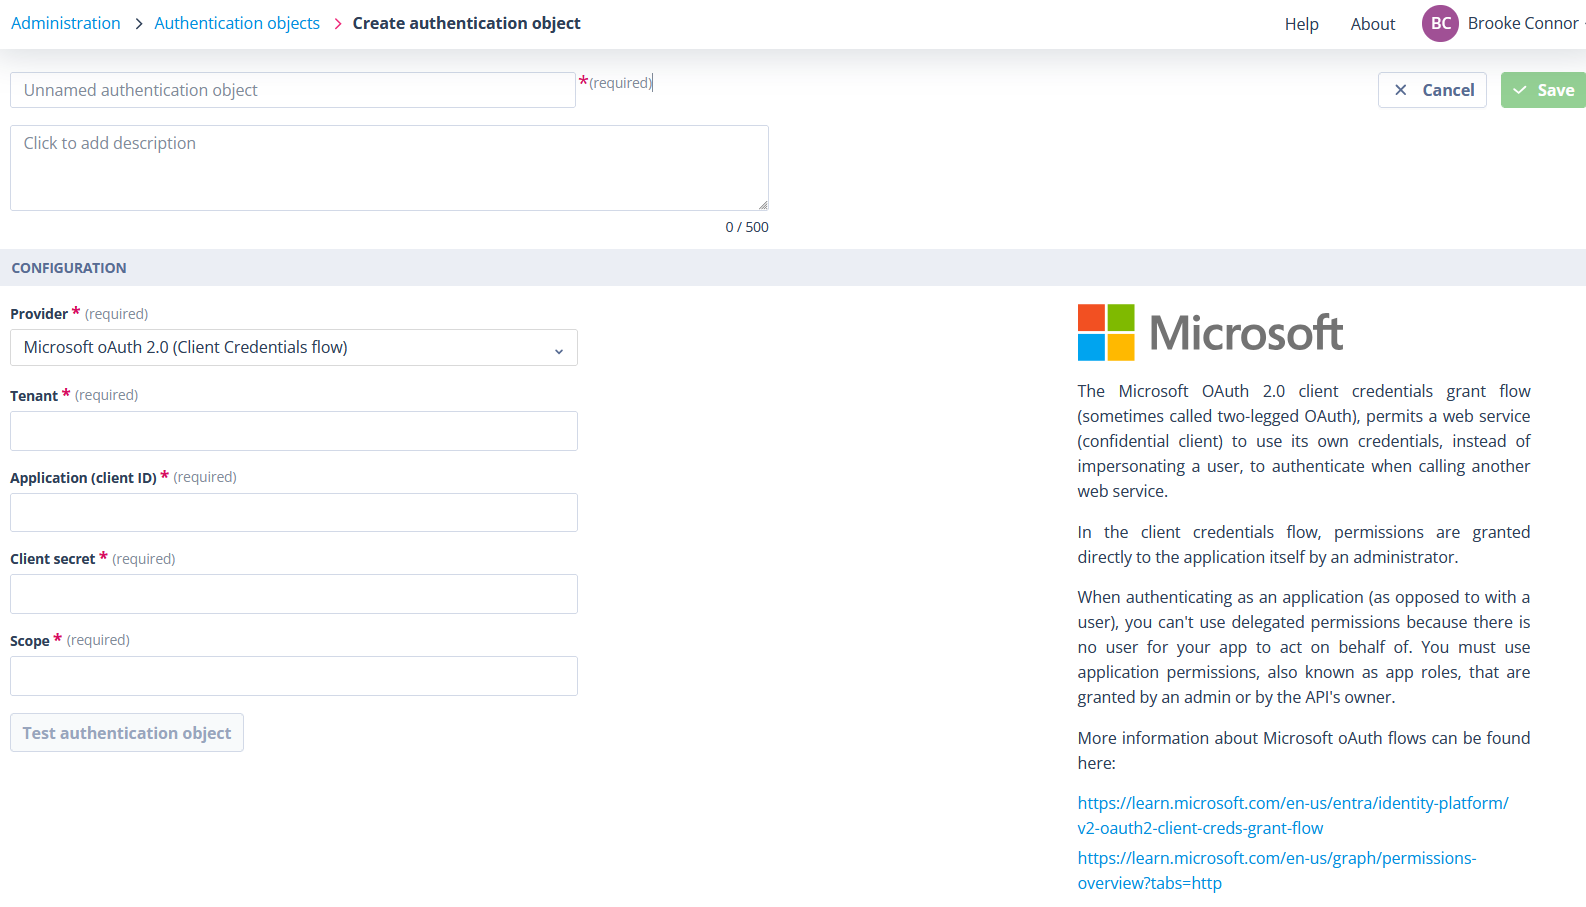
Step 6: Test and save the Authentication object
- Click Test to verify the Authentication Object.

- If the test is successful, click Save.
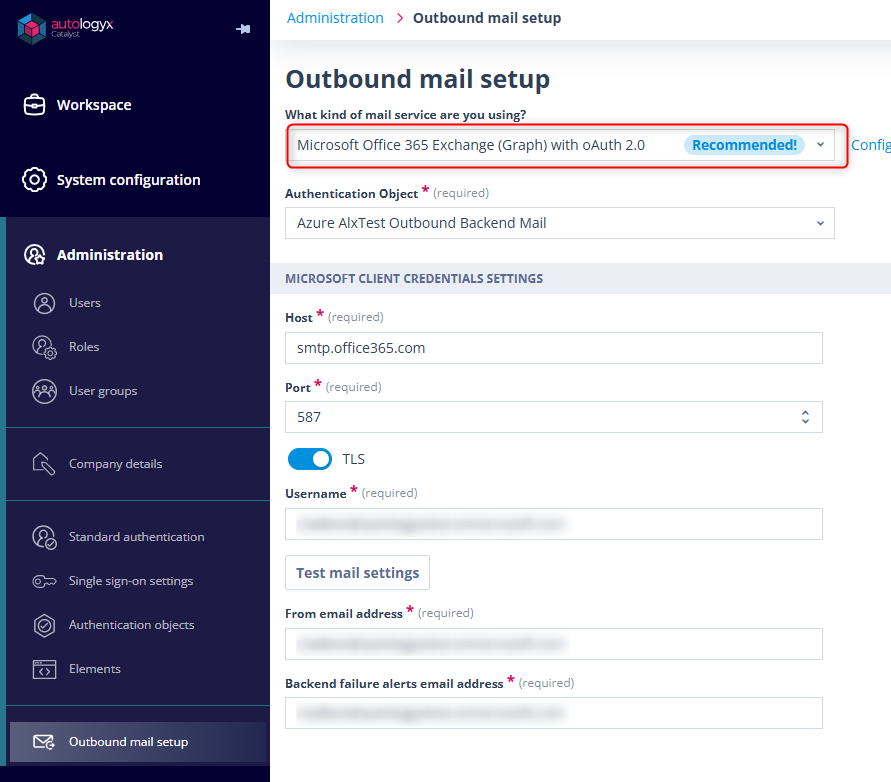
Step 7: Configure the Outbound mail setup
- In Outbound mail setup, select Microsoft Office 365 Exchange (Graph) with oAuth 2.0 as the mail service you will be using.
- Choose the newly created Authentication Object from the dropdown.
- Complete the Microsoft Client Credentials Settings section.
- Click Test mail settings to verify the configuration.
- If successful, click Save.