Okta SSO in Catalyst
We are pleased to announce that login via Okta Single Sign-On (SSO) is now supported on the Catalyst platform.
This guide walks you through the full configuration process, from creating an application in Okta to enabling SSO within Catalyst, so that your users can log in securely using their existing Okta credentials.
This guide assumes you have administrator access to both your Okta account and your Autologyx Catalyst platform.
Step 1: Create an Application in Okta
- Sign in to your Okta Admin Console.
- Go to the Applications section.
- Click Create App Integration.
- Select the Sign-in method as OIDC – OpenID Connect.
- For Application type, choose Web Application.
- Set an App integration name of your choice. This is just a label for your convenience.
- Leave Sign-in redirect URIs and Sign-out redirect URIs empty for now. We’ll come back to these after setting up the SSO configuration in Autologyx.
- In the Assignments section, select how the application should be made available:
- You can assign it to all users in your organisation,
- or to specific groups.
- Click Save to create the application.
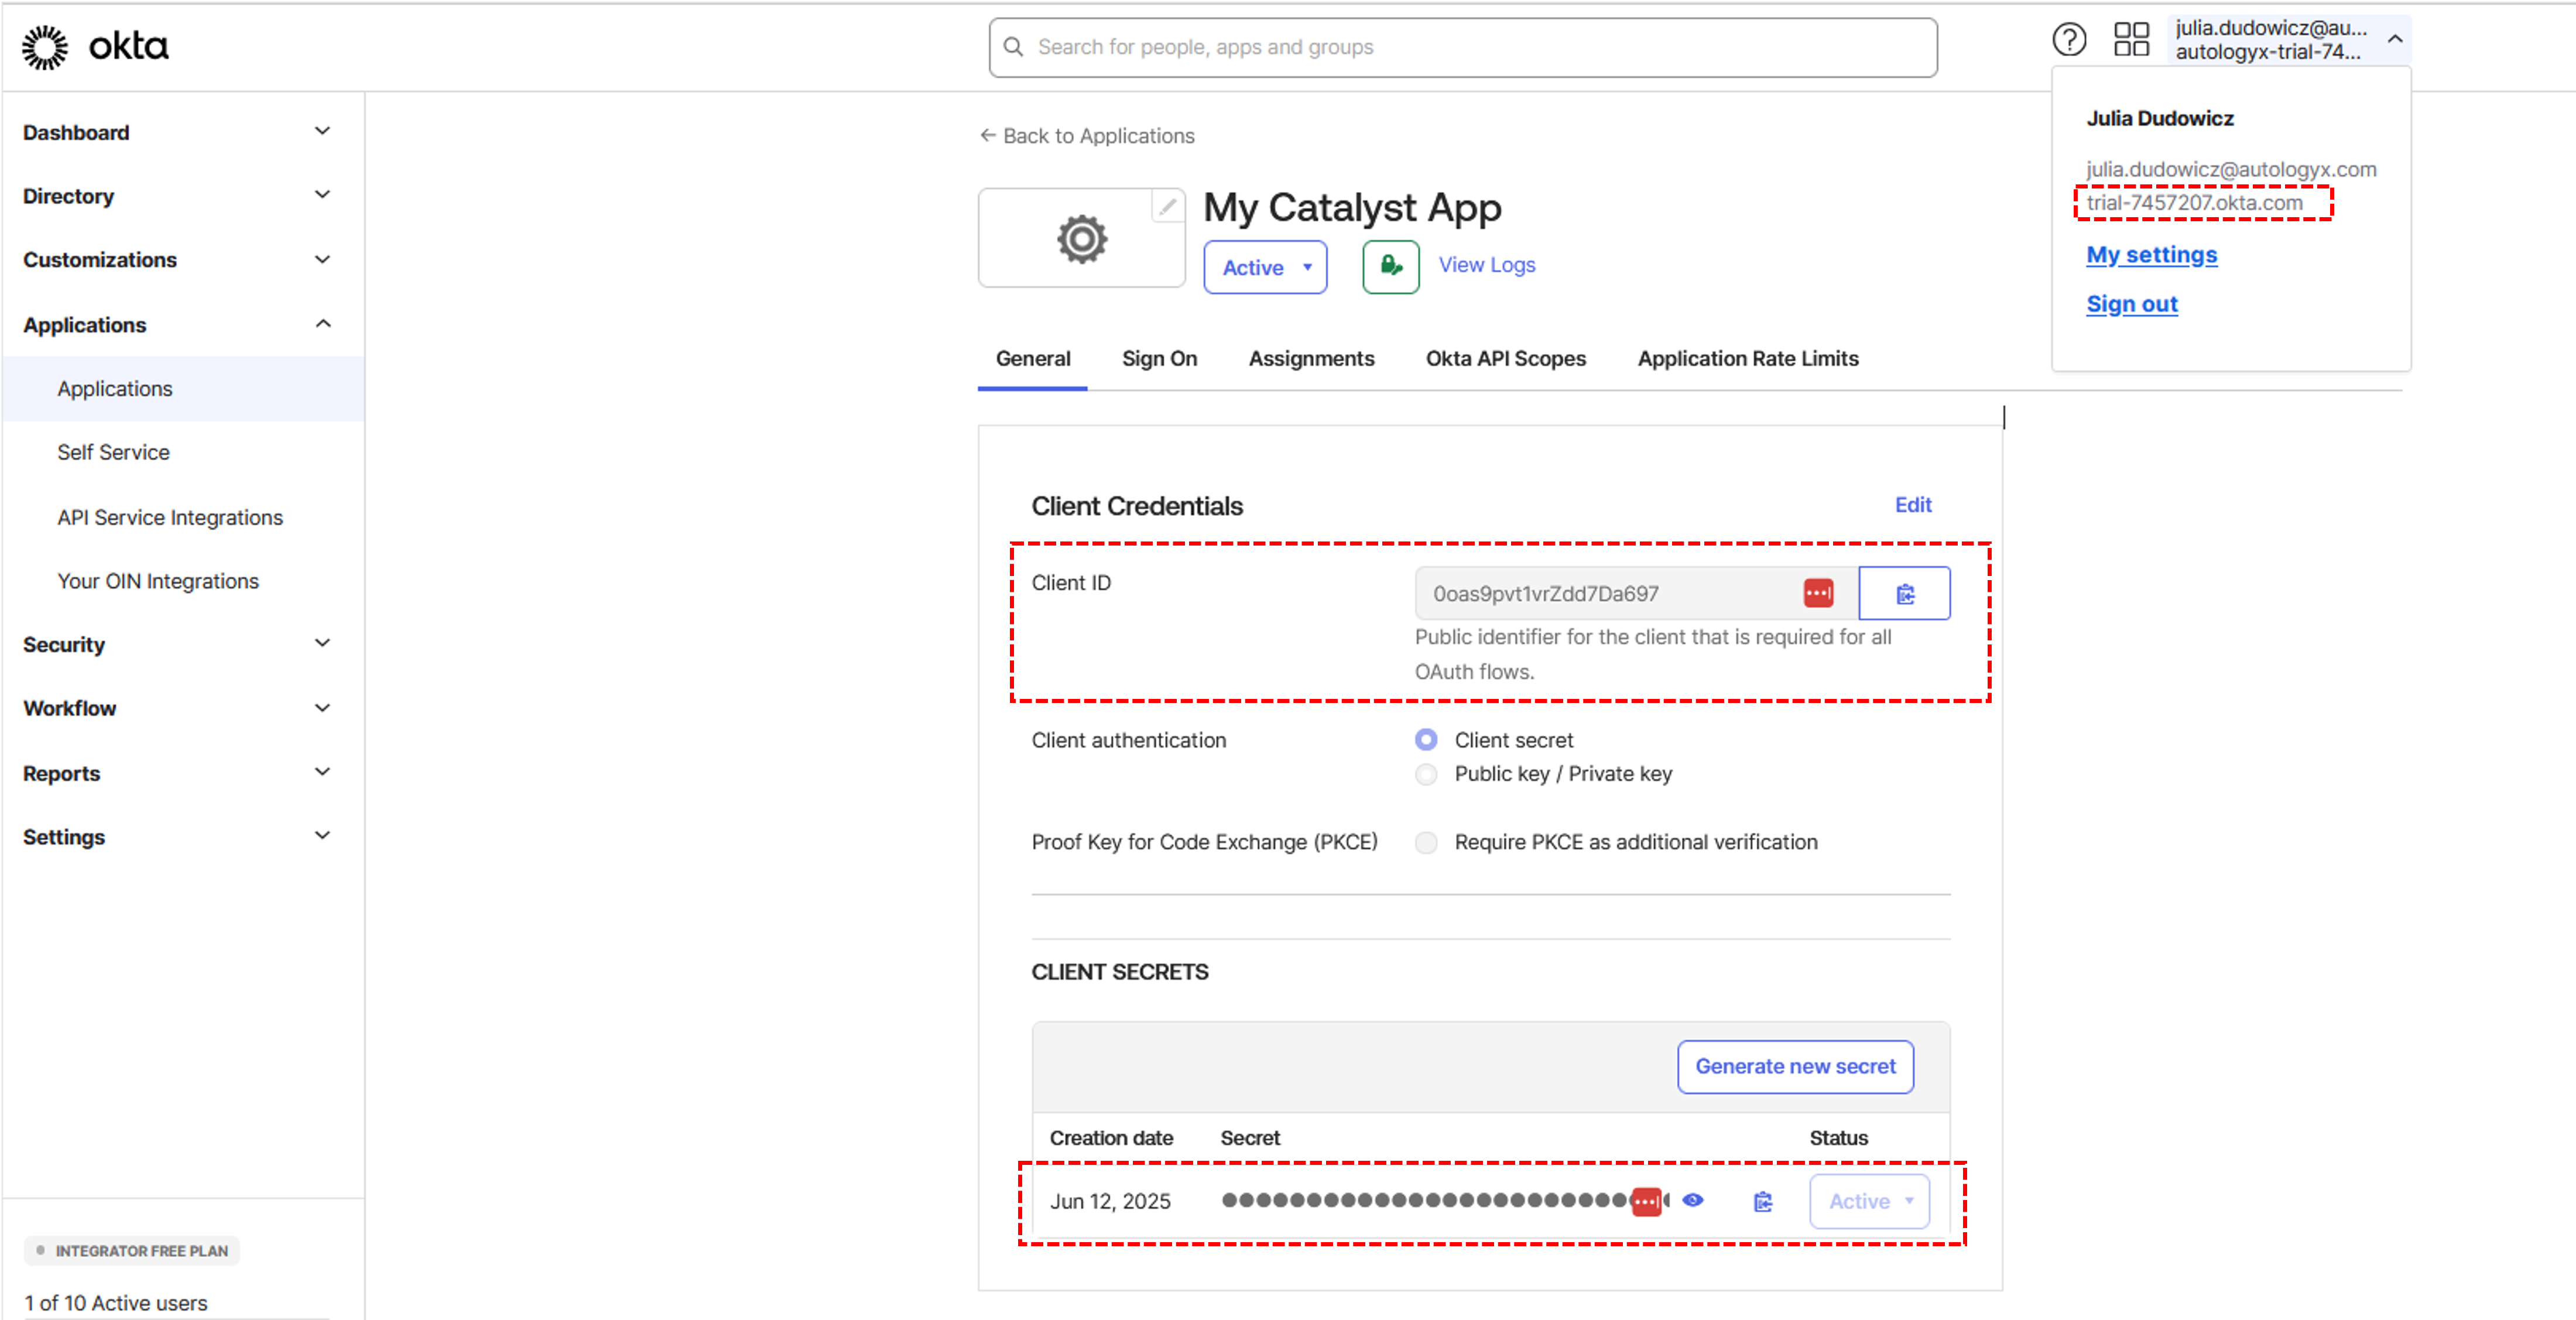
Step 2: Retrieve Credentials from Okta
Now that your application is set up, locate and securely store the following:
- Client ID – a unique public identifier for your application. Catalyst uses it to recognise your app during the login flow.
- Client Secret – a confidential key used to authenticate your application with Okta. Treat this as a password - do not share it or store it insecurely.
- Okta Domain – this is your organisation’s Okta tenant domain. You can find it in the browser’s address bar or under your email address in the top right of the Okta dashboard. It typically looks like:
yourcompany.okta.comortrial-1234567.okta.com
You will use all three of these values when configuring SSO in Catalyst.
Step 3: Set Up SSO Configuration in Catalyst
- Log in to the Catalyst platform with a user who has permissions to create SSO.
- Go to Administration > Single Sign-On Settings.
- Click Create to begin configuring a new SSO provider.
- For Single Sign-On Provider, select Okta OpenID Connect (OIDC).
- Fill in the following fields:
- Client ID – the identifier from your Okta application, as described in Step 2.
- Client Secret – the confidential key associated with your Client ID.
- Okta Domain – your organisation’s unique Okta URL. This will be used to route authentication requests.
- Optionally, you may enable:
- Catalyst login support – enable this if you want users to log into Catalyst using SSO.
- Automatically create user – when enabled, any valid Okta user who logs in for the first time will automatically have a Catalyst account created for them as an Internal User with active status.
- Click Save to complete the SSO configuration.
After saving, go back to the Okta SSO edit page, where you will find two important URLs:
- Redirect / Callback URI – the URI where Okta will send users after a successful login.
- Logout URL – the URI Okta will call after a user signs out.
You will now need to return to Okta to input these values.
Step 4: Update the Okta Application with Catalyst URIs
- Go back to the Applications section in your Okta Admin Console and open the application you created earlier.
- Click Edit in the General Settings or Login section.
- Fill in the following:
- Sign-in redirect URIs – paste the Redirect / Callback URI provided by Catalyst.
- Sign-out redirect URIs – paste the Logout URL from Catalyst.
- Click Save.
This ensures Okta can communicate correctly with Catalyst during login and logout flows.
Step 5: Configure Access Policy and Rules in Okta
To complete the setup, ensure that your Okta Authorization Server allows access from the application.
- Go to Security > API in your Okta Admin Console.
- Click on the default Authorization Server.
- Go to the Access Policies tab.
- Click Add Policy.
- Fill in the form as follows:
- Name – a descriptive name such as Catalyst SSO Policy.
- Description – an optional field to document the policy’s purpose.
- Assign to – choose whether this policy should apply to all clients or only specific applications. You should decide this based on your organisation’s internal security policy.
- Click Create Policy.
- In the newly created policy, click Add Rule and configure it with:
- Rule Name: provide a clear name, e.g.
Auth Code Grant Rule. - Under IF Grant type is, check Authorization Code.
- Configure any other options, such as users, scopes, and token lifetime, according to your organisation's security policies.
- Rule Name: provide a clear name, e.g.
- Click Create Rule.
Step 6: Enable SSO
Once your SSO configuration is saved and enabled in Catalyst, users will see the Okta login option on the Catalyst sign-in screen.
Any user with an active Okta account who also meets your organisation’s policy rules will be able to authenticate and access Catalyst through Okta.
If you selected the Automatically create user option, first-time Okta users will have Catalyst accounts created automatically upon login.