Configuring an Element and how it works on a form
After you have written the JavaScript, created the required files in your Git repository, and imported your package successfully, the Element becomes available for use in Catalyst.
This article explains where Elements can be used, how they are configured on a form, and how data is passed from Catalyst to the Element.
Where Elements can be used
Elements can be made available in the following places:
The configuration process is the same in each location.
Example: Elements on the Landing page
The following screenshots show Elements being used on the Landing page.
In this example, several Elements are available in the side panel. Two Elements have been added to a section on the Landing page.
The same Element can be used more than once on a page if required.
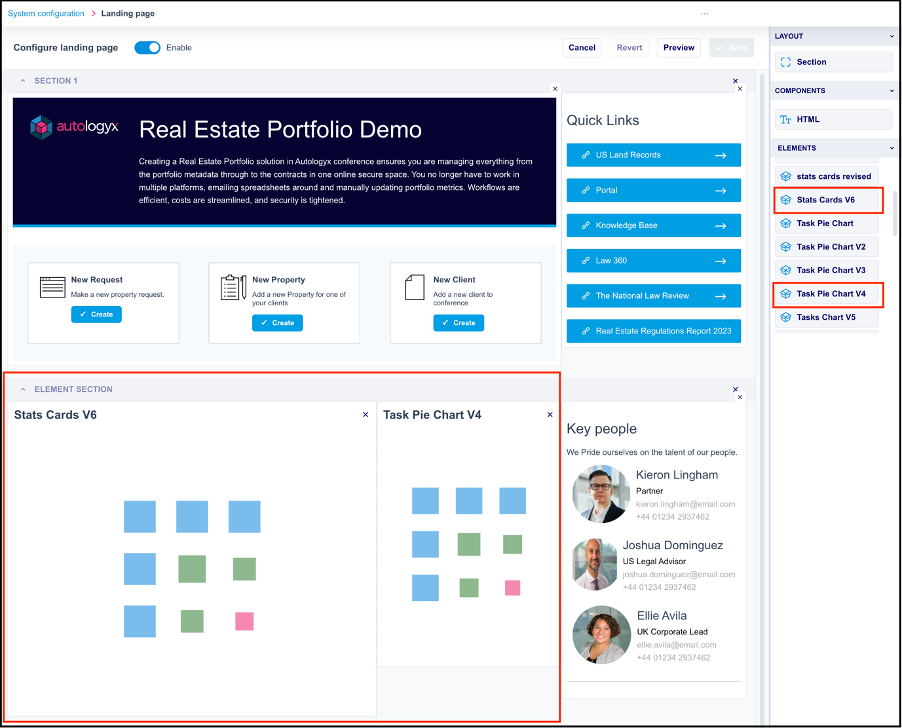
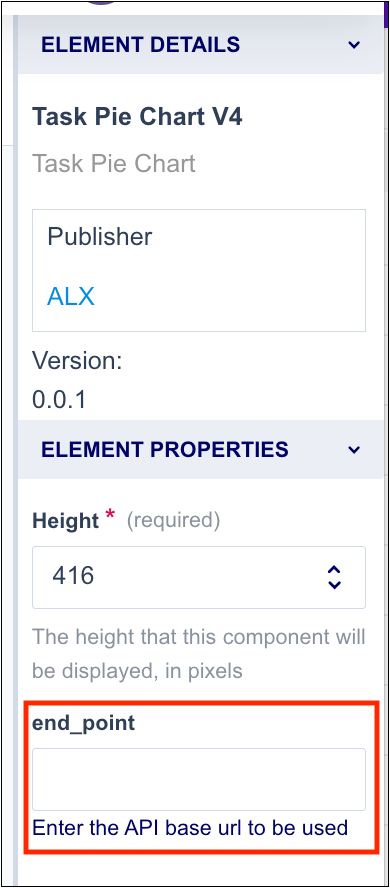
Drag the required Element onto the page, then click it to open Element Details in the side panel.
The Element properties shown in the side panel are generated from the parameter objects defined in the Element package.
For example:
parameter_nameisend_pointparameter_descriptionis the help text shown below the input fieldparameter_typeisstring, so the field accepts free text
The information entered in this field is passed to the application iframe as part of the message data.
You must also configure the Element height. This is measured in pixels.
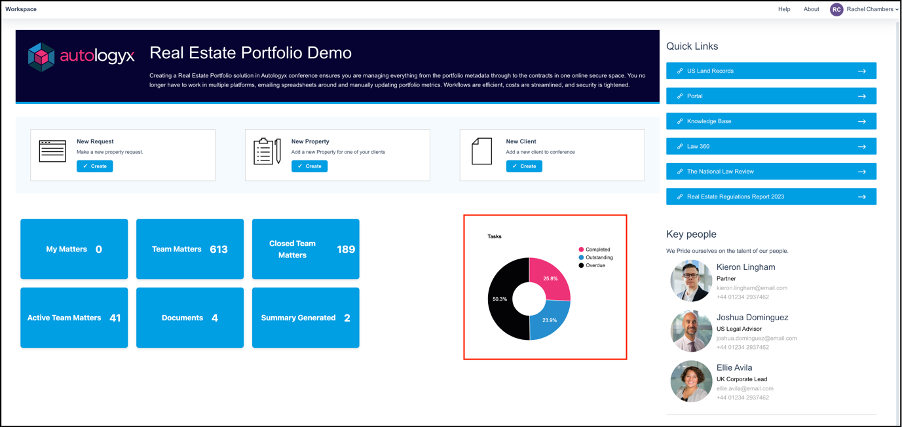
After configuring the Element, save the page and check that its position and size are correct.
On the Landing page, the pie chart Element shows the total number of Tasks in the system as a percentage for each status:
- Completed
- Outstanding
- Overdue
Message data passed to the application
Catalyst passes message data to the Element application.
The example below shows message data for an Element used on the Landing page.
The endpoint is populated with the URL of the instance so that API calls used by the Element are sent to the correct environment.
const messageData = {
  user_details: {
    access_token: "",
    first_name: "",
    last_name: "",
    user_id: 1,
    user_name: ""
  },
  object_record_meta: {
    class_id: undefined,
    record_id: undefined,
  },
  endpoint: "https://conference.autologyx.com",
  component_parameters: [
    {
      parameter_description: "Enter the API base url to be used",
      parameter_name: "end_point",
      parameter_type: "string",
      parameter_value: "/api/tasks/"
    }
  ],
  parameters: {
    end_point: "/api/tasks/",
  }
}
In this example, class_id and record_id are undefined because the Element is being used on the Landing page.
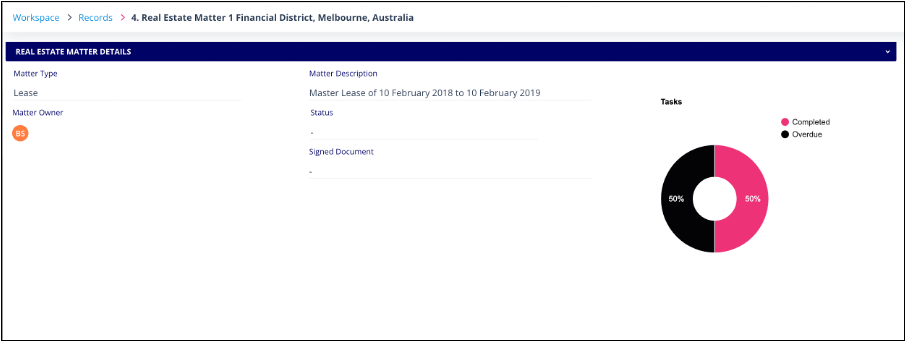
When the same Element is used on an Object class form, these IDs are passed in the object_record_meta section of messageData.
The example below shows message data for an Element used on an Object record.
const messageData = {
  user_details: {
    access_token: "",
    first_name: "",
    last_name: "",
    user_id: 1,
    user_name: ""
  },
  object_record_meta: {
    class_id: 265,
    record_id: 17521,
  },
  endpoint: "https://conference.autologyx.com",
  component_parameters: [
    {
      parameter_description: "Enter the API base url to be used",
      parameter_name: "end_point",
      parameter_type: "string",
      parameter_value: "/api/tasks/"
    }
  ],
  parameters: {
    end_point: "/api/tasks/",
  }
}
In this case, the Element uses the record_id to fetch Tasks related to the selected record and display their statuses in the donut chart.
How message data is received
The message data is passed from Catalyst into the iframe running the Element code.
To receive the message data and allow the Element to work, your Element code must include an event listener.
The example below uses a React hook.
import { useState } from "react";
import { MessageData } from "../types/interfaces";

export const useMessageData = () => {
  const [messageData, setMessageData] = useState<MessageData | undefined>();

  window.addEventListener("message", (event) => {
    const messageData: MessageData = event.data || {};
    if (messageData.user_details) setMessageData(messageData);
  });

  return {
    messageData,
  };
};
Whenever the message data changes, the event listener is triggered and the data is saved into the messageData variable.
The access token expires every five minutes. It is automatically passed again to the iframe and the message data is updated.
Things to remember
- Elements can be used on the Landing page and on Object class forms.
- The same Element can be used more than once on a page.
- Element properties are generated from the parameter objects defined in the Element package.
- Elements used on the Landing page do not receive
class_idorrecord_id. - Elements used on Object class forms receive
class_idandrecord_idinobject_record_meta. - Your Element code needs an event listener to receive message data from Catalyst.
- The access token is refreshed automatically and re-passed to the iframe.