OpenAI: GPT Actor

Introduction
With the OpenAI: GPT actor, you can bring the power of ChatGPT into your workflows:
- Dynamic Prompt Customisation: Prompts can be configured using merge fields to pull data directly from records, ensuring that every input is tailored to a specific context. This means you can design workflows where prompts adapt dynamically to the needs of the task or the data within a record.
- Versatile Responses: The output generated by ChatGPT can be seamlessly injected back into the system. Whether it’s adding insights to a record, generating summaries, or creating custom reports, the integration enables you to operationalise AI responses across your business processes.
- Full API Configuration in Sequencer: The actor allows complete customisation, mirroring API functionality. You can set parameters such as context, temperature, authentication objects, and even the model version to ensure your workflows leverage AI in the way that best suits your needs.
How to get the OpenAI: GPT actor
Our OpenAI: GPT integration is a premium service that is enabled by contacting your client manager who will ensure it is switched on based on your subscription to the service.
Configuring the OpenAI: GPT actor
The OpenAI: GPT integration into Autologyx Catalyst relies on a couple of dependancies:
- That you have an OpenAI platform account
- That you are able to create and manage OpenAI API Keys
All being well with those, to get started with OpenAI: GPT in Autologyx, you must first set up an Authentication Object using the API method.
Head to the Administration section of your Autologyx Catalyst instance
Click Authentication Objects
Click Create

Fill out the fields below, choosing API Key from the drop down and ensuring you use your API Key from your OpenAI Platform account
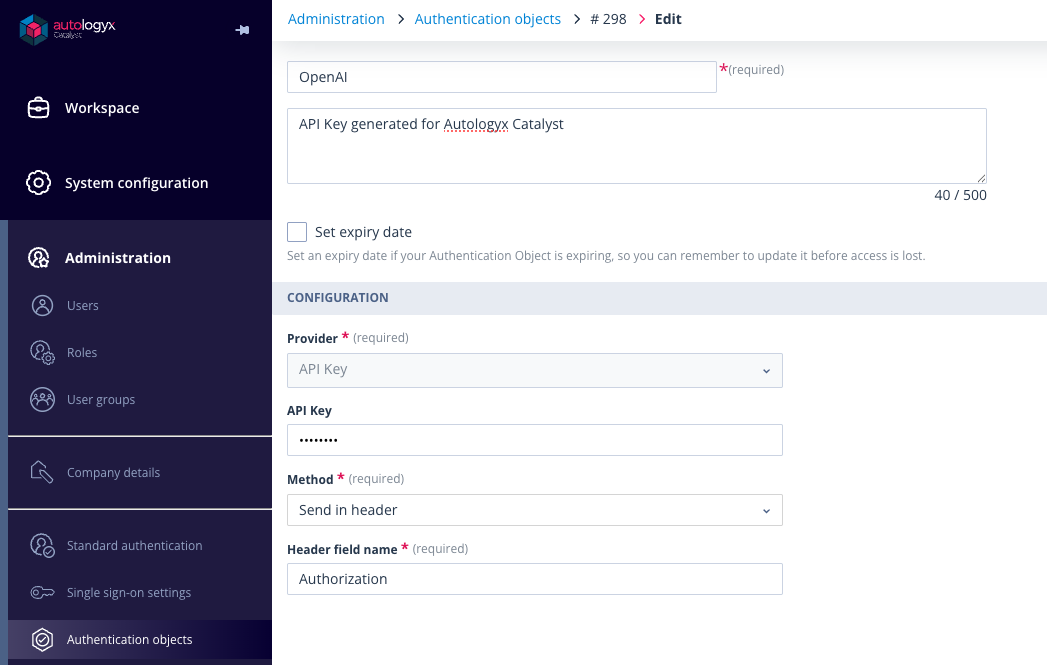
Complete by clicking Save.
Adding the OpenAI: GPT actor to a Sequence
As with all actors in the Autologyx Catalyst Sequence builder, the OpenAI: GPT actor can be dragged onto your Sequence canvas to perform a function based on your triggers.
- Go to System Configuration > Sequences > Open your Sequence
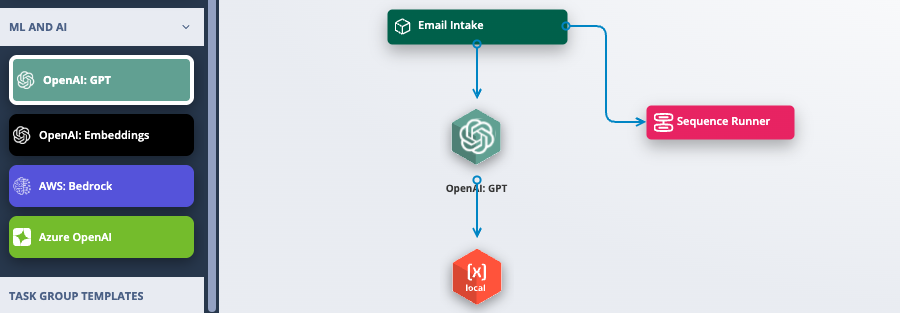
- You'll find the OpenAI: GPT actor under the ML and AI tab
- In Edit mode, drag it onto your Sequence canvas at the relevant point of your workflow
- In the example below, the OpenAI: GPT actor is linked by a simple trigger from the Email Intake Object Class
Using the OpenAI: GPT actor in a Sequence
Where your OpenAI: GPT actor is placed in your workflow will depend on precisely what it is required to do, at what point in your workflow, and how it is progressing your automation.
Right click on the actor and you will see two options:
- Properties: where you can name your actor and give it a brief description
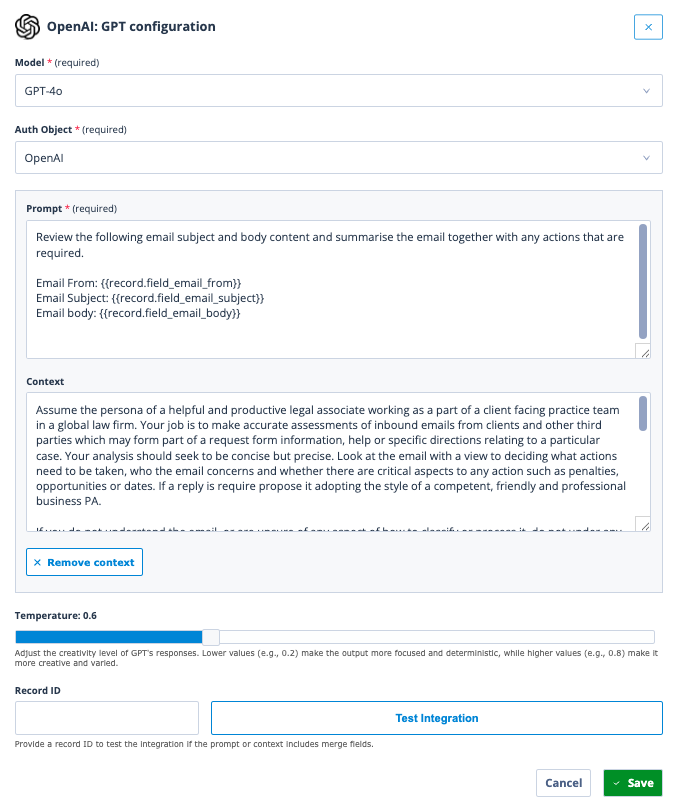
- Configure: this will open a modal window (below) where you will select your model, authentication method, choose your data points to send to the LLM, and add your prompts.
Configuration breakdown
Here's a breakdown based on a very simple legal intake and triaging use case:
Model: Choose from the three models:
- GPT 3.5
- GPT 4.0
- GPT 4
Auth Object: Select the authentication object that you created earlier using your API key.
Prompt: This is where you will most likely use a combination of static prompt text and data points (merge fields) from the Object Class that you are referencing in your Sequence. In this example, we have an Object Class that stores email data, and our prompt is asking for a review of the email subject and body content, and to summarise the email together with any actions that are required.
Record Fields (for example,
{{record.field_email_from}}) or Record Properties can be inserted by right clicking on the Prompt box and choosing the fields you need, e.g.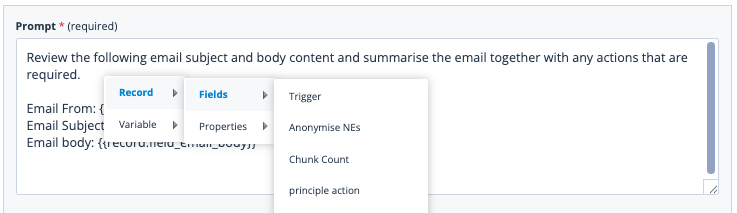
This data will then be parsed into the prompt and sent to the model as part of the query.
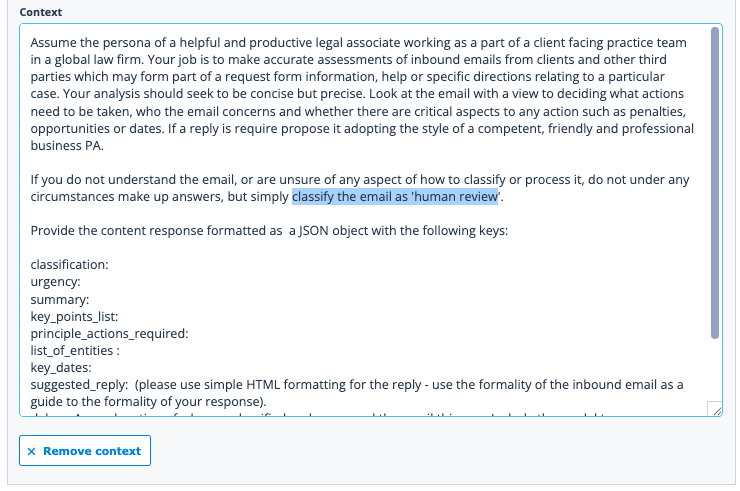
Context: In addition, you can also set additional context to aid the model with its response. In the example below, we're setting some additional parameters in which the response should be framed, e.g to look at the email with a view to deciding what actions need to be taken, to classify the email as in need of 'human review' if anything is unclear, and to return a response in JSON format with predesignated keys, e.g. 'classification' and 'summary'.
Temperature: You can adjust the creativity level of GPT's responses by using the slider. Lower values (e.g., 0.2) make the output more focused and deterministic, while higher values (e.g., 0.8) make it more creative and varied.

Testing the OpenAI: GPT actor responses: If the prompt or context includes merge fields then you can test your OpenAI: GPT actor responses by providing a record ID to test the integration. Insert a record ID into the Record ID box and click the Test Integration button.

An additional modal window will open with the query you've sent to OpenAI and the model's response, e.g.

Save both your actor configuration and Sequence.
Using the OpenAI response in a Sequence
Typically, you'll need to create a variable to store the OpenAI:GPT actor's response to enable you to use the data within your sequence. For this, we use the Local Variable actor.

Drag the Local Variable actor onto your Sequence canvas, connected by a trigger to the OpenAI:GPT actor that you've just configured.
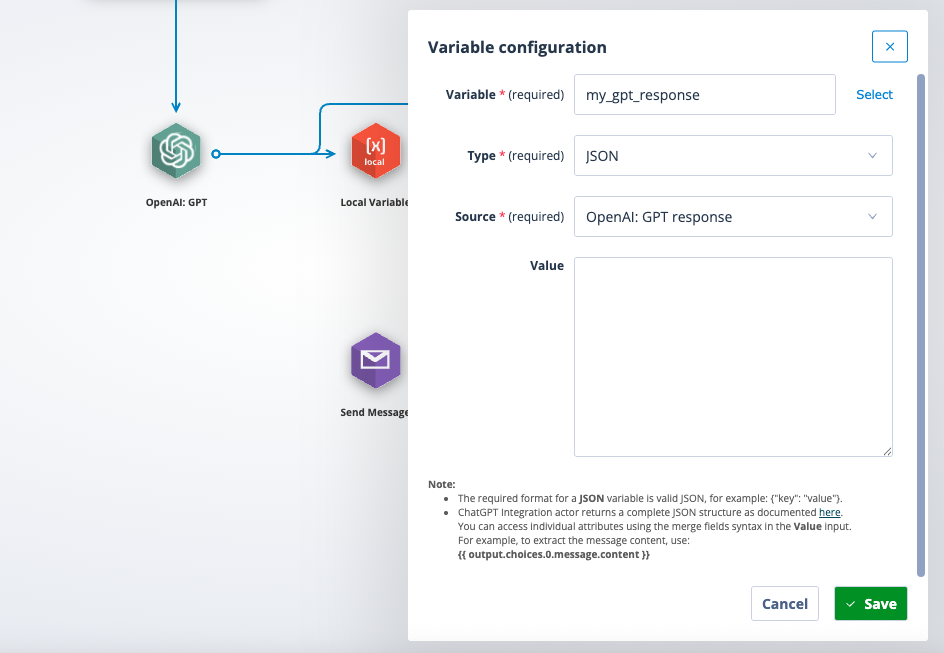
In the example below, the Local Variable actor is then configured to return the output of the OpenAI:GPT actor. You will need to define:
- Variable: add a variable name to the Variable field
- Type: select what type of variable it is, in this case JSON (remember that's what we asked GPT to output as)
- Source: this will be the OpenAI:GPT response
- Value: this is where you define the fields in the JSON response that you want included in the variable, e
- The required format for a JSON variable is valid JSON, for example: {"key": "value"}.
- ChatGPT Integration actor returns a complete JSON structure as documented here. You can access individual attributes using the merge fields syntax in the Value input. For example, to extract the message content, use:
{{ output.choices.0.message.content }}Save
Your variable is now ready to use through the Sequencer, e.g. updating the initial record with the LLM response, sending an email that includes the response etc