Creating the Theme
Only users with a Super admin account type will be able to create a Theme.
The Theme configuration page can be found in the System configuration section of the main menu. Users who do not have a Super admin account type will not see the Theme menu item.
Clicking on Theme will open the Configure Theme page on the Media tab. The Theme is disabled by default.
The page has 3 tabs:
Media
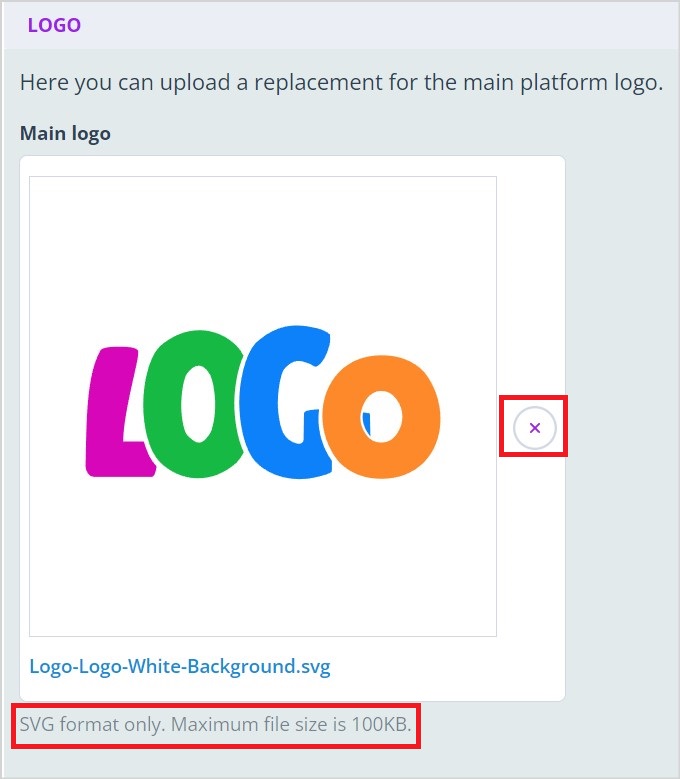
Here you can upload your logo or the logo of your client/customer for whom the system is being prepared or maintained.
The logo must be in SVG format (because these are easily resized without loss of resolution) and cannot be larger than 100KB. You can drag and drop the required logo or browse for it.
You might find the following image convertors useful:
https://www.adobe.com/express/feature/image/convert/png-to-svg
An incorrectly uploaded logo can be removed by clicking the X to the right hand side of the Main logo field.
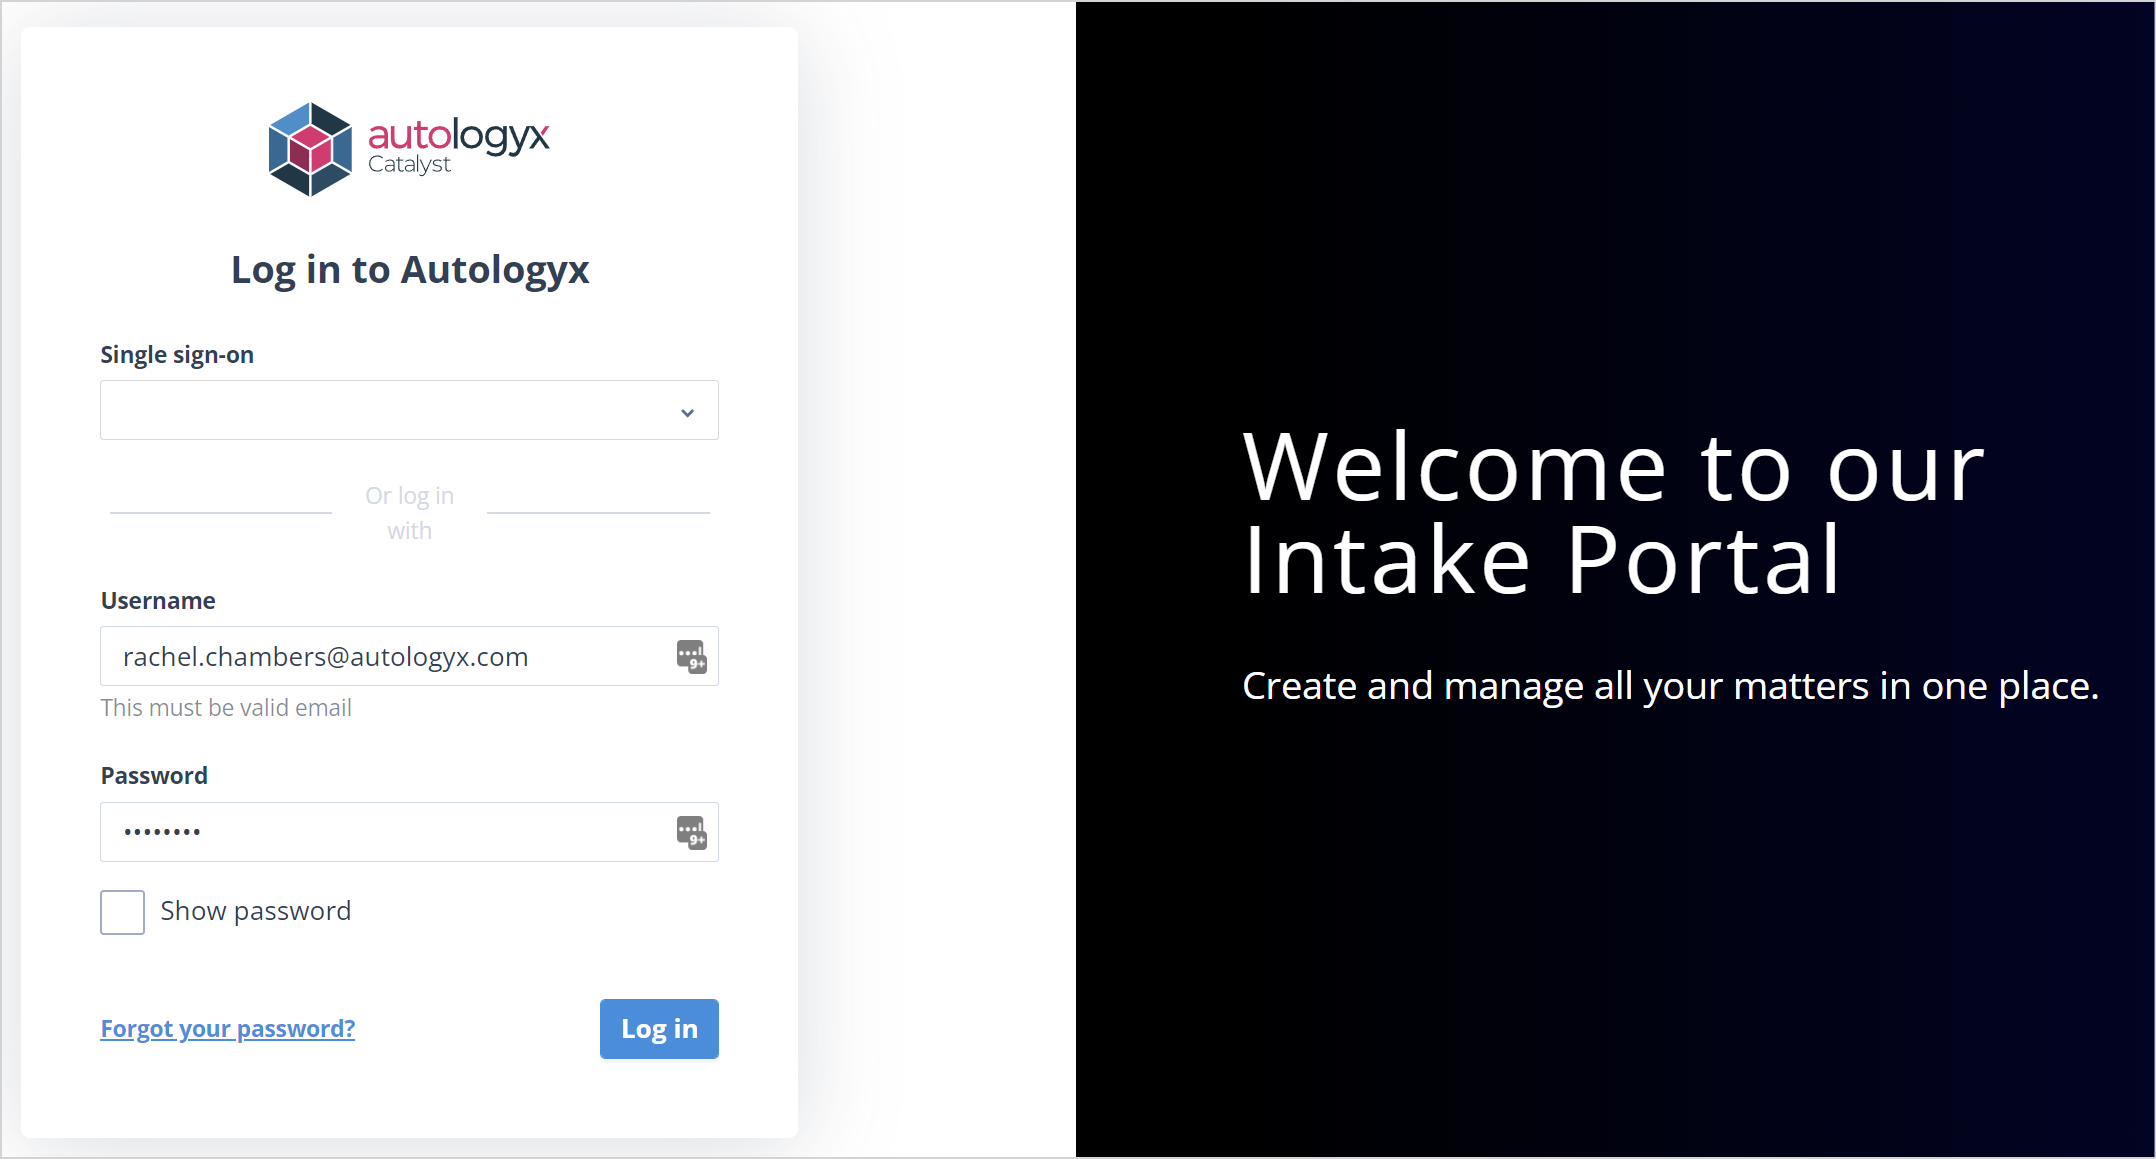
Your logo will replace the default Autologyx Catalyst logo throughout the application including, on the login page, at the top of the main menu and on the forgotten password screen.
The logo is not mandatory. If a file is not uploaded, the default Autologyx logo will be used throughout the system.
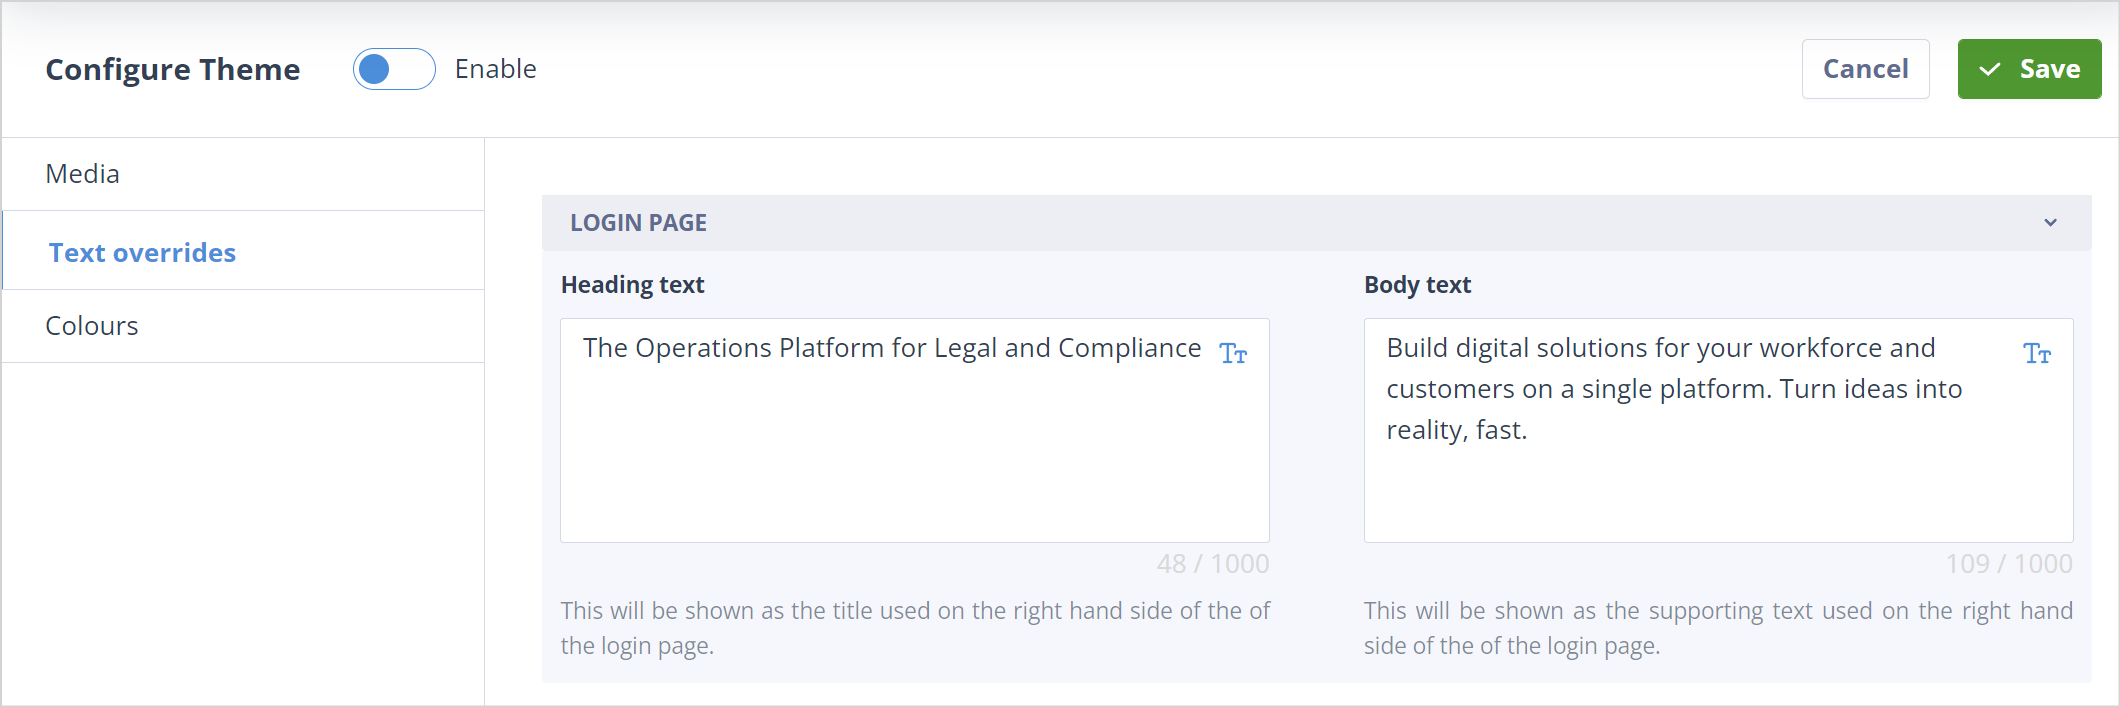
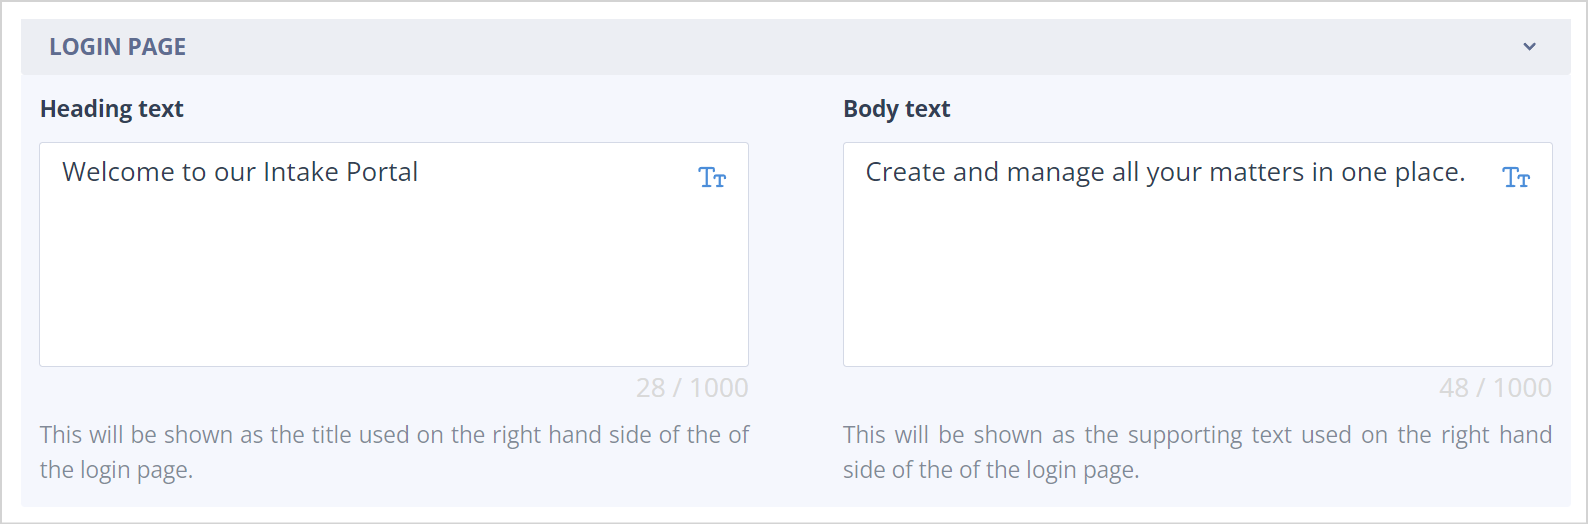
Text overrides
Here you can change the text which is displayed on the right hand side of the login page.
You can use this area to add a welcome message or instructions to users, but bear in mind that there is a 1000 character limit in each text field.
| Default text | Customised text |
 |  |
 |  |
Colours
This tab allows you to define which colours are used throught your system. Colours have to be entered as Hex numbers. The tab is split into 3 sections:
Core colours
Primary colour - this controls areas such as Radio buttons, the + Create buttons for instance on the Object classes and Task templates lists, the + Add buttons such as the + Add field button in an Object Class, the gradient colour on the right hand side of tiles in the System configuration and Administation menu pages.
Secondary colour - this controls the colour of the menu place and dividing lines as well as the filter and column configuration button graphics, the list page control icons and section names as well as the text on the "Cancel" and "X No, go back" buttons. It is also used for the field names in Object records and the Task summary tab.
Tertiary colour - this controls the colour of the Save and Complete buttons.
Additional colours
Navigation panel background colour - this clearly controls the background colour of the main menu on the left hand side. It also provides the gradient colour on the right hand side of tiles in the System configuration and Administation menu pages.
Form colours
Section content background - this controls the background colour on the create/view Object record form, the standalone form used to create Object records and Task forms.
Section header background - this controls the colour of the section headers on the same forms.
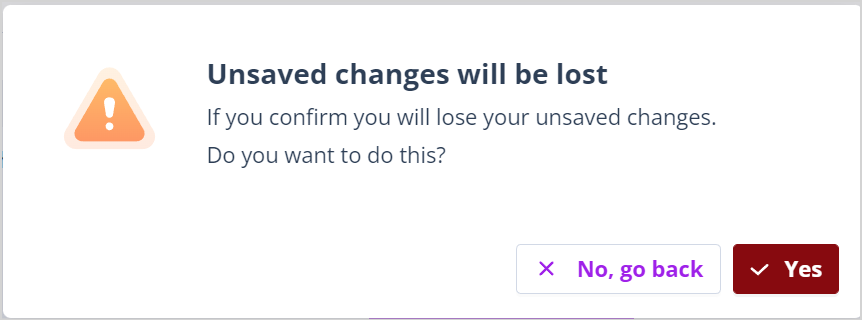
Cancelling changes
You'll note that there is a Cancel button on the top right hand side of the page. Clicking this will display the "Unsaved changes will be lost" modal.
Click Yes to confirm the cancellation. The Theme will revert to the last saved version.
Click X No, go back to retain the Theme you are working on.
Having configured your Theme, remember to click the Enable button and Save so that it can be applied throughout the application.
A user with a Super admin account can edit the theme at any time by clicking on Theme in the main menu. This allows you to keep your theme updated to match new branding requirements.
Useful info:
Colour control fields are mandatory. Hex values must be entered into the fields to determine which colours will be used for each colour control. Once entered, the corresponding colour will be displayed above with its hex value overlayed. It is important to note that:
- The colour control will never allow an empty value because it will reset to the previous valid value if the control field is not populated.
- The colour control will never allow an invalid value because it will reset to the previous valid value if an invalid entry is made.