How do I create a user account?
If you have a Super Admin account type, you can manually create user accounts for other individuals.
Go to:
Administration > Users
Clicking Users opens the Users list.
At the top of the page, click + Create to open the Create user page.
The first thing you need to decide is which account type the user needs. User account type is mandatory, as shown by the red asterisk.
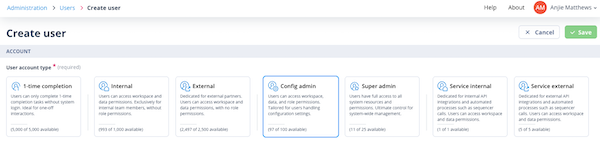
User account types
1-time completion
Users with this account type do not log in.
They can complete tasks from links in email notifications sent to them after task assignment.
This account type is suitable for users who are rarely asked to complete a task and do not need to interact with records.
Once created, the status of this user account immediately becomes Active.
Internal
Internal users are part of your own organisation.
They usually work with records and tasks and may be members of one or more User groups. They may also be given Object class and/or record permissions.
Users created through Single sign-on are always given an Internal account type.
External
External users are individuals outside your organisation, such as clients, suppliers, or other third parties.
They may need record permissions to access a defined set of records, or they may have no record permissions and only access tasks assigned to them.
Service Internal
Service Internal accounts are designed for integrations and automated Catalyst processes that need to authenticate to the platform without relying on a named individual user.
Examples include:
- API integrations
- automated workflows
- background services
- system-to-system communications
Service Internal accounts are automatically activated when created and do not use the standard account activation process.
Unlike standard users, Service Internal accounts can use username and password authentication even when your organisation has disabled password-based login for human users in favour of Single Sign-on (SSO).
This allows integrations and automated processes to continue operating without affecting user authentication policies.
Service Internal accounts are granted Super Admin permissions automatically.
Service External
Service External accounts are intended for external integrations and automated processes that require authenticated access to Catalyst.
Examples include:
- third-party integrations
- external automation platforms
- partner system integrations
- external API consumers
Like Service Internal accounts, Service External accounts are automatically activated when created and do not require account activation emails.
Service External accounts can use username and password authentication even when password-based login has been disabled for standard users.
Unlike Service Internal accounts, Service External accounts do not receive any permissions automatically.
If access to records, tasks, or Object classes is required, permissions must be assigned using:
- User Groups
- Object Class Permission Sets
- Record Permission Sets
Config admin
Config admin users are usually internal users who need access to selected areas under System configuration and Administration.
They may have a Business Analyst or Implementation Specialist role and be responsible for configuring the data model, tasks, and sequence workflows.
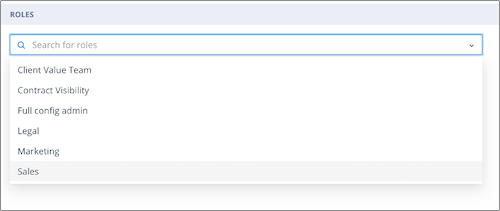
Roles
When the Config admin account type is selected, a Roles section is displayed.
Click into the field and select the required Role.
If there are many Roles, start typing the name of the Role to filter the list.

Managing Service Accounts
Service Accounts are created and managed from the same Users area as standard user accounts.
You can:
- view Service Account details
- create Service Accounts
- edit usernames and personal information
- reset passwords
- delete Service Accounts
- view account-type limits
Service Accounts are useful when integrations or automated processes need a dedicated account that is separate from a named user account.
This makes it easier to manage security, audit activity, and integration ownership independently of individual users.
Super admin
This account type should be given sparingly to users who require all possible permissions.
Super Admin users do not require a Role. They also do not need Object class, record, or User group permissions. However, you may still add them to a User group for task assignment or messaging.
Users with this account type are the only users who can access Users and Roles. They cannot edit their own user account type.
The Super Admin account type is required for:
- configuration of the Landing page
- configuration of Outbound mail setup
- configuration of the Theme
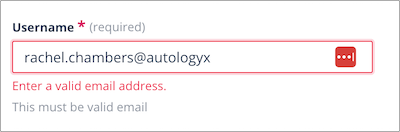
Username
A user's email address is their username, so this field must contain a valid email address.
Each user must be created with a unique email address.
If you try to create a user with an email address that already exists, an error message is displayed.

If you enter an unrecognised format, a validation error is displayed.
Password
This field is not editable.
A password cannot be edited by any user from this page.
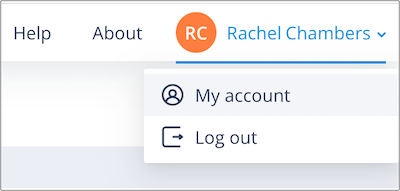
If a user wants to change their account password, they must do this from My account, which is available from the menu under their name in the top-right corner of the page.
Users with an Internal, External, Config admin, or Super admin account type receive an activation email either when their account is created or later, if that option is chosen.
The activation email contains a unique URL that takes the user to the account activation page. From there, they can set their password.
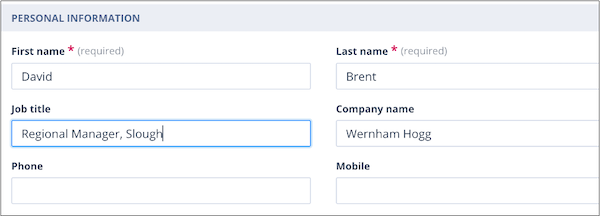
Personal Information
In this section, the new user's First name and Last name are mandatory.
The other fields are optional.
For external users, it can be useful to include the Company name.
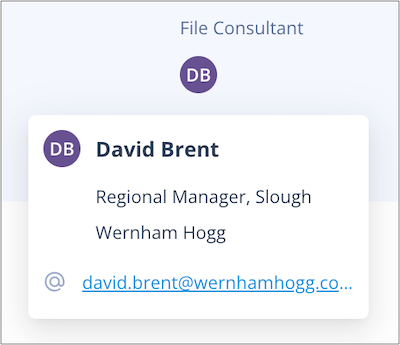
The information entered in this section is shown when the user's avatar is clicked elsewhere in the system.
When you are done, click Save in the top-right corner.
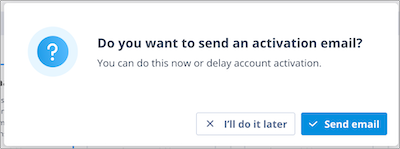
A modal is displayed asking whether you want to send an activation email.
- Click I'll do it later to create the account without notifying the user immediately.
- Click Send email to send the activation email immediately.
Unless filtering or sorting has been applied to the Users list, the new user is added to the top of the list and is given a User ID.
If the Status column is visible on your Users list, the new user is shown with the status Created.
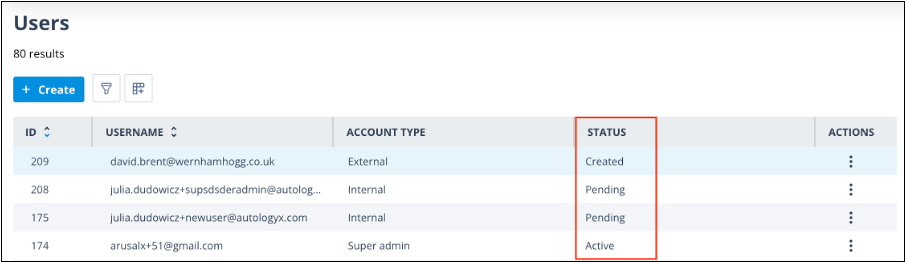
Account statuses
Most user accounts use one of the following statuses:
- Created - the user account has been created but not activated.
- Pending - the account activation email has been sent but the account has not been activated.
- Active - the user has activated their account and logged in.
Service Accounts are activated automatically when they are created and do not normally pass through the Created and Pending stages.
Things to remember
- The + Create button is disabled when you reach the maximum number of users allowed.
- The maximum number of users allowed in your system is 1,000,000.
- Only users with the Super Admin account type can create, edit, and delete user accounts.
- The maximum number of Roles you can assign to a user with a Config admin account is 25.
- Service Accounts are automatically activated when created.
- Service Accounts can use username and password authentication even when standard users authenticate through Single Sign-on.
- Once a Service Account has been created, its account type cannot be changed to a standard user account.
- Standard user accounts cannot be converted into Service Accounts.
- Service Internal accounts automatically receive Super Admin permissions.
- Service External accounts require permissions to be assigned explicitly if access to records, tasks, or Object classes is required.