Everything you need to create an Element
Before you can create and use an Element, there are several prerequisites to consider.
Elements allow you to extend Autologyx with your own web components, but they require both a correctly structured package and access to a Git repository from which the package can be imported.
Before you begin
Ensure you have:
- A Super Admin account type. Only Super Admin users can create, import and manage Elements.
- Access to a Git repository that stores your Element package.
- A working knowledge of JSON, as Elements are configured using a
config.jsonfile. - A clear understanding of where the Element will be used and any configuration options it should expose to administrators.
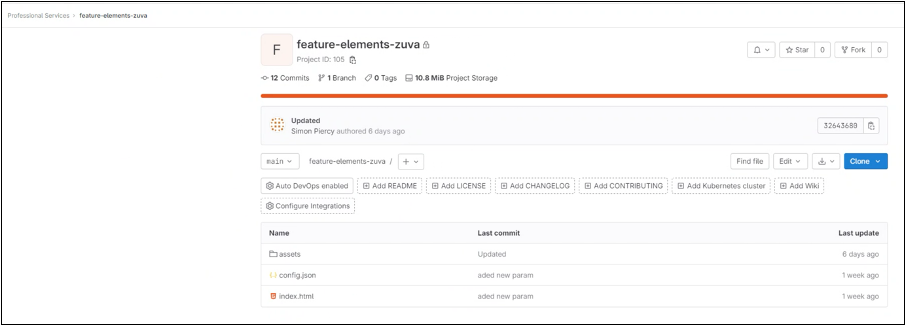
Prepare your Git repository
Our recommended approach is to maintain two repositories:
- a development repository containing your source code
- a deployment repository containing the production-ready files that Autologyx imports
Required files
Every Element package must contain the following files:
config.json— defines the Element metadata and configurationindex.html— the entry point loaded by Autologyx
Without both files, the import will fail.
Configure the config.json file
The config.json file must follow the required schema exactly.
If the structure or required properties are incorrect, the Element cannot be imported.

Important configuration fields
Several configuration properties are particularly important:
- Version — a string identifying the Element version. This can contain numbers or descriptive text.
- Logo — a URL pointing to the Element logo.
- Publisher — the company or organisation responsible for the Element. This is displayed in the Elements list.
- Publisher URL — a website that users can open directly from the Publisher field.

Parameters
The first three parameter properties are mandatory.
These parameters generate the configuration fields shown when administrators place the Element onto a page or form.
For more information, see Configuring an Element and how it works on a form.
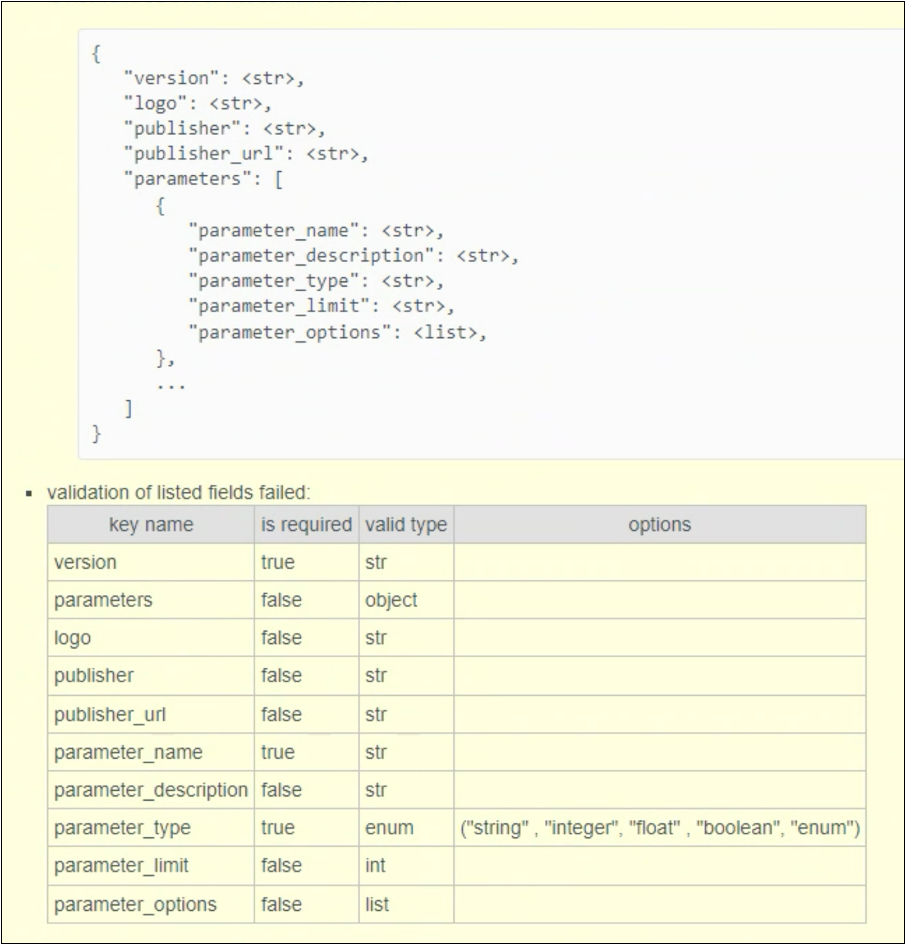
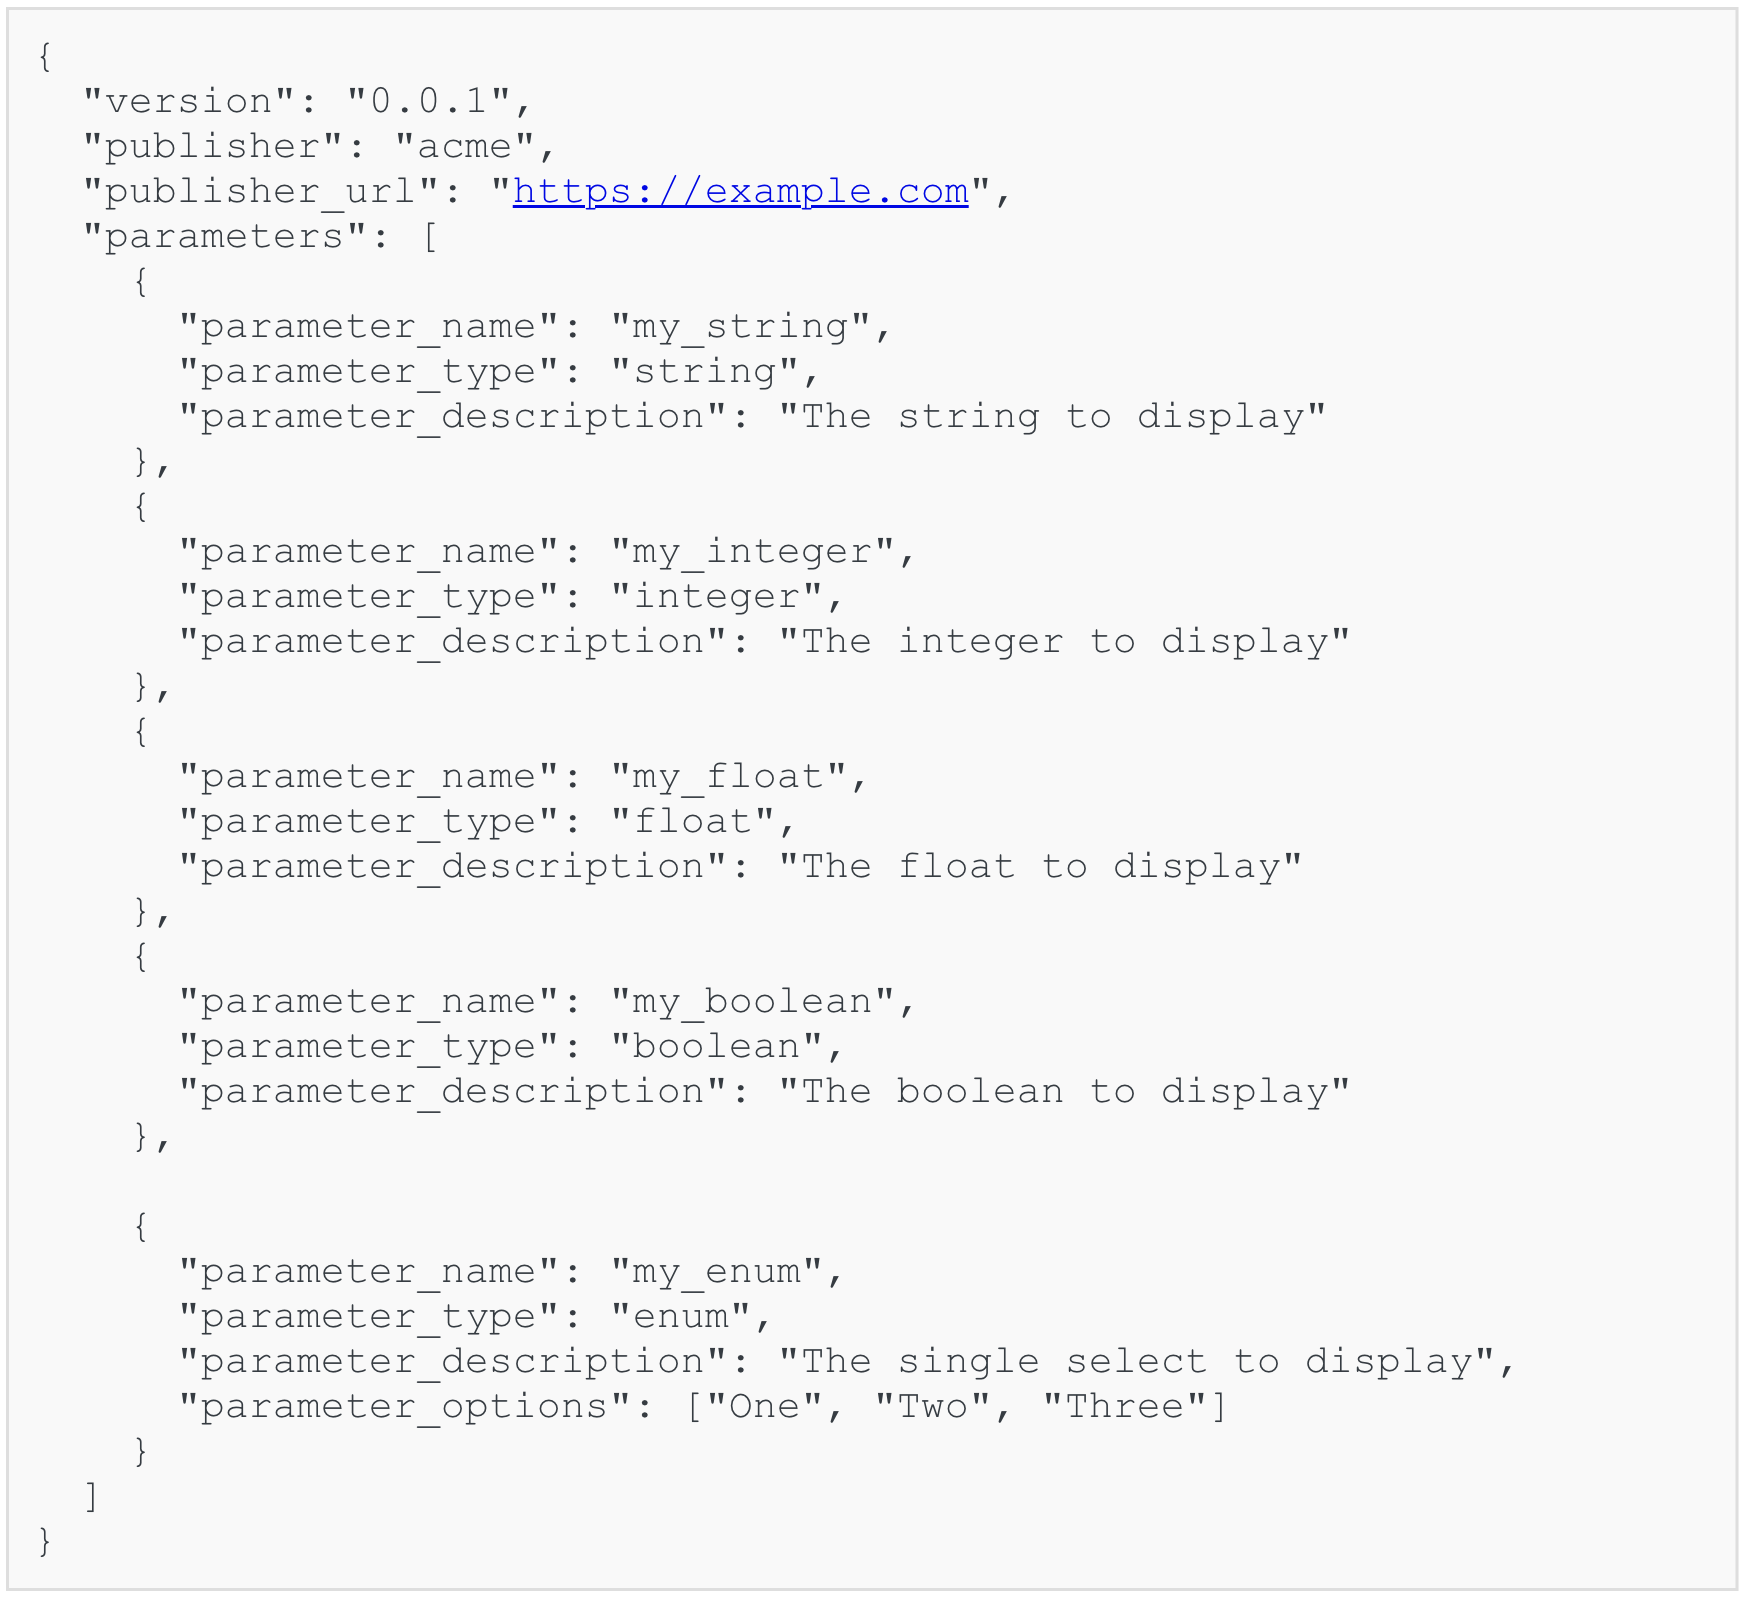
If parameter_type is set to enum, you must also define parameter_options, which populate the drop-down list presented to administrators.
An example is shown below.
Note:
parameter_limitis currently reserved and is not used.
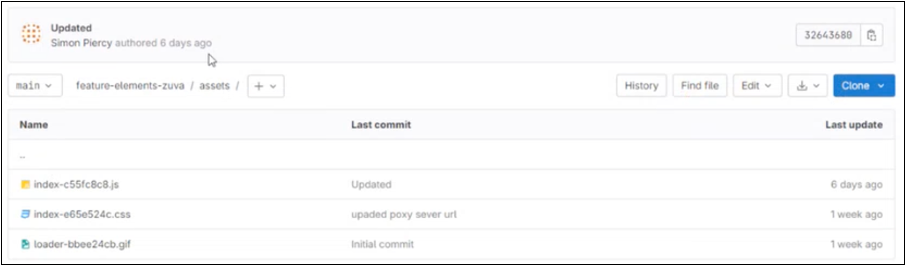
The index.html file
If your Element is built using React, the index.html file is responsible for loading the compiled application from the Assets folder.
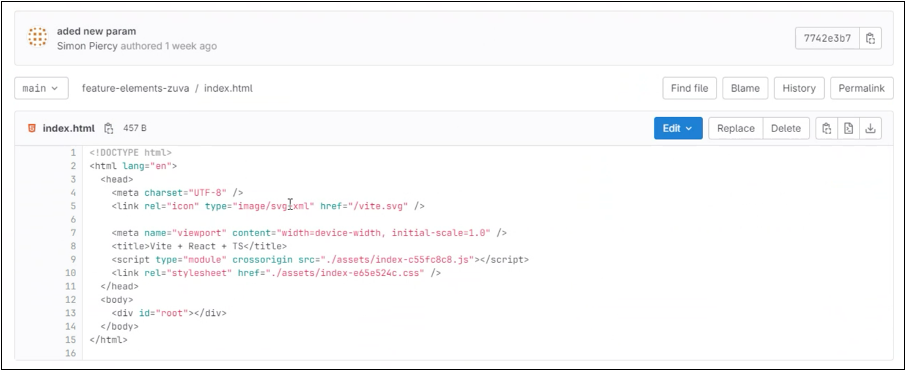
The Assets folder typically contains:
- the compiled JavaScript bundle
- CSS files
- loader images and other supporting assets
Create an Element in Autologyx
Navigate to:
Administration → Elements
Click + Create.
Enter a unique Name for the Element. You can also provide an optional description to help administrators understand its purpose.
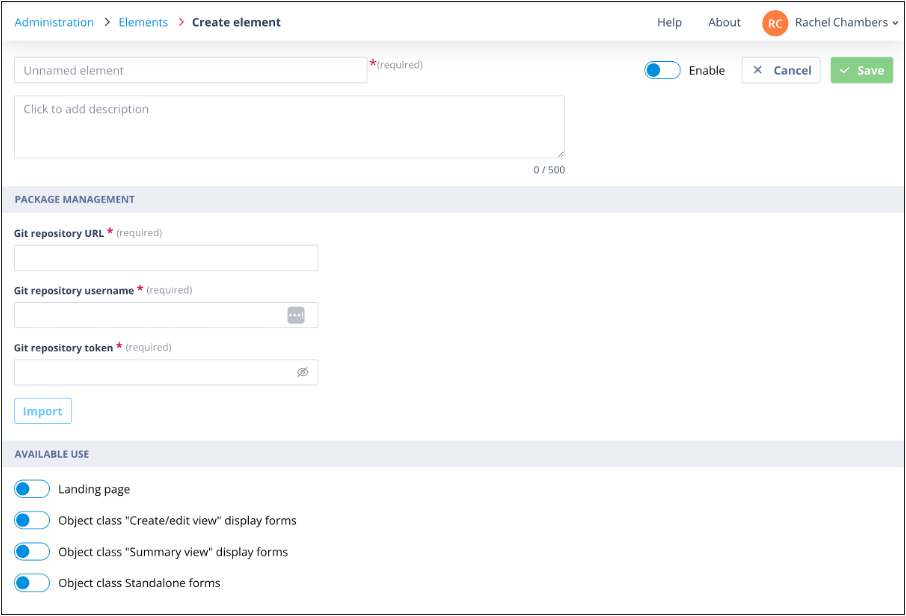
Package Management
The Package Management section requires information from your Git repository.
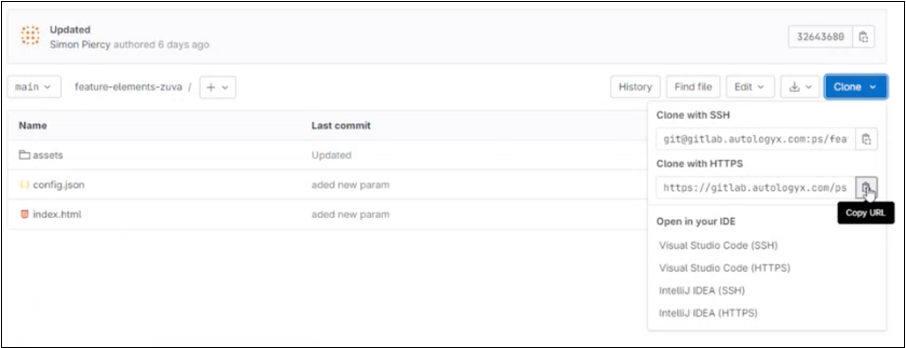
Git repository URL
(The following example uses GitLab.)
Open the Clone menu and copy the Clone with HTTPS URL.
Paste this into the Git repository URL field.
Git repository username and access token
In GitLab, navigate to:
Settings → Access Tokens
Create a new access token.
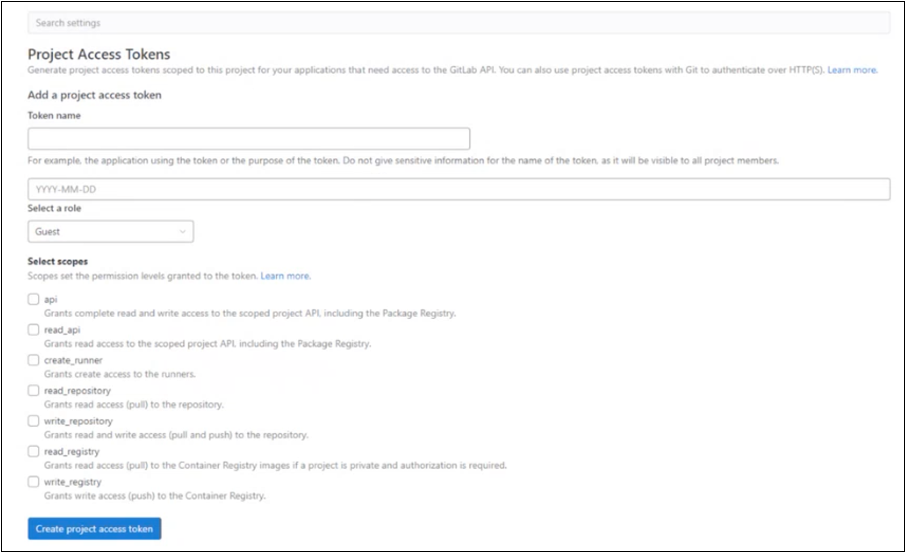
Required scopes
The access token must include both of the following scopes:
read_apiread_repository
After creating the token:
- copy the token immediately into the Git repository token field in Autologyx
- copy the Token name into the Git repository username field
For security reasons, GitLab only displays the access token once.
Most access tokens expire after a fixed period (commonly four weeks). If the token expires before you re-import or update the Element, the import will fail. Consider using a longer expiry period if permitted by your organisation's security policy.
Import the Element
Once all repository details have been entered:
- Select the system areas where the Element should be available.
- Enable the Element.
- Click Import.
A successful import enables the Save button.
Click Save to add the Element to your Elements list.
Further reading
For guidance on creating repository access tokens, refer to your provider's documentation:
- GitLab: https://docs.gitlab.com/ee/user/project/settings/project_access_tokens.html
- GitHub: https://docs.github.com/en/enterprise-server@3.6/authentication/keeping-your-account-and-data-secure/managing-your-personal-access-tokens
- Bitbucket: https://support.atlassian.com/bitbucket-cloud/docs/create-a-repository-access-token/
Things to remember
- Only Super Admin users can create and manage Elements.
- Every Element package must include both
config.jsonandindex.html. - The
config.jsonfile must follow the required schema exactly. - Repository access tokens must include both
read_apiandread_repositoryscopes. - Expired access tokens will prevent future imports.
- After a successful import, click Save to add the Element to your system.