Configuring relationships in Object classes
Having used the Relational modeller to create parent/child relationships between your Object classes, you now need to edit each parent object class in order to add the available child Object classes. This will provide the interface for a user to create relational records.
This is done on the create/edit view under the Display tab. Each parent will have to be updated individually.
Example relationship
As a reminder, below is one of the relationships we saw in the article about creating a Relational model.
The parent object class, Mortgage Application, has four child object classes:
- Applicant 1
- Applicant 2
- Properties
- Lender
Add child Object classes to the form
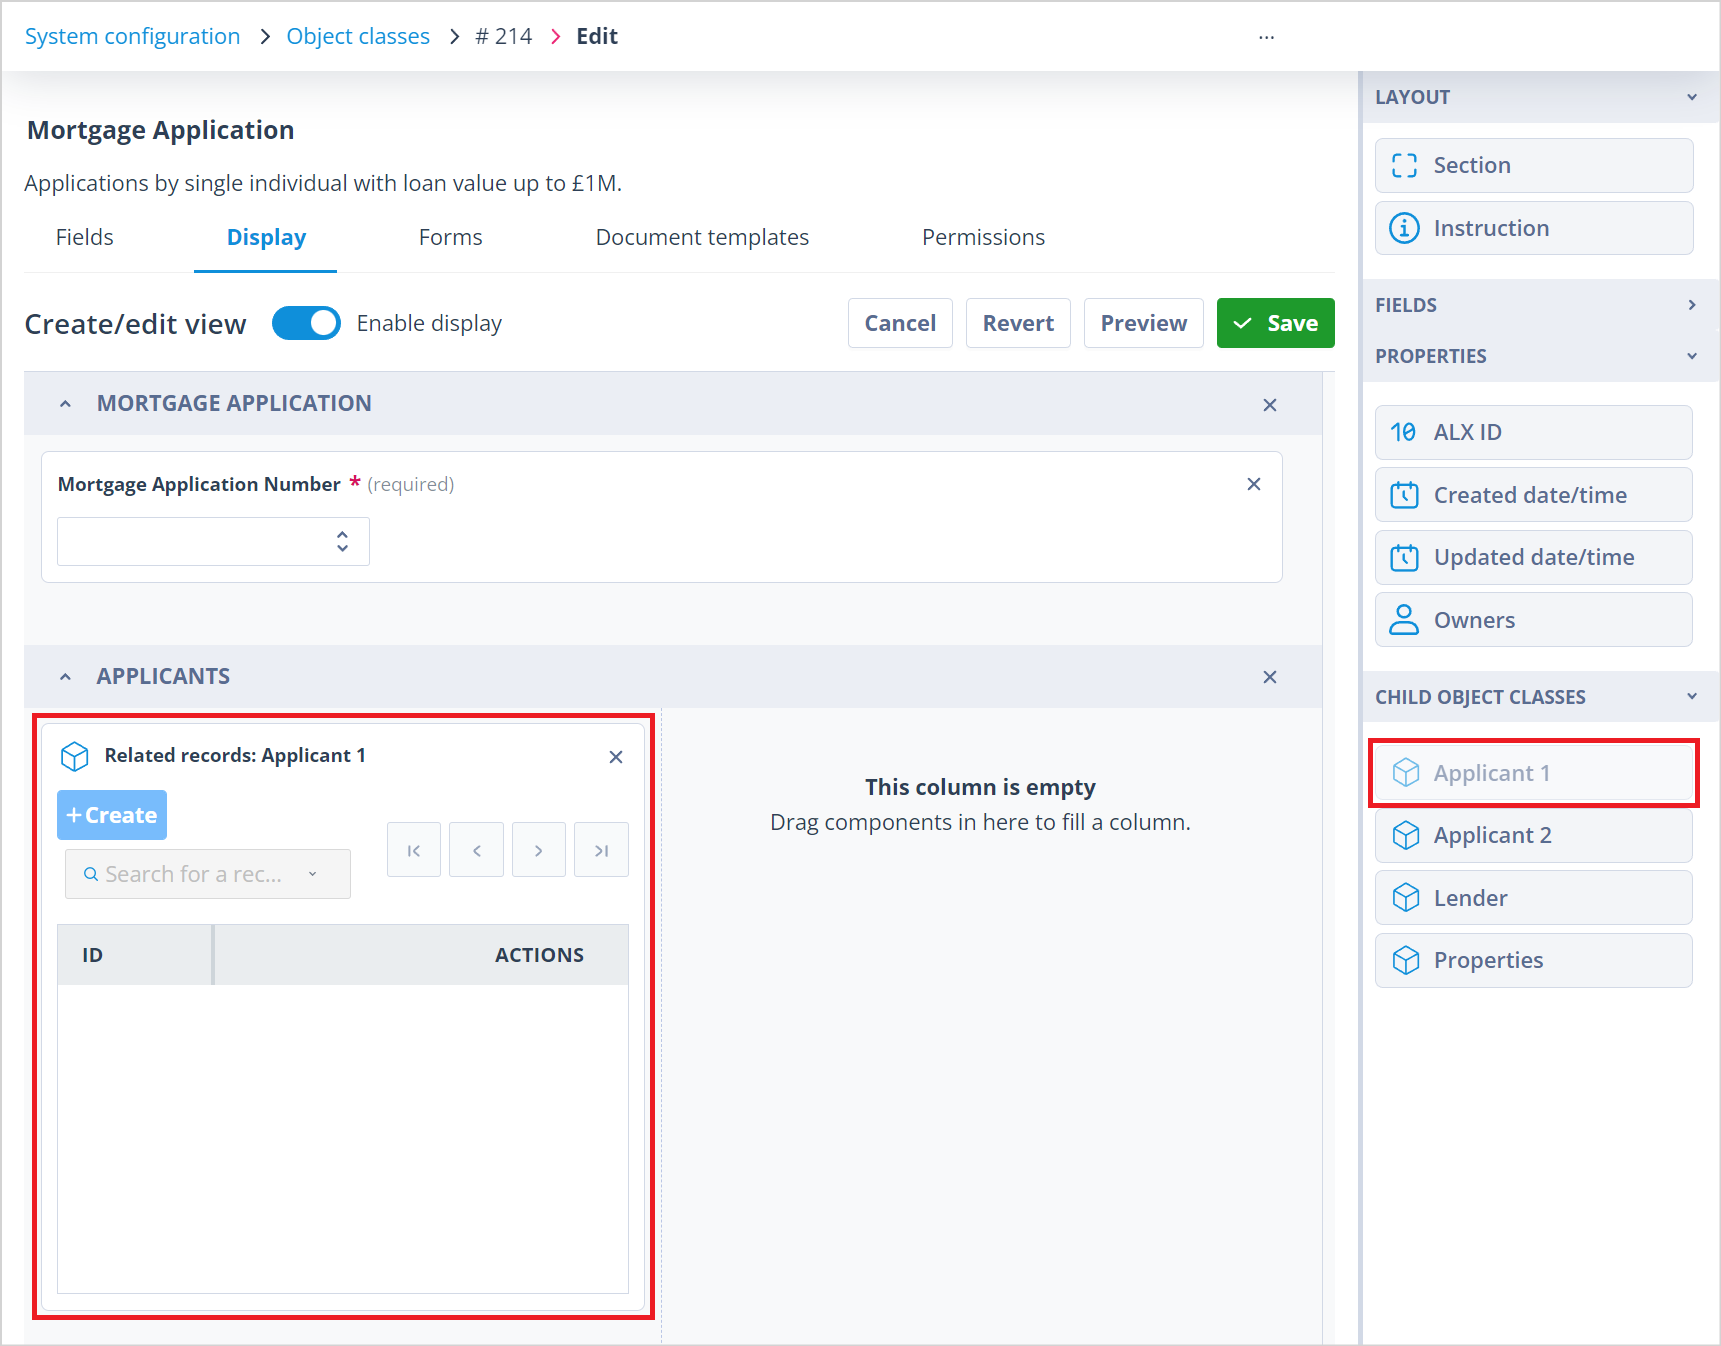
| In the create/edit view of the parent class, Mortgage Application, there is a new section which has been added to the bottom of the side bar, "CHILD OBJECT CLASSES". The four child object classes are listed in alphabetical order. These can be dragged and dropped into the create/edit form in the same way as sections, instruction widgets and fields. Note in this sidebar, the fields section is collapsed. |
Add the first child object class
Drag and drop your first object class onto the form. You can add it to an existing section, but it is likely that you will want to edit your view by adding a new section or a new column to an existing section in order to accommodate the object class.
When the child object class has been added to the form, you will note that it is greyed out in the sidebar. This is because you will only need it once.
Configure child object class display fields
You can now configure the child object class display with fields from that class. The default fields shown are ID and Actions.
Add fields to display
Click anywhere on the field column header; a plus symbol (+) will appear between these two fields.
Click the + symbol. This will open the add field panel - it is the same as used in the column configuration function on the records list and is divided into Record properties and Class fields.
Check the boxes adjacent to the fields you require for the view. Then click the '+ Add columns' button.
You can reduce the column size by clicking on and dragging the column divider. If your columns exceed the given window, there will be a horizontal scroll bar at the bottom of the window.
Click out of the section to save the field selection.
Multi-level relationships
The relationship shown above is only two levels deep. As you will be aware, the Relational modeller allows you to create relationships which have up to five levels.
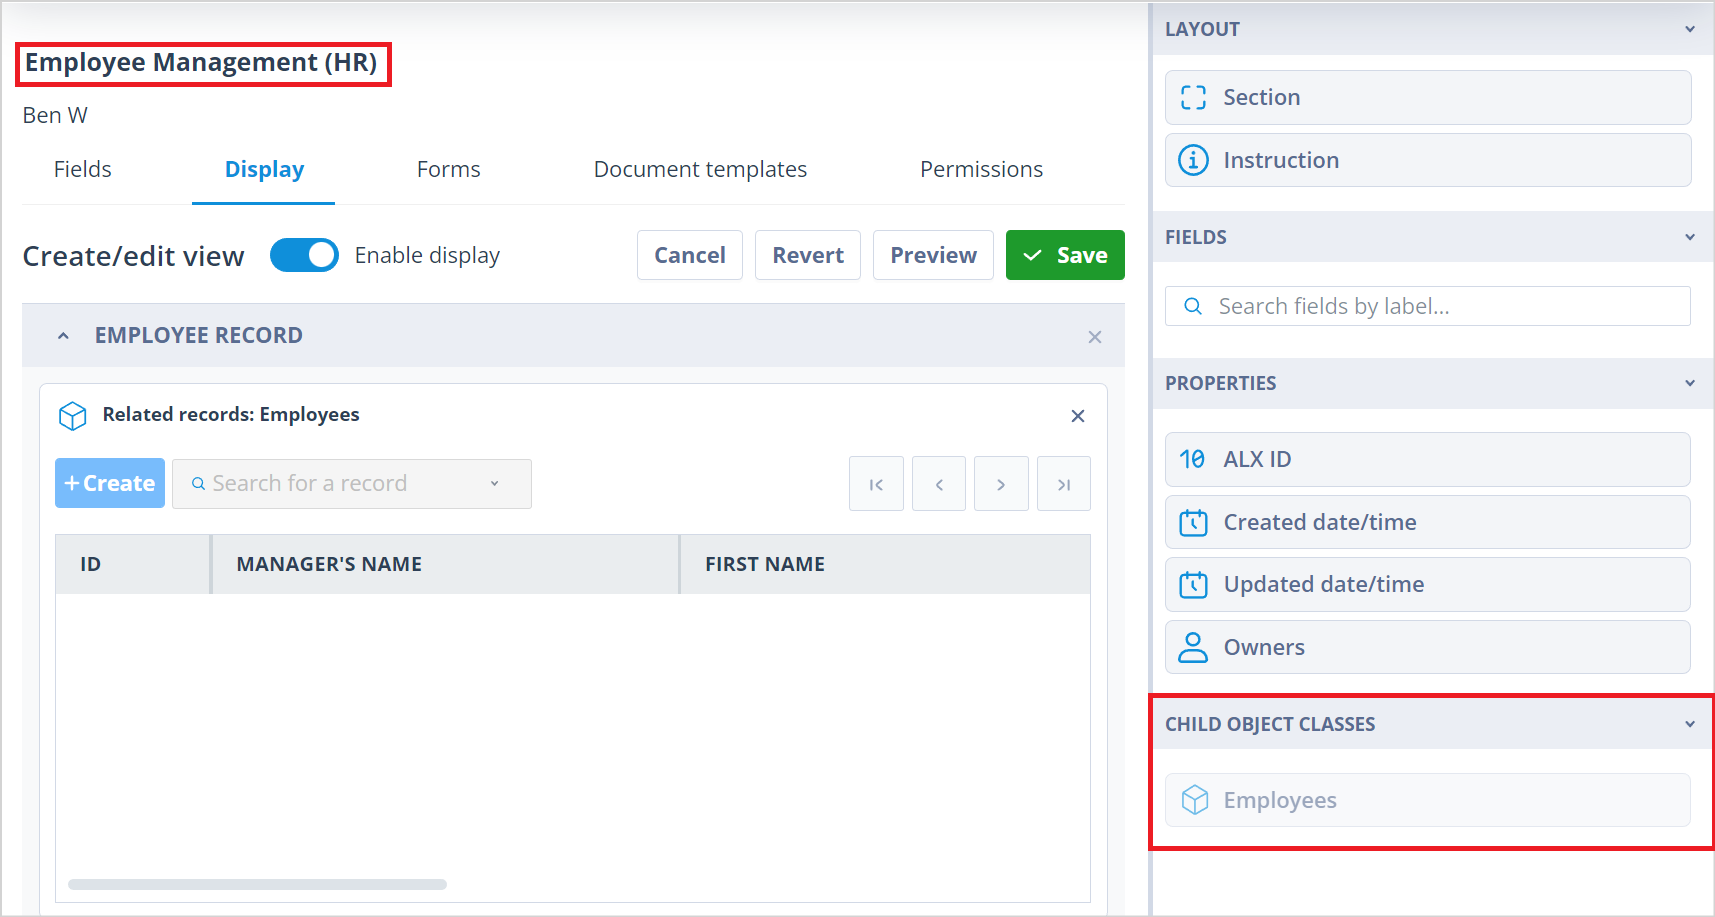
| The relationship shown to the left has three levels. However, each parent object class will only have their direct child object classes available in the sidebar. See the below screenshots. |
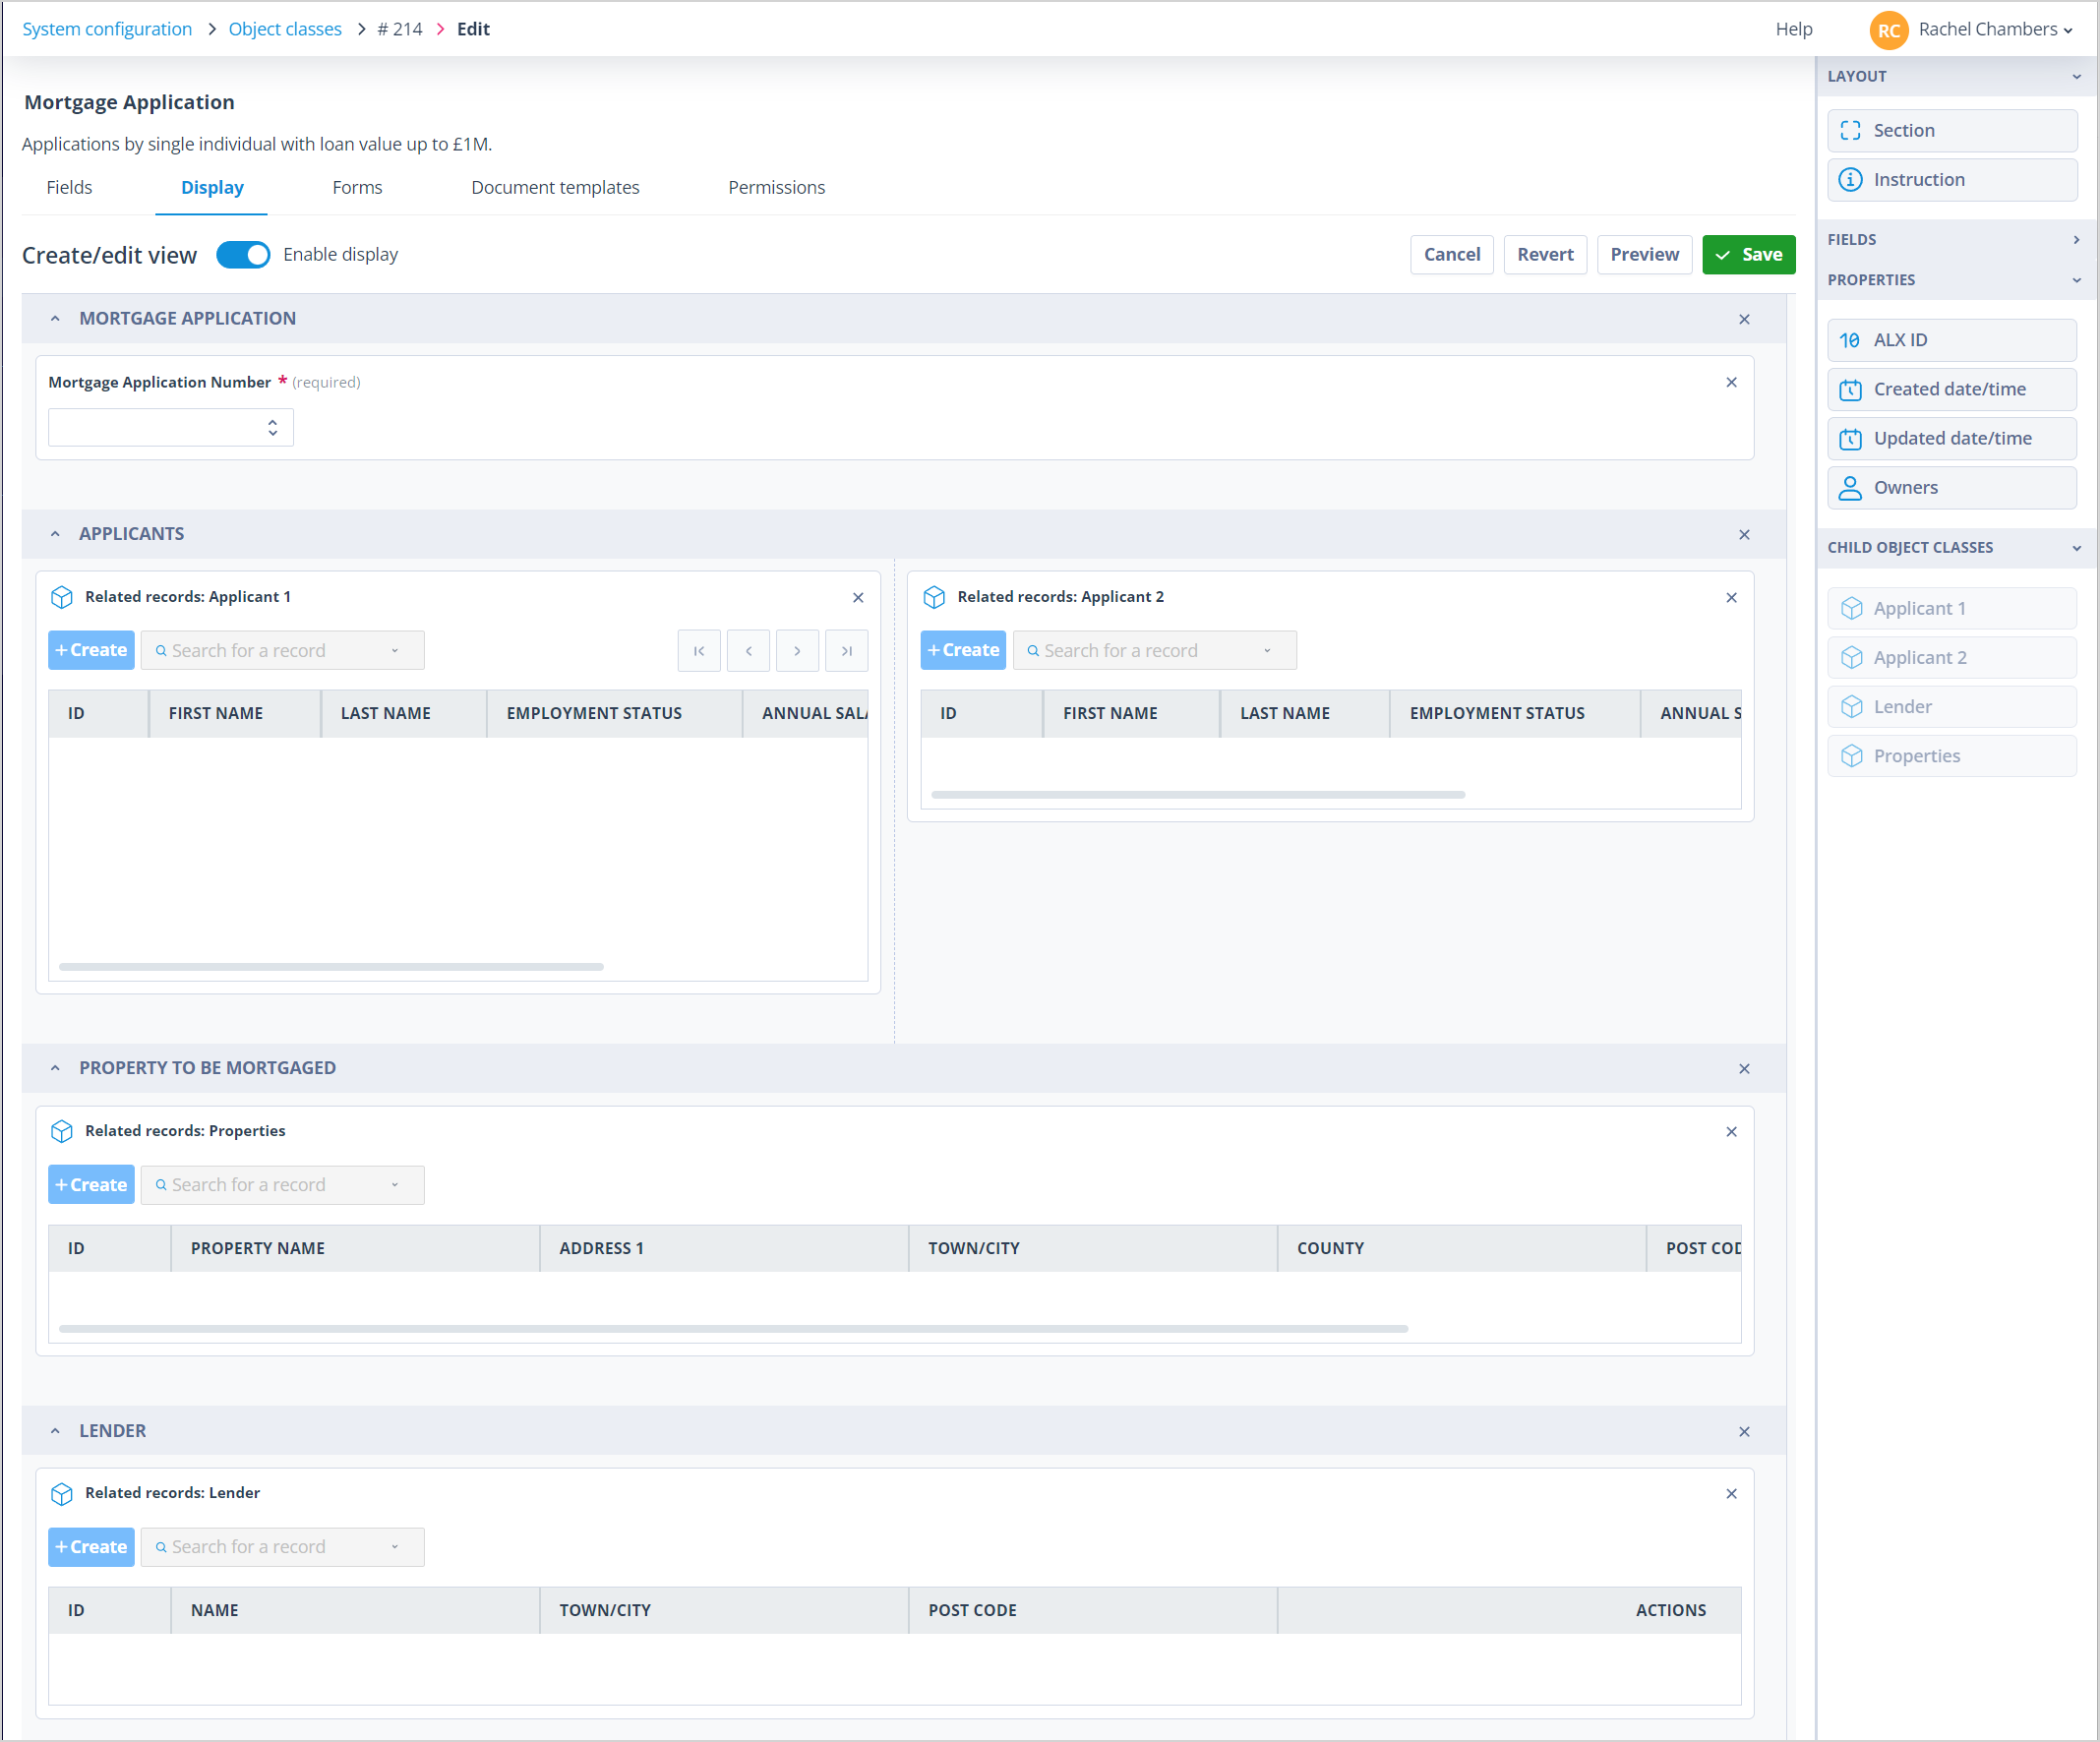
Finish configuration
Complete the setup
Continue placing the child object classes into the form so that each is greyed out, and configure the required fields before saving.