Editing a Sequence - Design
Once you have created a Sequence, you will need to edit it in order to construct the workflow. This is done from the Sequence list. Either double click the Sequence row or select Edit design in the Actions menu. Either will open the Edit page in a new browser tab.
Requirements
In order to edit any part of the Sequence design, you must meet one of the following requirements:
| - You have a Super admin account type - You have a Role with the Edit permission enabled under the Sequencer tab. This is commonly enabled together with the Create permission but can be applied alone if the User's Role is more about system maintenance rather than design and creation. In addition, you must be an Owner of the Object class for which the Sequence has been created | mceclip0.png |
If you are editing the Sequence design for the first time, the page will open with an empty Workflow area like this:
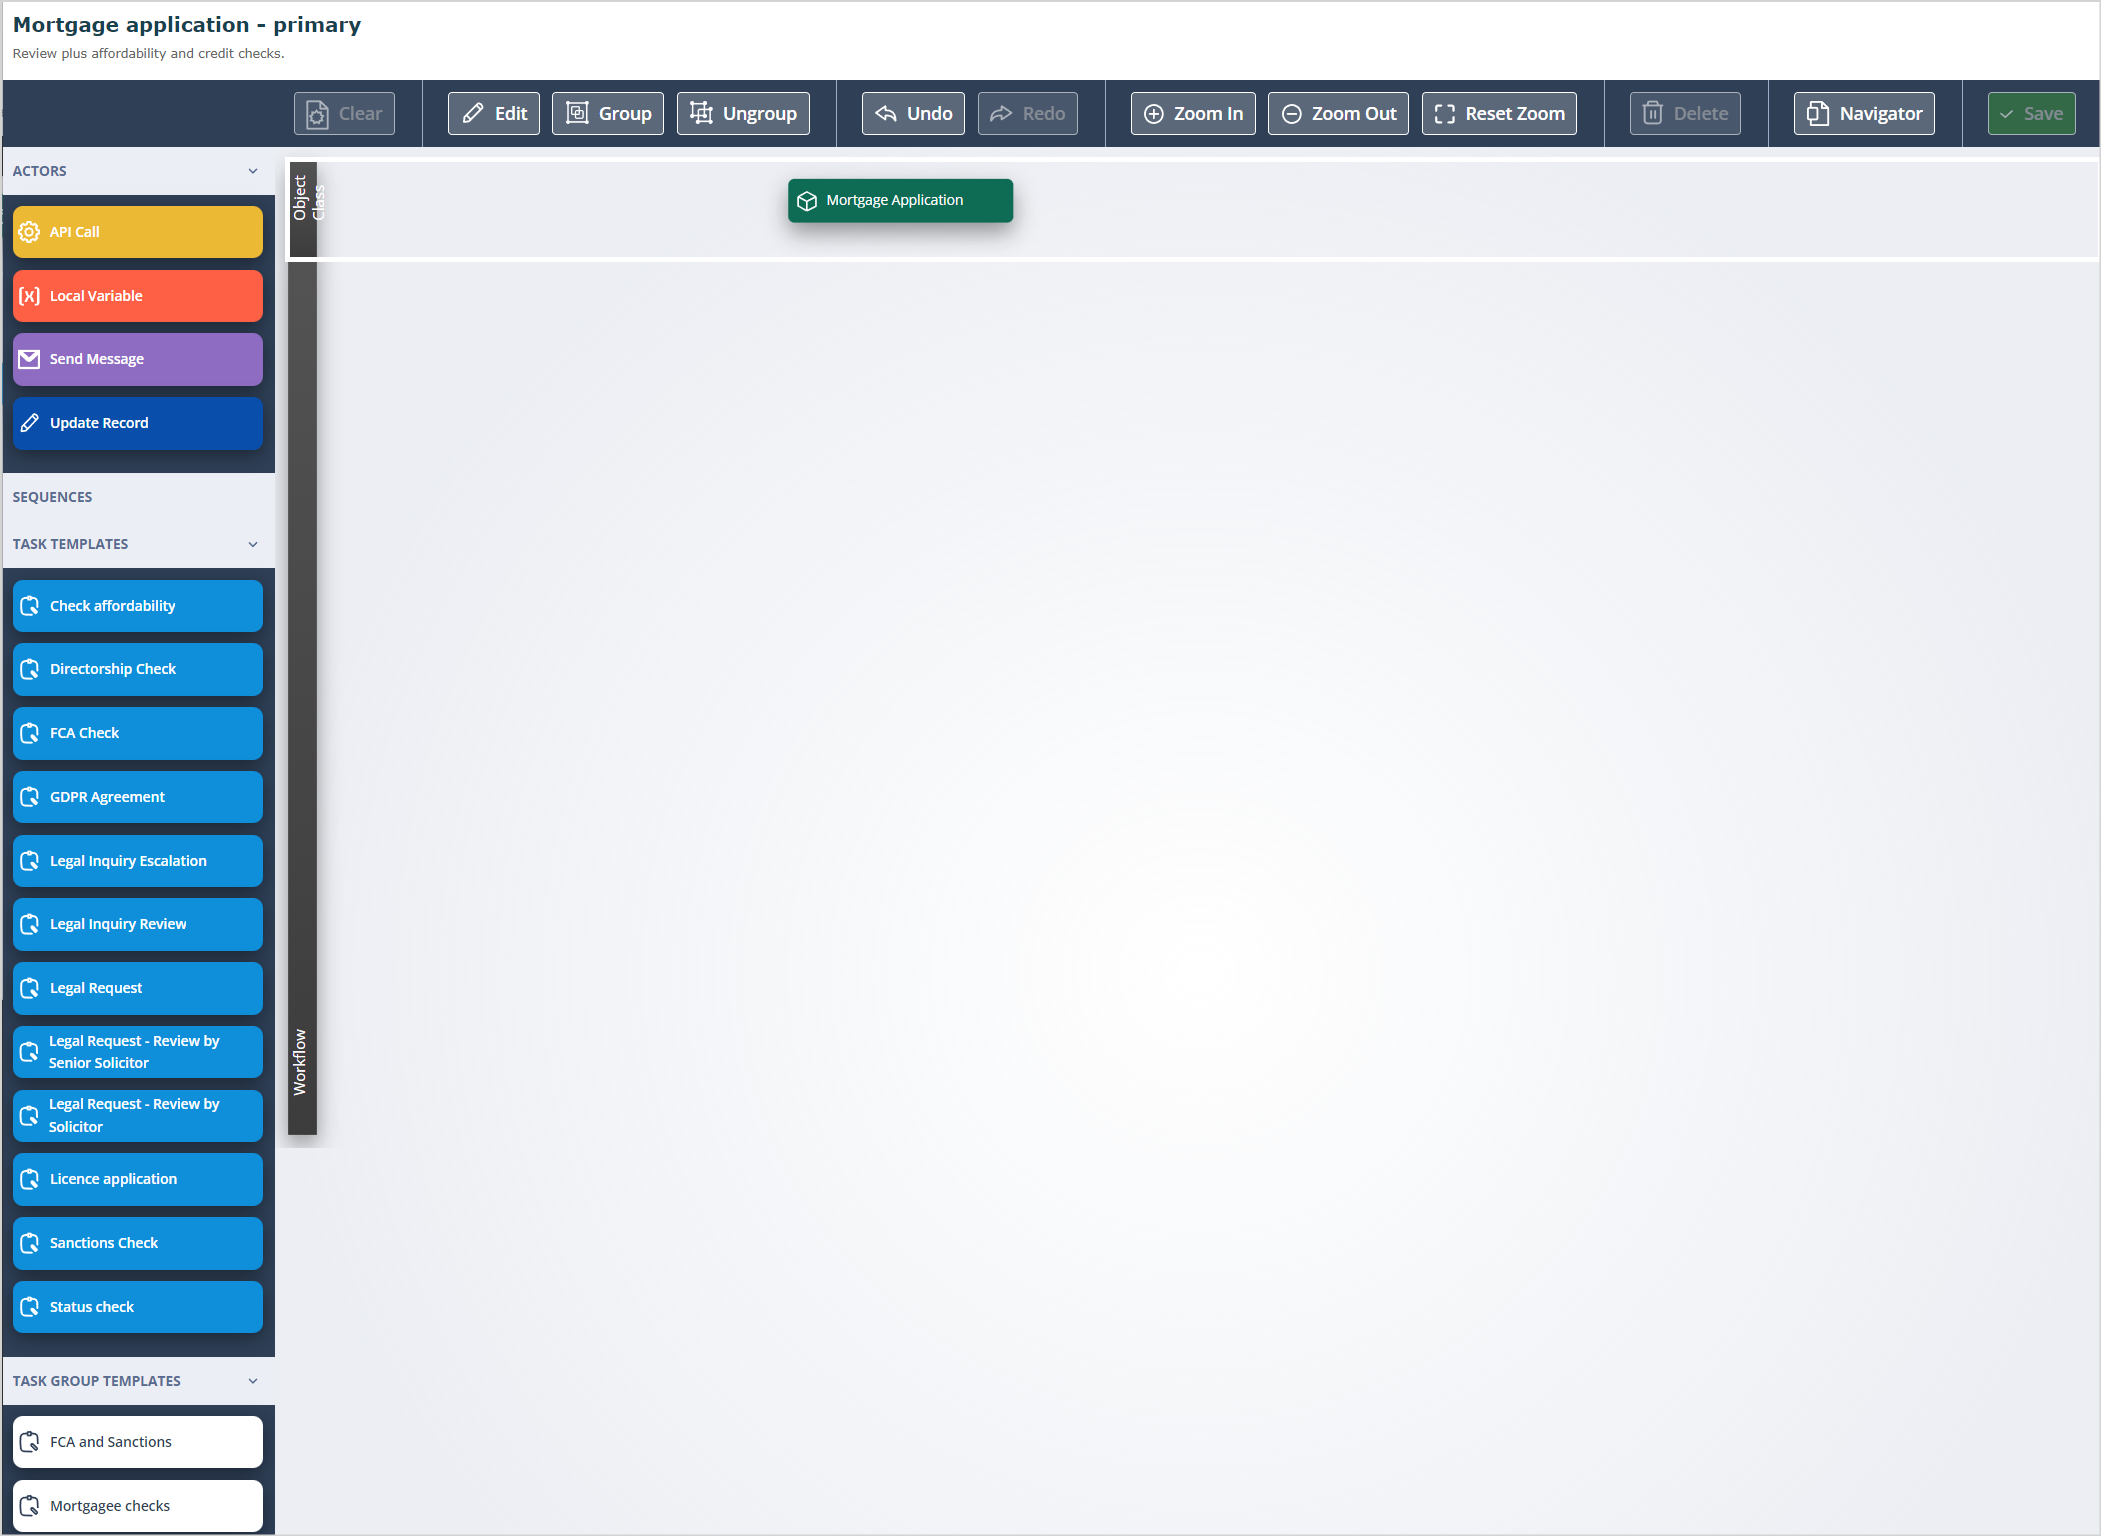
Workflow design
The Object class which was selected when the Sequence was created will be displayed in the Object class section at the top of the Sequence.
Click HERE for information about Sequence navigation and menus.
To start constructing your Sequence: click Edit in the top horizontal menu.
Click and drag the first object into the Workflow area. Let's say this is a Task template; in this example the Object class is Mortgage Application and the Task template is GDPR Agreement. You will need to click on the Object class in the object class area of the Sequence and drag a connector to the Task template object like this:
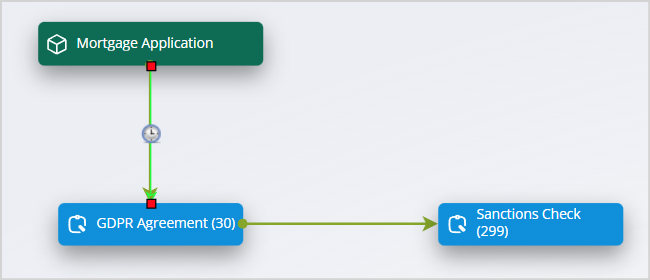
When the receiving object is outlined in green, you can release the mouse to drop the connector. A trigger configuration modal will open like this:
Starting conditions
You will need to select the starting condition.
A Sequence can be triggered to commence when the selected method is true, or it can be delayed. Open the drop-down which is defaulted to When and there is an option for After.
Select After and two further fields are displayed before After. The second of these fields has options based on time.
| Select the appropriate time option delay and enter the number required in the first field, as shown above. When the trigger configuration is saved a clock icon is shown on the trigger to indicate that this is a timed trigger. | mceclip3.png |
Record created
Record created - the most commonly used method of starting a Sequence. This is When (or After a specified time) a Record is Created. This simply means that when a record of the selected Object class is added to the system, the Sequence will commence the workflow. It doesn’t matter what method is used to create the record, the Sequence will run.
Record updated
Record updated - this is another commonly used method of starting a Sequence or a particular workflow contained in a Sequence. It relies on data in the Object Record being added or amended. However, it is rarely used without further conditions being added.
In the below example, the Sequence workflow is started by an update to a record in the Mortgage Application Object class, with an additional condition being that a field on the record called “Risk level” must have the value “High”.
It is important to note that addition or change to an Object record by certain methods constitutes an update to the record and can therefore be used to commence a Sequence. The change made manually directly into the Object Record or via an Update object record Task type is an update.
A change made via an API Call is also considered an update. However, a change made via an Update Record Actor in a Sequence does NOT constitute an update in terms of commencing Sequence workflow. This is a deliberate architectural limitation in order to prevent eternal loop processing.
Record created or updated
Record created or updated - the Sequence will start when a record is created/added to the Object class OR when an Object record is amended.
Sequence Activated
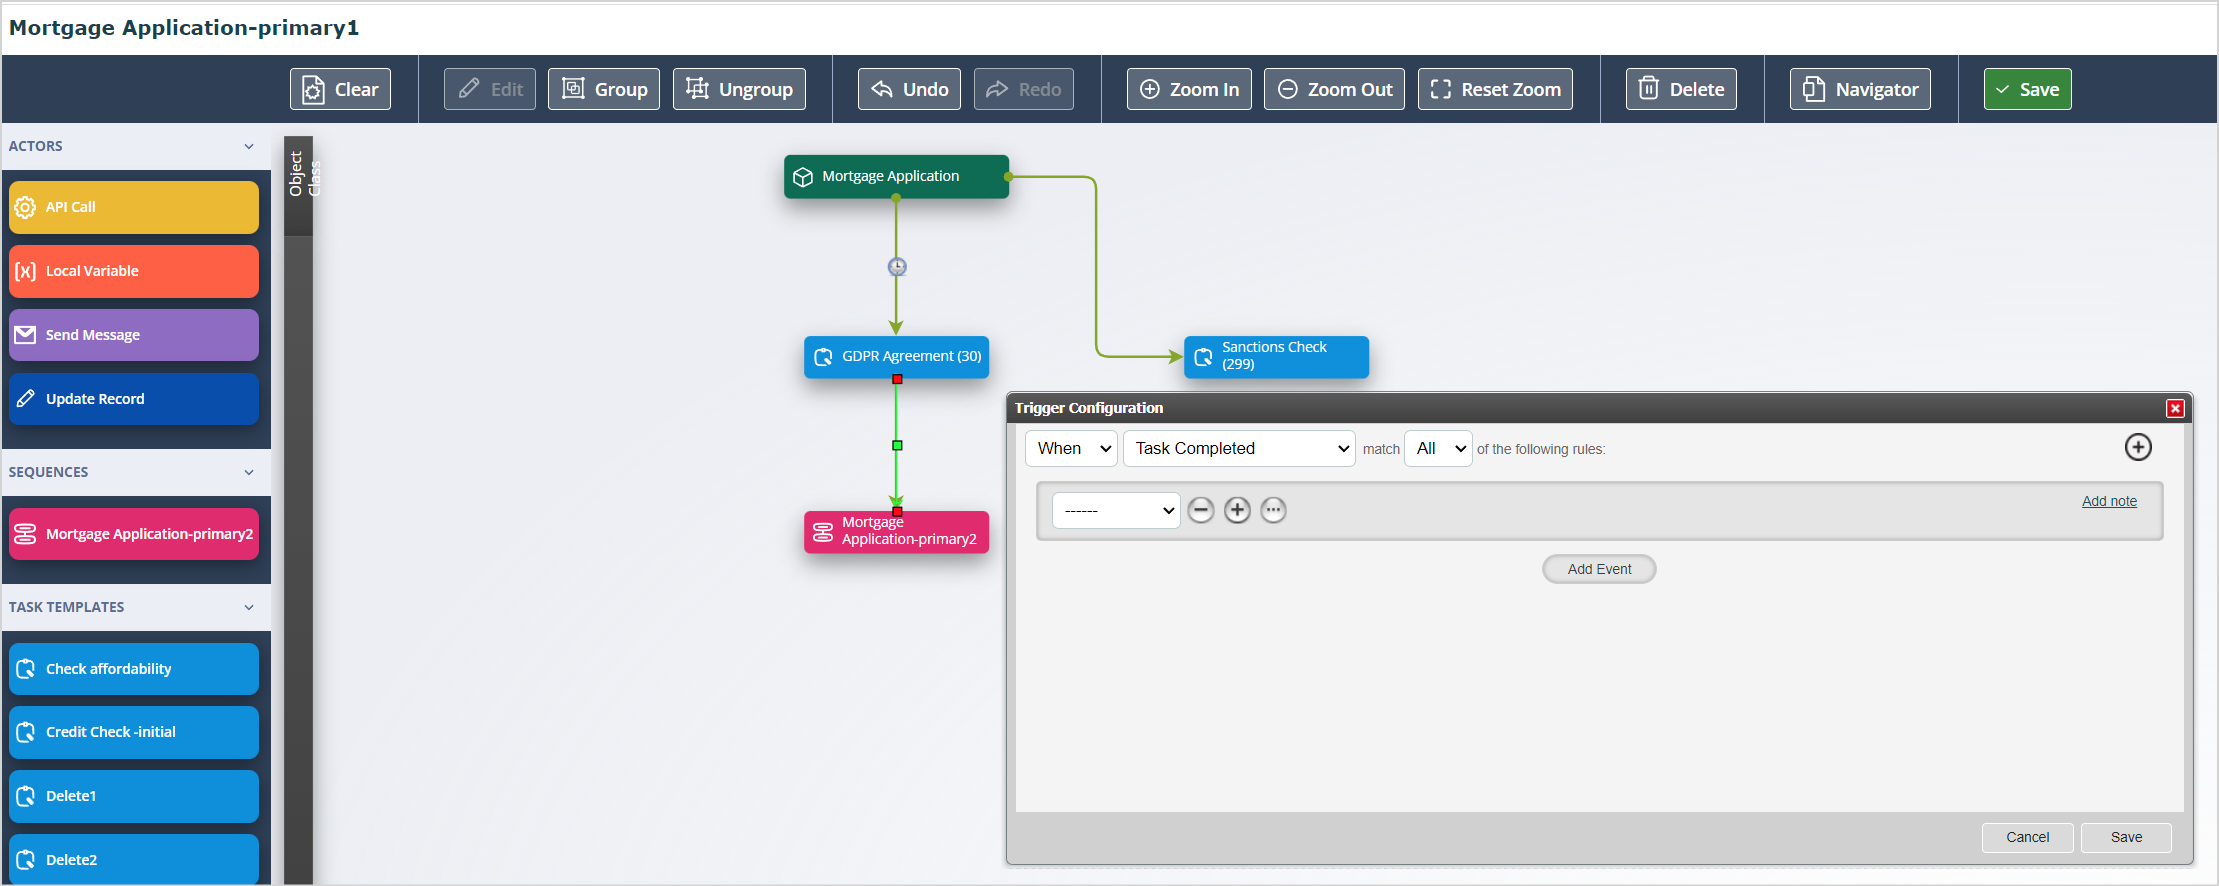
Sequence Activated - this method allows you to activate the Sequence from another Sequence. In the example shown, the Sequence called “Mortgage Application-primary2” has the starting trigger, “When Sequence Activated”.
In the Sequence below called “Mortgage Application-primary1”, you can see in the Sequences section of the left hand menu, there is a Sequence called "Mortgage Application-primary2".
This Sequence object can be dragged and dropped onto the workspace of another Sequence and connected from any other object. Note: the pink object on the Workflow.
Related articles
Other articles which may be of interest:
[Adding conditions for Sequence commencement](/knowledgebase/system-configuration/sequences/adding-conditions-for-sequence-commencement/)Useful info
- Only Task templates with the Task creation mechanism set to Automatic will be available for selection in the left hand menu.