How do I create a task template?
To create a Task template, you will need one of the following:
- A Super admin account type
- For Task templates of the Complete self contained form type: a Role where the permission for Task Templates Create has been enabled under the Task configuration tab
- For Task templates of the Update object record type: a Role where the permission for Task Templates Create has been enabled under the Task configuration tab and you are the Owner of the Object class
Tasks are created from Task templates. You can think of these as the blueprint for what needs to be done in the Task.
You will find Task templates in the left hand menu under System configuration. This takes you to the Task templates list.
From here, click the + Create button to start building a new Task template.
Basic details
You need to give your Task template a name. This is a required field and it must be given a unique value. If you keep it fairly generic, you will be able to use the same Task template for more than one Object class.
There is also an optional field where you can add a Description. This can be useful if you have a number of Task templates with similar names, or where one person is responsible for the creation of Task templates but another deals with maintenance and upkeep.
You'll notice that the template is divided into the following 3 sections or tabs:
- Response configuration
- Lifecycle
- Stages
Response configuration
This area allows you to define the requirements of the task response.
In the Task Definition section, you must select the Task type. Each of the task types available has dedicated articles which can be found here:
[Task Type - Complete self-contained form](/knowledgebase/system-configuration/task-templates/response-configuration---task-type---complete-self-contained-form/)Task type - Update object record
Having selected the Task type, you must then select the Task creation mechanism. There are two choices:
- Automatic - for Tasks designed to be used in a Sequence. These Tasks will be created for Records in a specific Object class at a particular point in the workflow.
- Manual - for Tasks which can be created for Records on an ad hoc basis from the Tasks panel.
Lifecycle
This area allows you to define whether the task:
- is completed only once, or if it is a Task which will expire
- has an SLA for its completion
| For either Lifecycle option you can set a Due Date. Your choices are: - No due date - the task should be completed ASAP - Date - you will be prompted to select a specific date by which the task should be completed - Time frame - here you can select a number of days/weeks/months after the Task is created by which it should be completed | mceclip0.png |
The Due Date is important in determining the Status of a Task. When a Task is created it is Outstanding. Once it has gone beyond its Due Date without being Completed, its Status will change to Overdue.
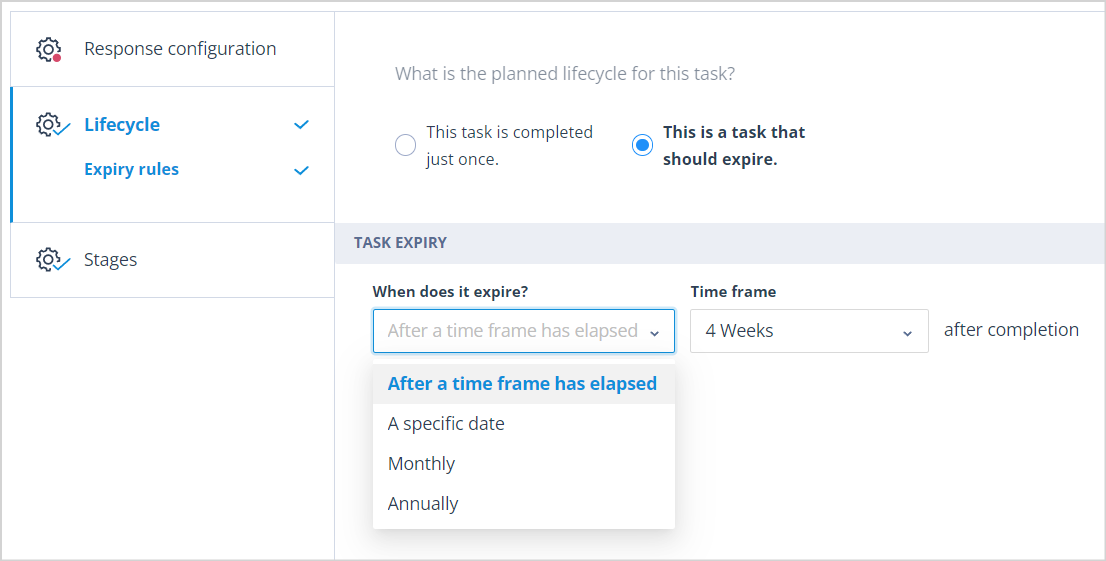
If you choose the Lifecycle option This is a task that should expire, a new menu item called Expiry rules will be added to the Lifecycle tab.
| When you click on this, a new Section called Task Expiry is displayed. Here you must configure the expiry date for the Task. There are 4 options as follows: | mceclip2.png |
| After a time frame has elapsed - here you can select a number of days/weeks/months after completion of the Task. | mceclip3.png |
| A specific date - this must be a date in the future! | mceclip4.png |
| Monthly - you will be prompted to select a day of the month for the expiry. Note that if the 31st is chosen the default will become the last day of the month. | mceclip5.png |
| Annually - you will be prompted to select a day of the year. | mceclip6.png |
If a Task expires, it will still be completed.
Stages
For now, we have one completion stage for the Task.
If the Task is Automatic, the User or Users responsible for completing the Task will be determined in the Sequence setup. For Manual Tasks, Users who may complete the Task are defined at the time of Task creation.
In a future version of Catalyst, the stages section will allow the user to determine whether the task will simply need to be completed or if it requires an approval step. Further, you will be able to define approval conditions. Beyond this we plan to add the ability to define more than one completion stage so that multiple Users will be able to input towards the Task response prior to approval by another.
Each stage can be assigned to an individual user or multiple users. In future, you will be able to select a User group in order that multiple Users can be selected in one action.
Who can complete a Task?
In order to complete a Task you must have one of the following:
- A Super admin account type
- Be an Owner of the Object class
- An Object Class Permission set which allows you to Complete all tasks
- Be an Assignee of the specific Task
Useful info
- The maximum number of Task templates you can have in your system is 10,000.