4. Configuring an API call to create an envelope in DocuSign
Before you go to the Sequencer, you will need an Object class with a document template. The template will need to be generated and saved to a field on the Record.
You might find this article about automatic document generation useful, as it describes the steps required for the above scenario.
Alternatively, the API call might follow an "Update object record" type task where a user is required to upload a document to a field.
DocuSign uses “envelopes” to manage the sending and signing of documents. Therefore, the API call from Catalyst needs to be able to create an envelope.
This is a POST call using JSON Data.
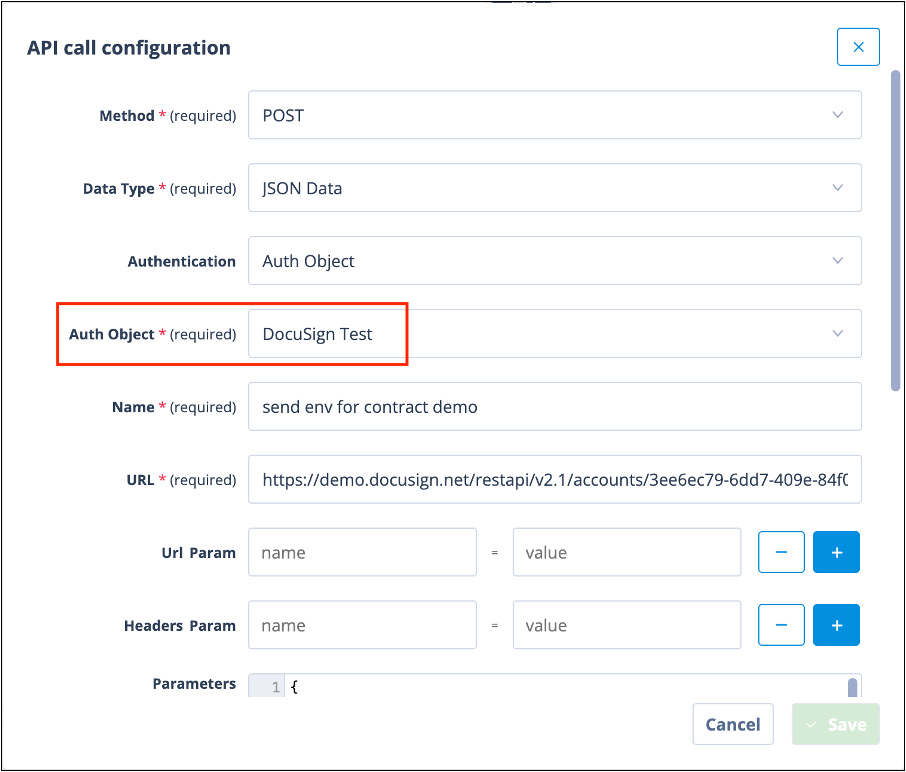
Authentication
For Authentication, select Auth Object. In the Auth Object field, select your DocuSign authentication object.
Always give your API call a name that is descriptive of the content. This will help if debugging is ever necessary.
URL structure
The URL is made up of:
- the Account Base URI (found at the top of your DocuSign account Apps and Keys page)
- followed by
/restapi/v2/accounts/ - then the API Account ID (also found at the top of your DocuSign Apps ad Keys page)
- then
/envelopes
So an example is:
https://demo.docusign.net/restapi/v2.1/accounts/3ee6ec79-6dd7-409e-84f0-f8dxxxxxx/envelopes
In this case, “demo” in the URL denotes that this is for test purposes rather than a “live” account.
The URL for a live DocuSign account will look like something like this:
https://eu.docusign.net/restapi/v2.1/accounts/947229c3-c654-45xx-xxxx-xxxx/envelopes
API call body
The body of the API call (Parameters) must identify the following:
- Recipients, of whom Signers and Carbon Copies can both be subsets. The type of recipient will determine the email they are sent.
- The document(s) to be signed.
You can also use the API call to specify wording to be used in email notifications from DocuSign.
The following example call body is shown in a JSON editor so that you can view the full set of Parameters.
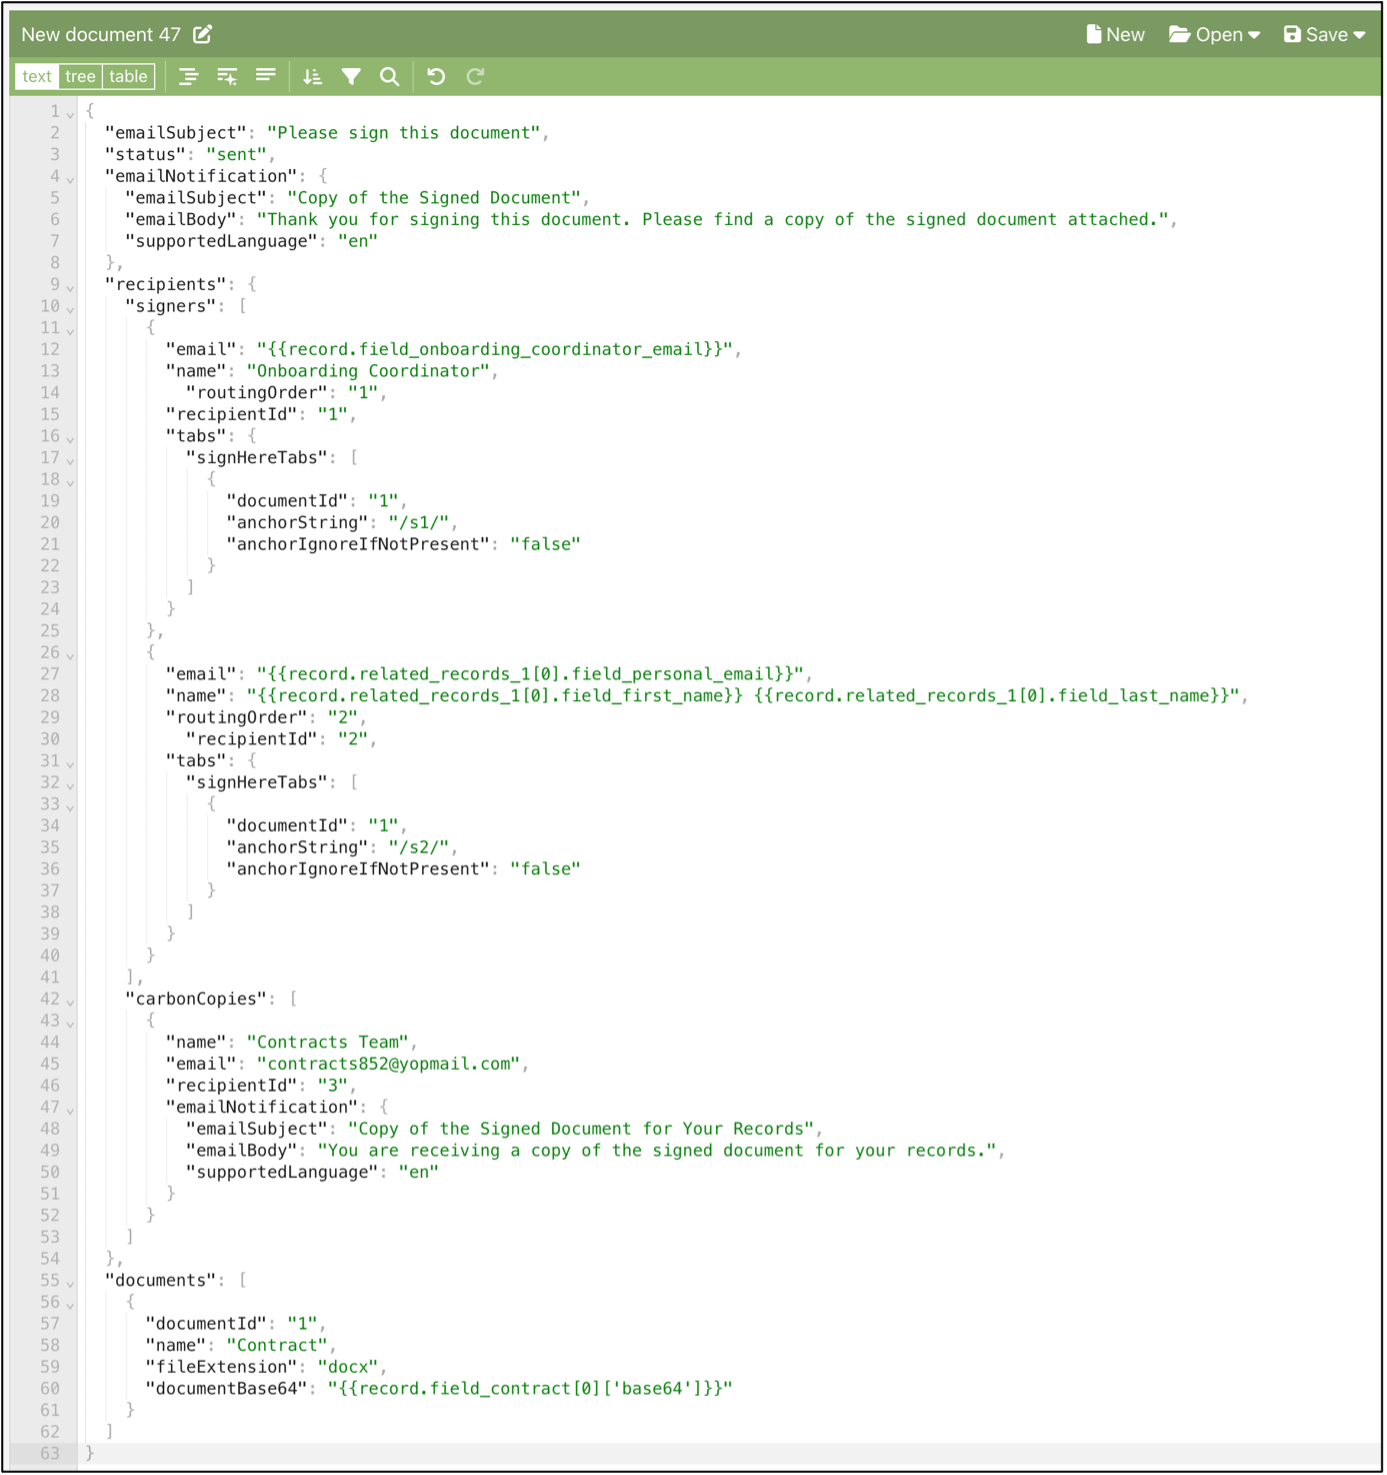
Explanation of call parameters
- Row 2 – email subject for notification to send the document to “signers”, asking them to sign. This can be any value. See 1 in below screenshot.
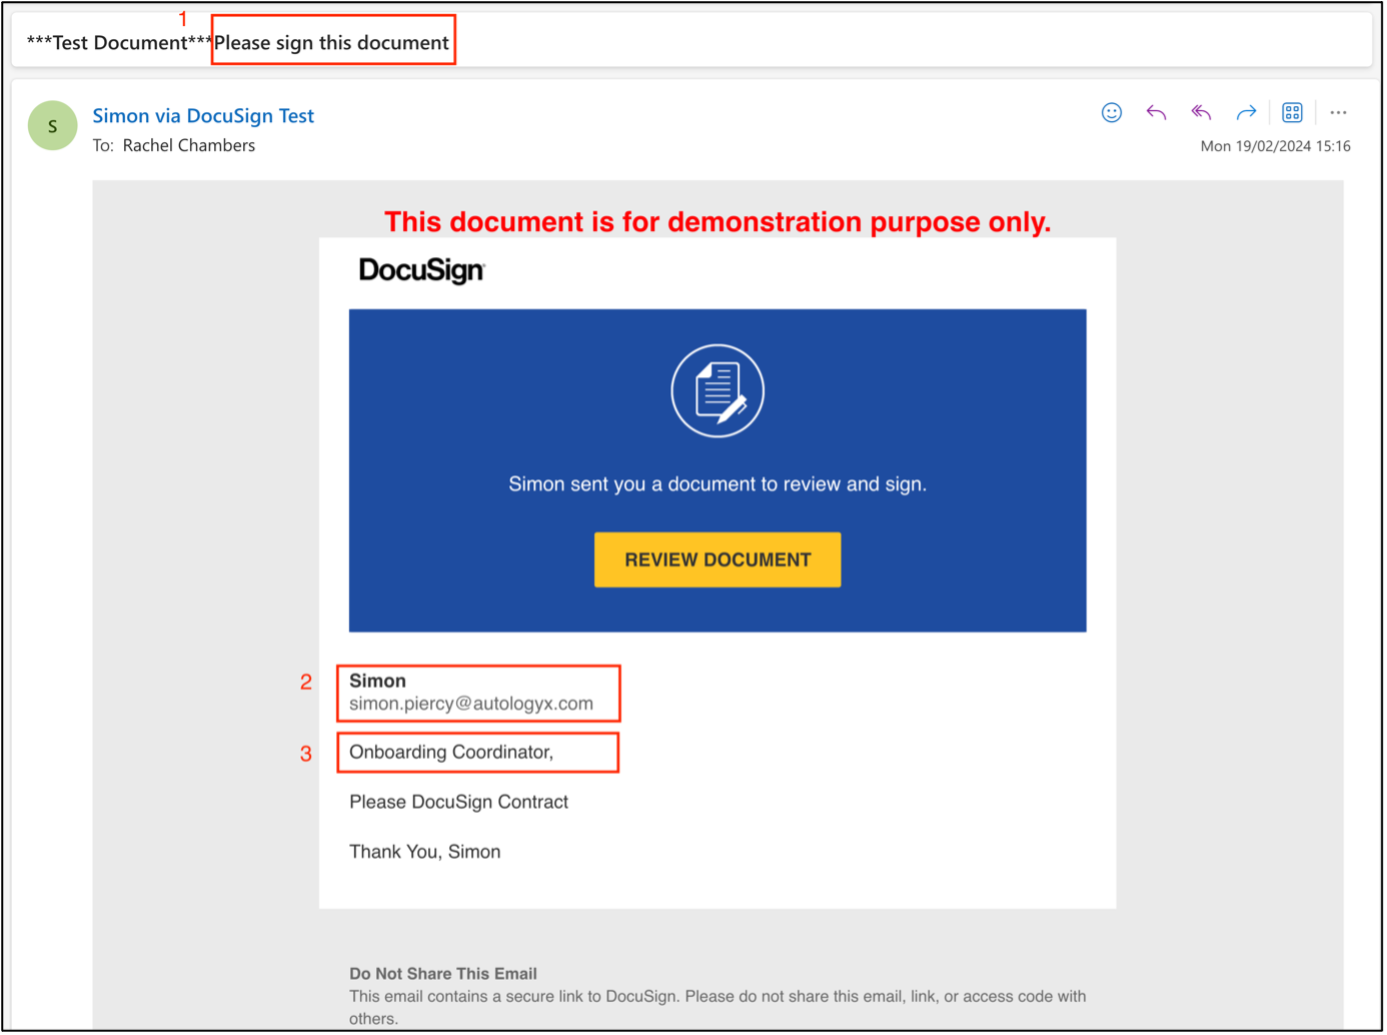
Note: 2 in the above screenshot shows the name and email address of the DocuSign account holder.
- Row 3 – this is the status for the envelope once the email has been sent.
- Row 5 – email subject for notification to signers when signing is complete.
- Row 7 – to have emails sent in English.
- Row 9 – shows the start of “recipients”. Each recipient must have a unique ID.
- Row 10 – subset “signers”, of which there are two.
- Row 12 – first recipient’s email address, shown as merge field from Catalyst.
- Row 13 – first recipient’s name. In this case “hard coded” but could be a merge field. See 3 in above screenshot.
- Row 14 –
routingOrderused to determine that recipient 1 will receive the document for signing first. (NB if you don’t have an order in which the document(s) must be signed, this can be omitted. - Row 15 – recipient ID. In this case, "1". See row 20 under “signHereTabs”. The
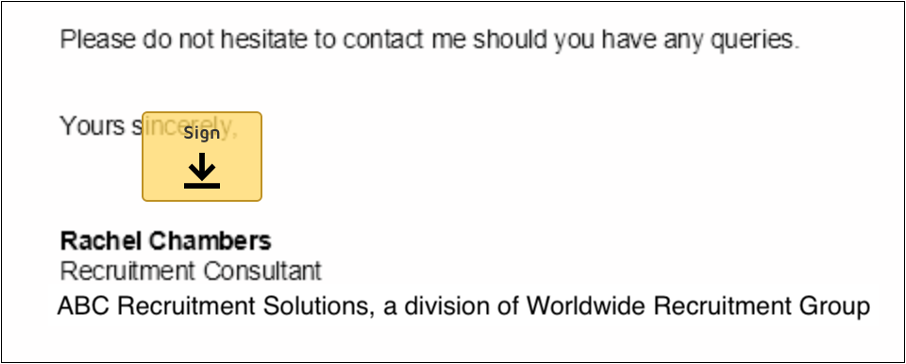
anchorString/s1/is placed in the document template where this signer’s signature is to be positioned. Remember to use white text colour to hide theanchorStringin the document template – shown in the sample template below.
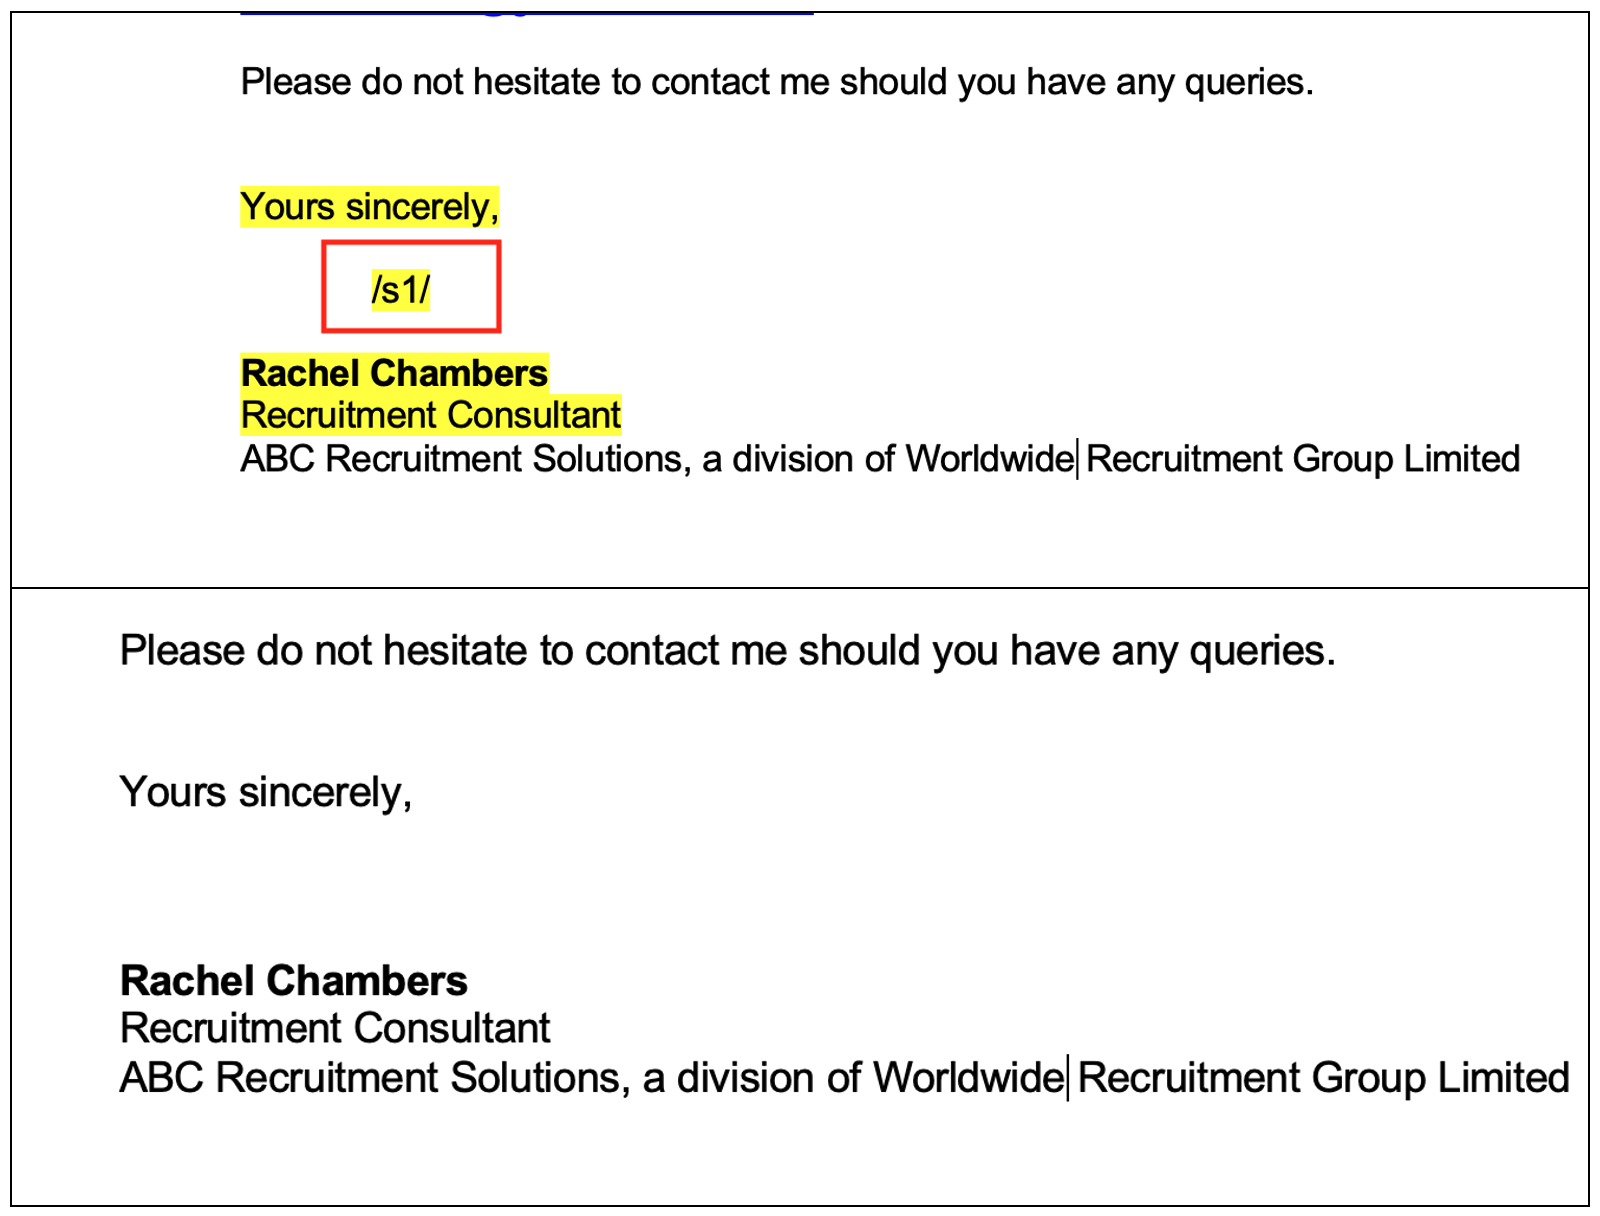
When the recipient reviews the document from the email, they will find the sign button where the anchorString was positioned.
- Row 27 – email address for second signer. This one is a merge field from a related object class as is the signer’s name shown on row 28.
- Row 29 –
routingOrderfor second signer so that they will only receive the document(s) once the first signer has completed the signing process. - Row 35 – note the
anchorStringfor the second signer includes their recipient ID, in this case "2". - Row 42 – subset of recipients is “carbonCopies”, of which there is one. Name and email address are hard coded for this team but could be merge fields.
- Row 46 – recipient ID for this team ie "3".
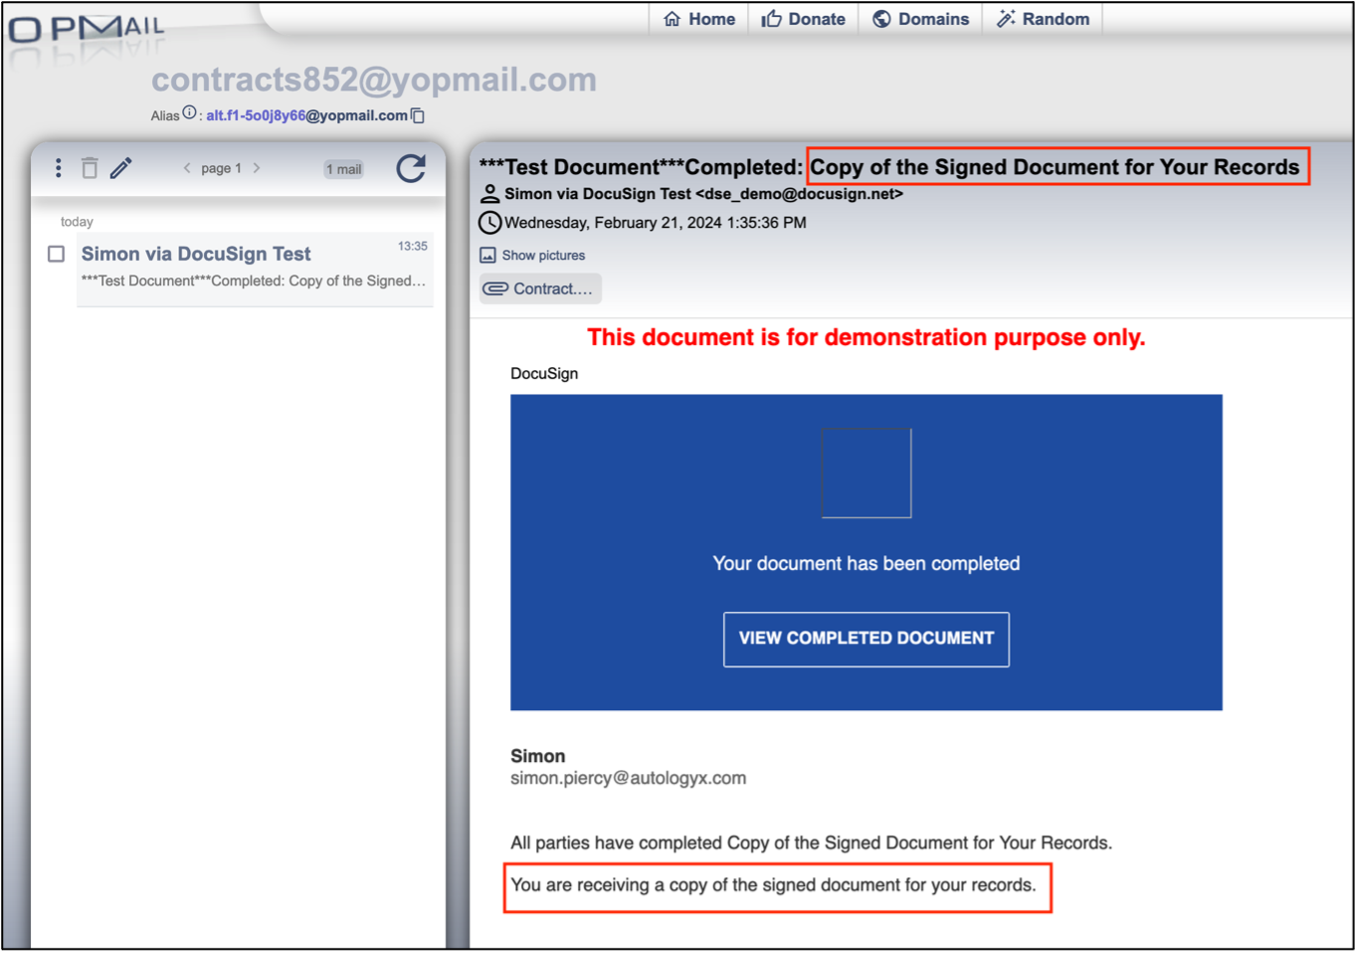
- Rows 47 to 50 – give the detail for the email the cc is to receive once signing is complete. See below screenshot.
- Row 55 – “documents”. In this example, there is only one but a DocuSign envelope can contain up to 130 unique documents.
- Row 58 – name. This is the name of the document as on the email to signers. See 4 in previous screenshot. You can use merge fields to personalise the document name, if required, with case, matter, candidate name or reference number.
- Row 60 – the merge field for the generated document in base64 format.
Useful info
- Other tabs can be added. Another commonly used tab is
dateSignedTabs, which will add the date the document is signed. The code refers to thedocumentIdand also uses ananchorString:
"dateSignedTabs": [
{
"documentId": "1",
"anchorString": "/d1/",
"fontSize": "Size10",
"font": "Tahoma"
},
{
"documentId": "2",
"anchorString": "/d18/",
"fontSize": "Size10",
"font": "Tahoma"
}
]
In this example, /d1/ will position the date on which the recipient signs document ID 1 and /d18/ will position the date on which they sign document ID 2.
If needed, font size and font type can be stipulated. Again, when the anchorString is added to the document template, white text should be used to hide it.
- For more information on envelope/document limits: https://support.docusign.com/s/articles/DocuSign-Document-and-Envelope-File-Size-Limitations?language=en_US