MS Word add-in - configuration
Document templates in Catalyst are created from Word documents.
In order to help you create complex documents and easily manage merging data from records in multi-leveled relationships, we have developed an Add-In which can be used in the Microsoft Word application. This has been specially designed to help eliminate manual entry and therefore errors too.
Prerequisites for Word Add-In configuration
There are 3 things you will need to set up the Word Add-In configuration:
Access to the Autologyx Domain you wish to configure with sufficient permissions to configure Single sign-on settings.
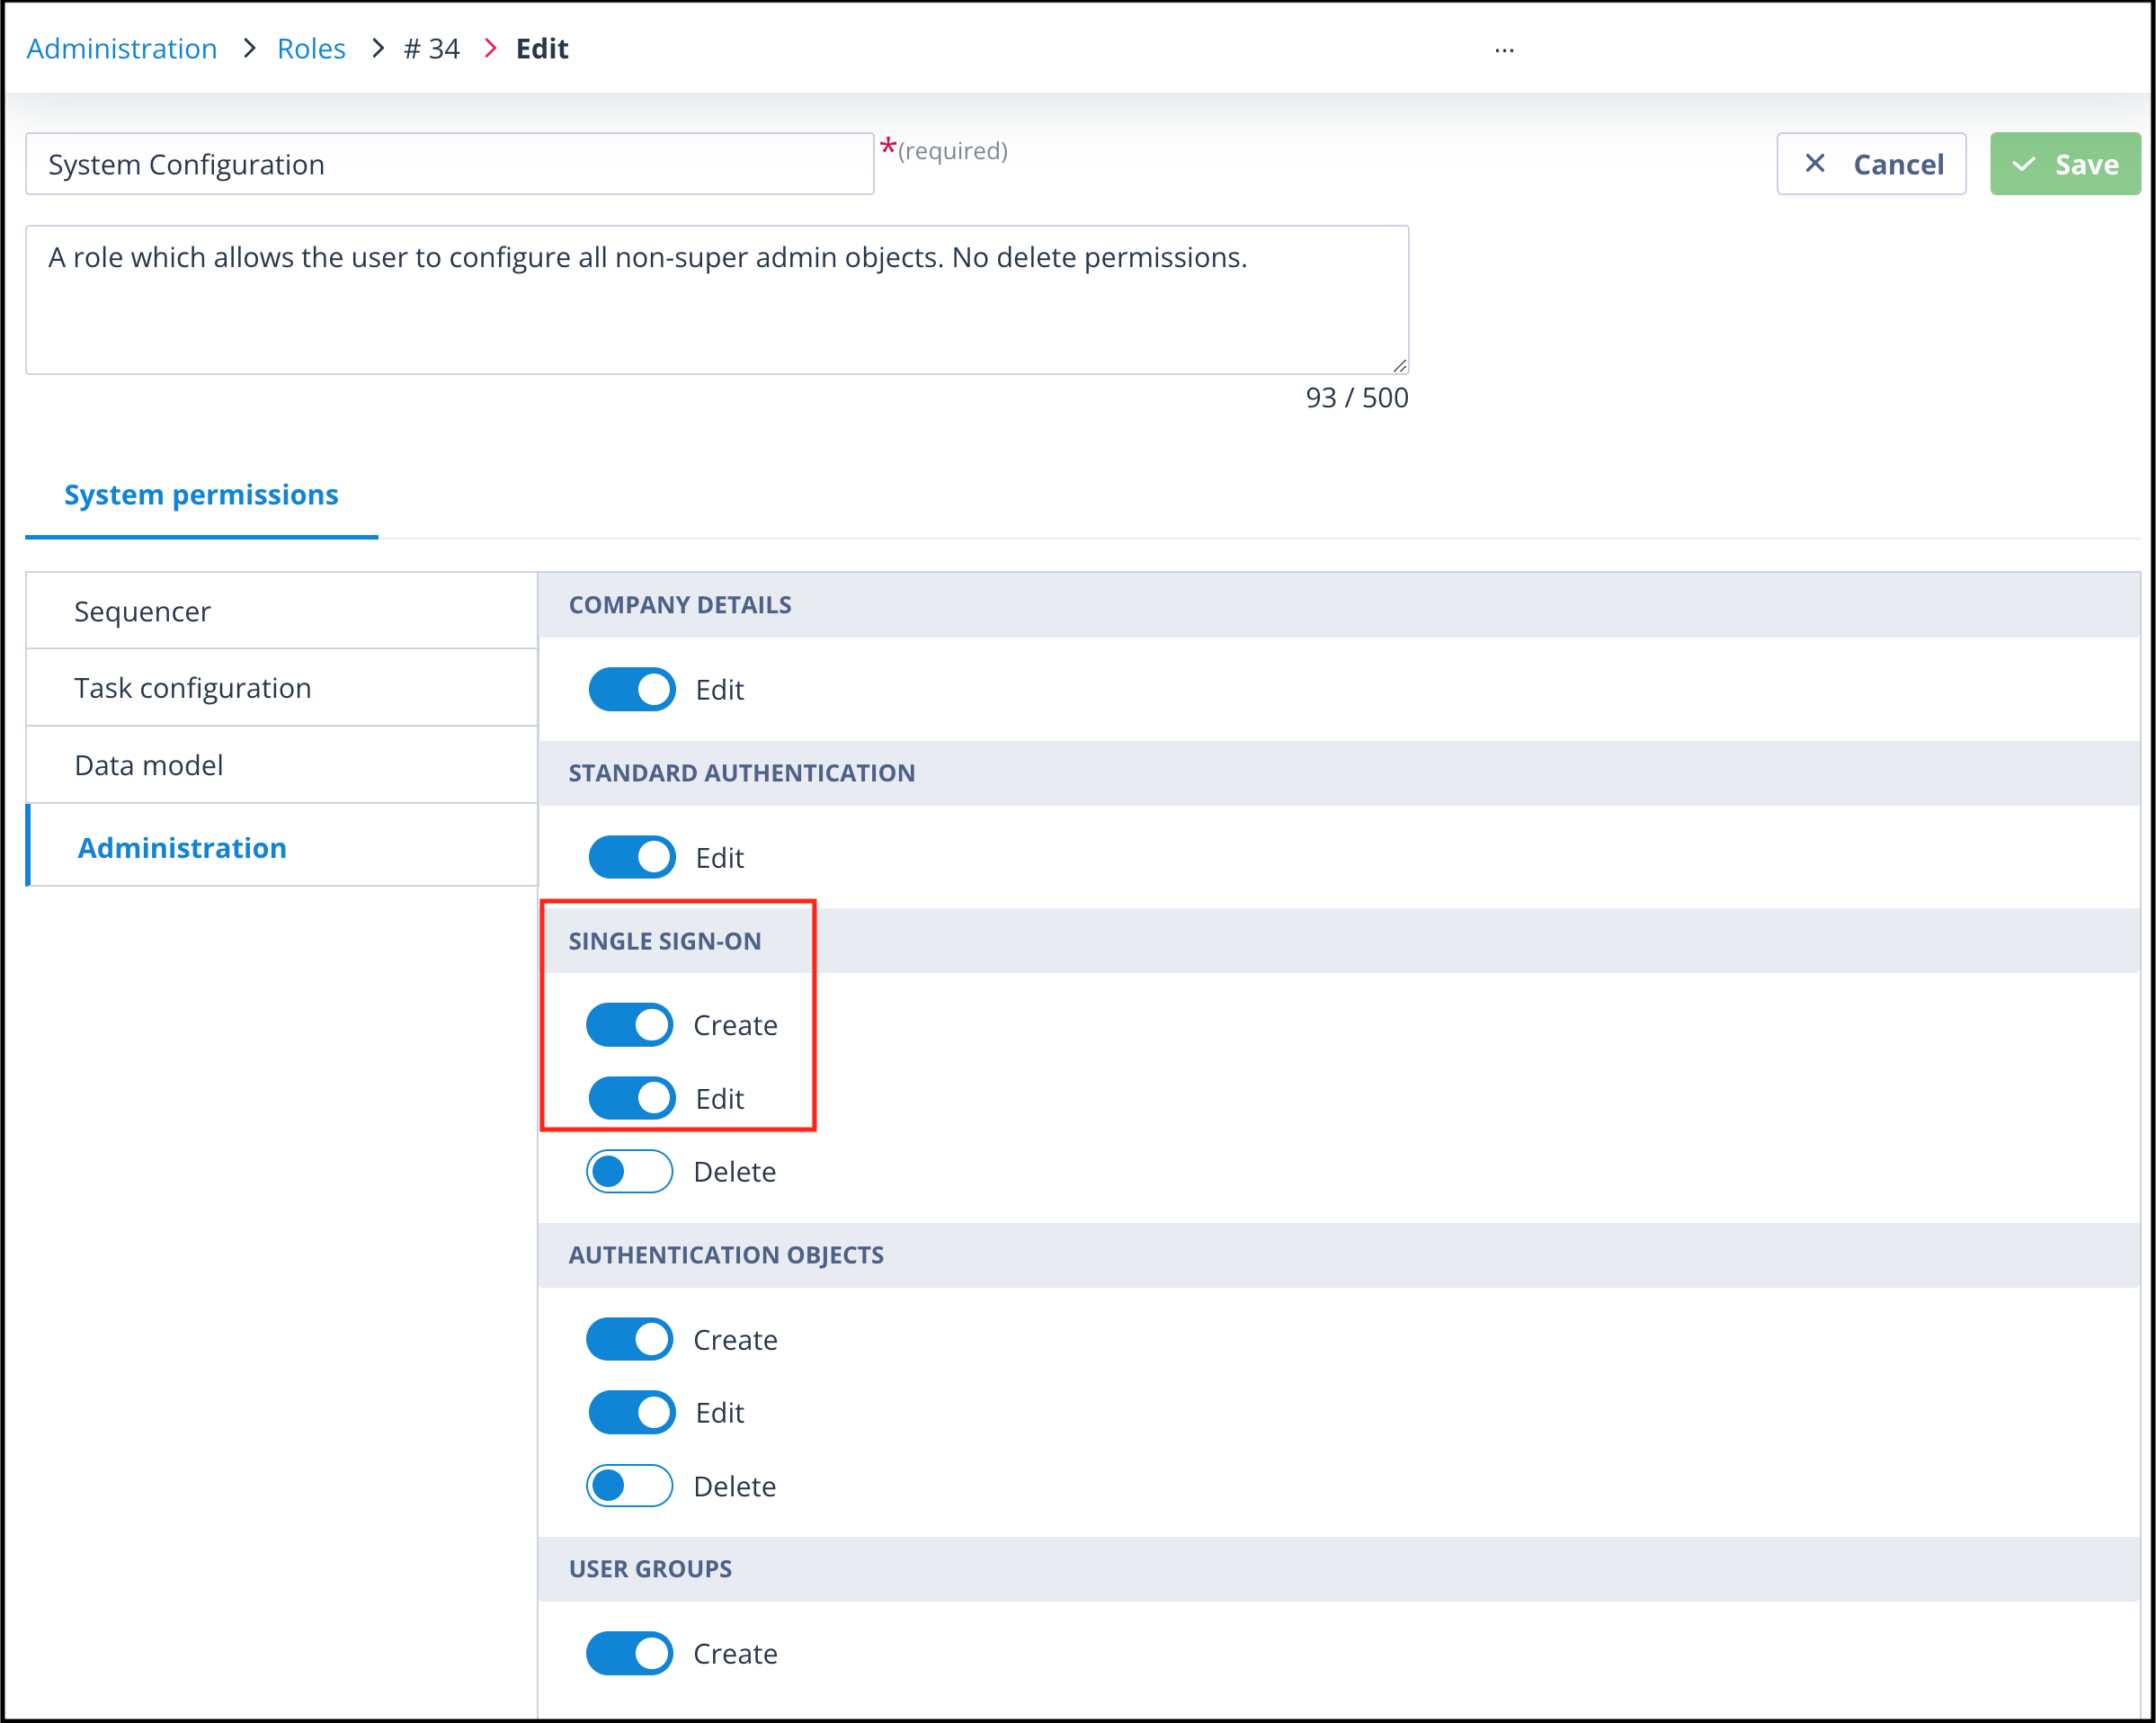
This means you will have a user account of the Super Admin type or a Standard account type with a Role which has Single Sign-On create and edit permissions enabled.
Access to the Microsoft Azure Domain Admin, with permissions to create (and edit) new Enterprise Applications. This is usually a specialist role within your IT team.
Access to your Microsoft 365 admin center, with permissions to allow you to upload custom add-ins. Again, this may need to be done by your IT team.
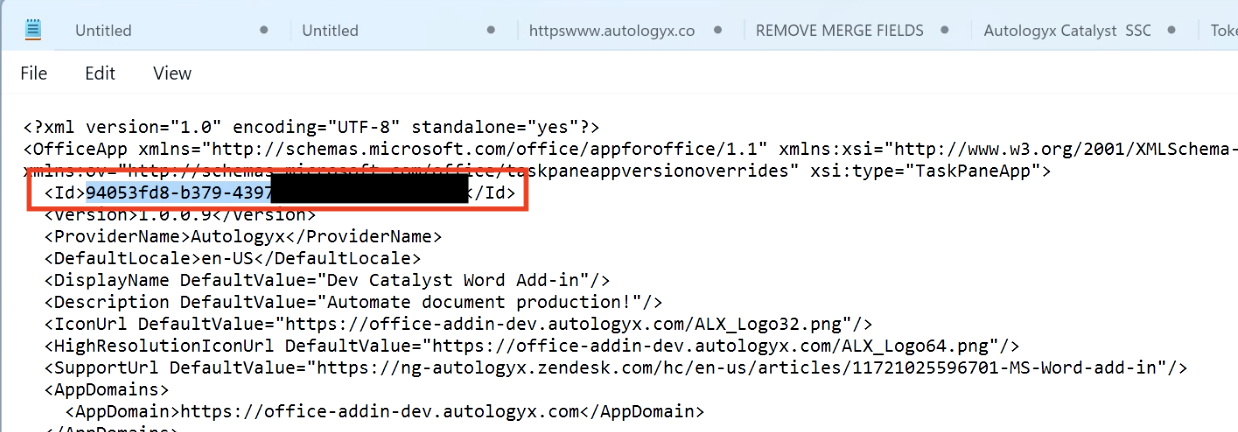
The upload relates to a manifest file (xml) which contains the details for where the source code of the Add-in is downloaded from, and the ID of the Enterprise Application Registration on the domain, as shown below.
Generate the manifest file with the Enterprise Application Registration ID
The following steps show what must be done to get the Enterprise Application Registration ID embedded into the manifest file.
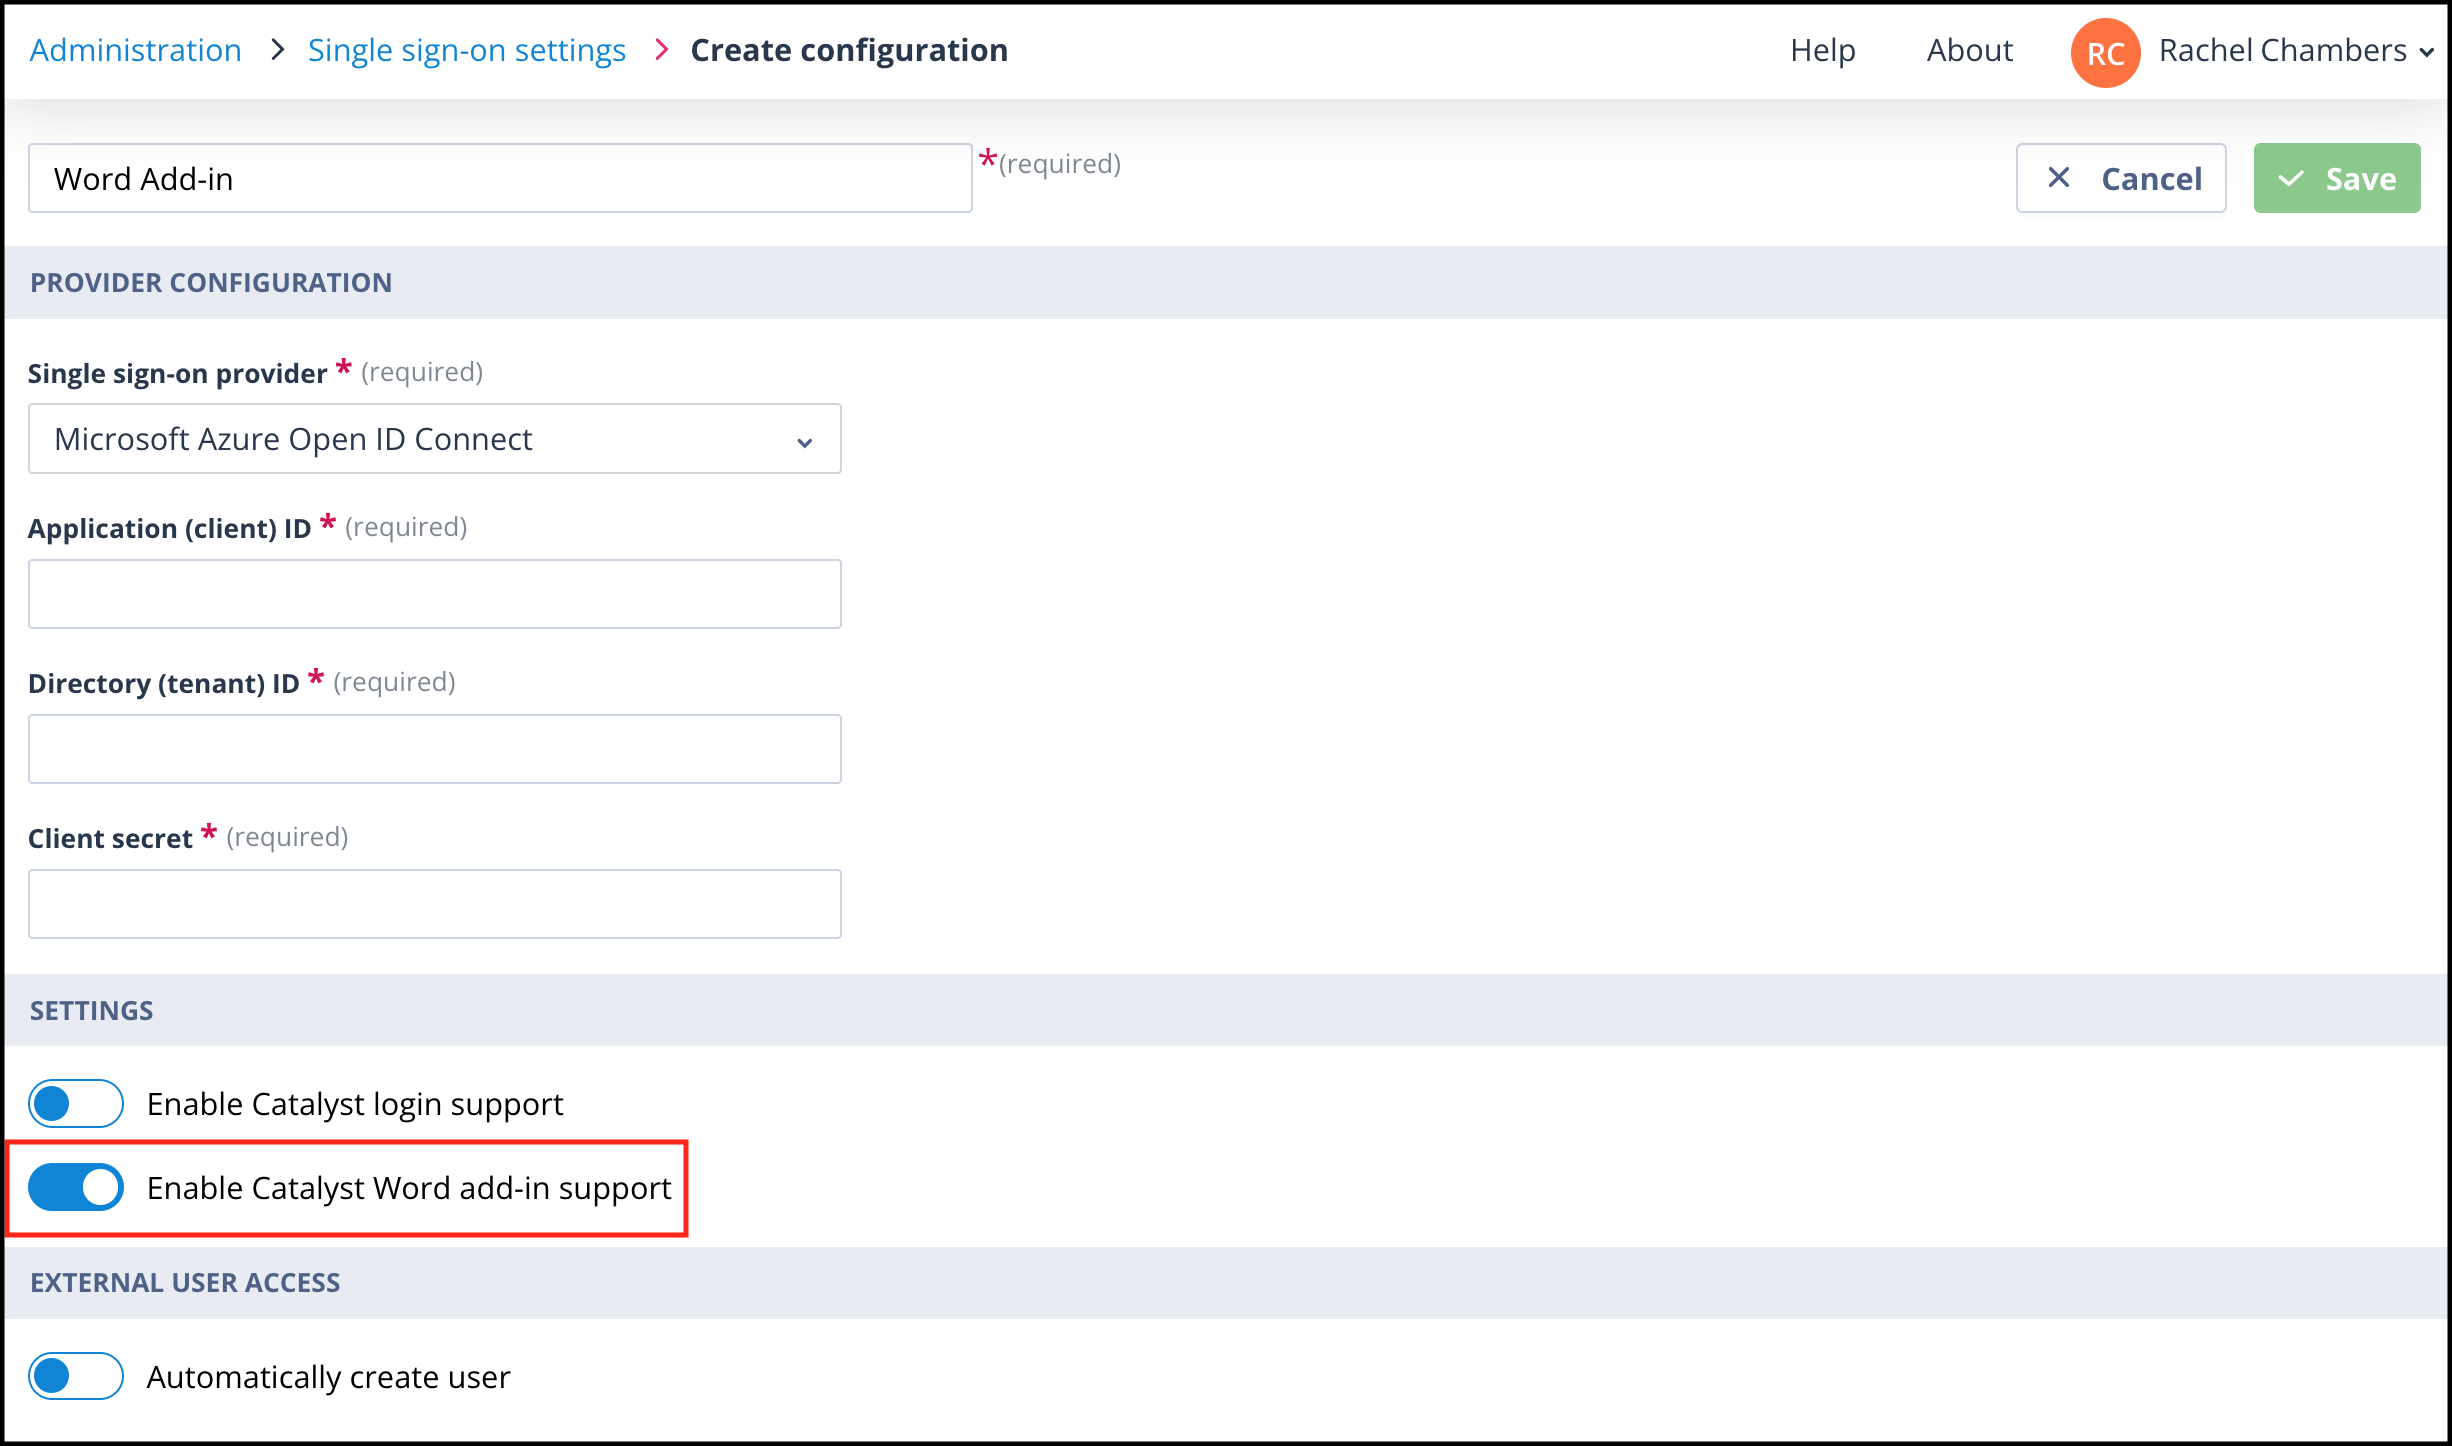
- In your Autologyx system, navigate to Administration/ Single sign-on settings and click the +Create button. In the Settings section, slide the radio button to "Enable Catalyst Word add-in support".
In Azure, go through the steps to create the registration entry. CLICK HERE for an article which explains how to configure User Single Sign-on authentication. The steps to get the Application (client) ID, Directory (tenant) ID and Client secret are included.
Enter these details and SAVE. You will be taken to the Single Sign-on settings list.
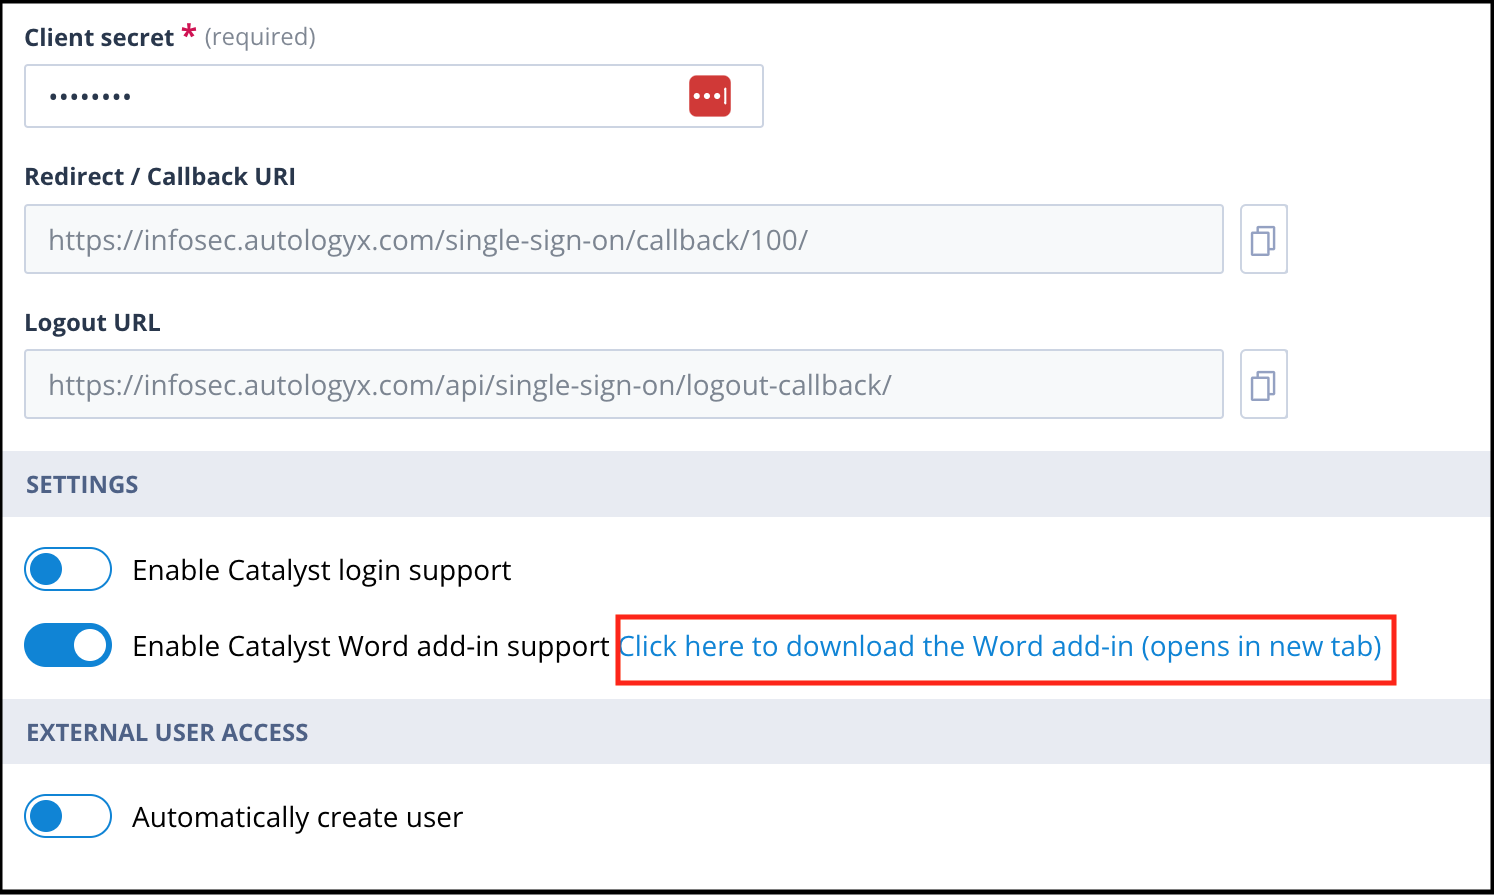
Edit your new entry and the Redirect / Callback URI and Logout URL will have auto-populated. You will also see that the manifest file has been generated as a link so you can download it.
- Click the link provided to download the manifest file. The Application (client) ID will have been embedded in this file. This is important because it tells the manifest file which registration object to connect to on the Azure domain.
Complete the required permissions in the Azure Registration
Follow these steps to complete the required permissions in the Azure Registration:
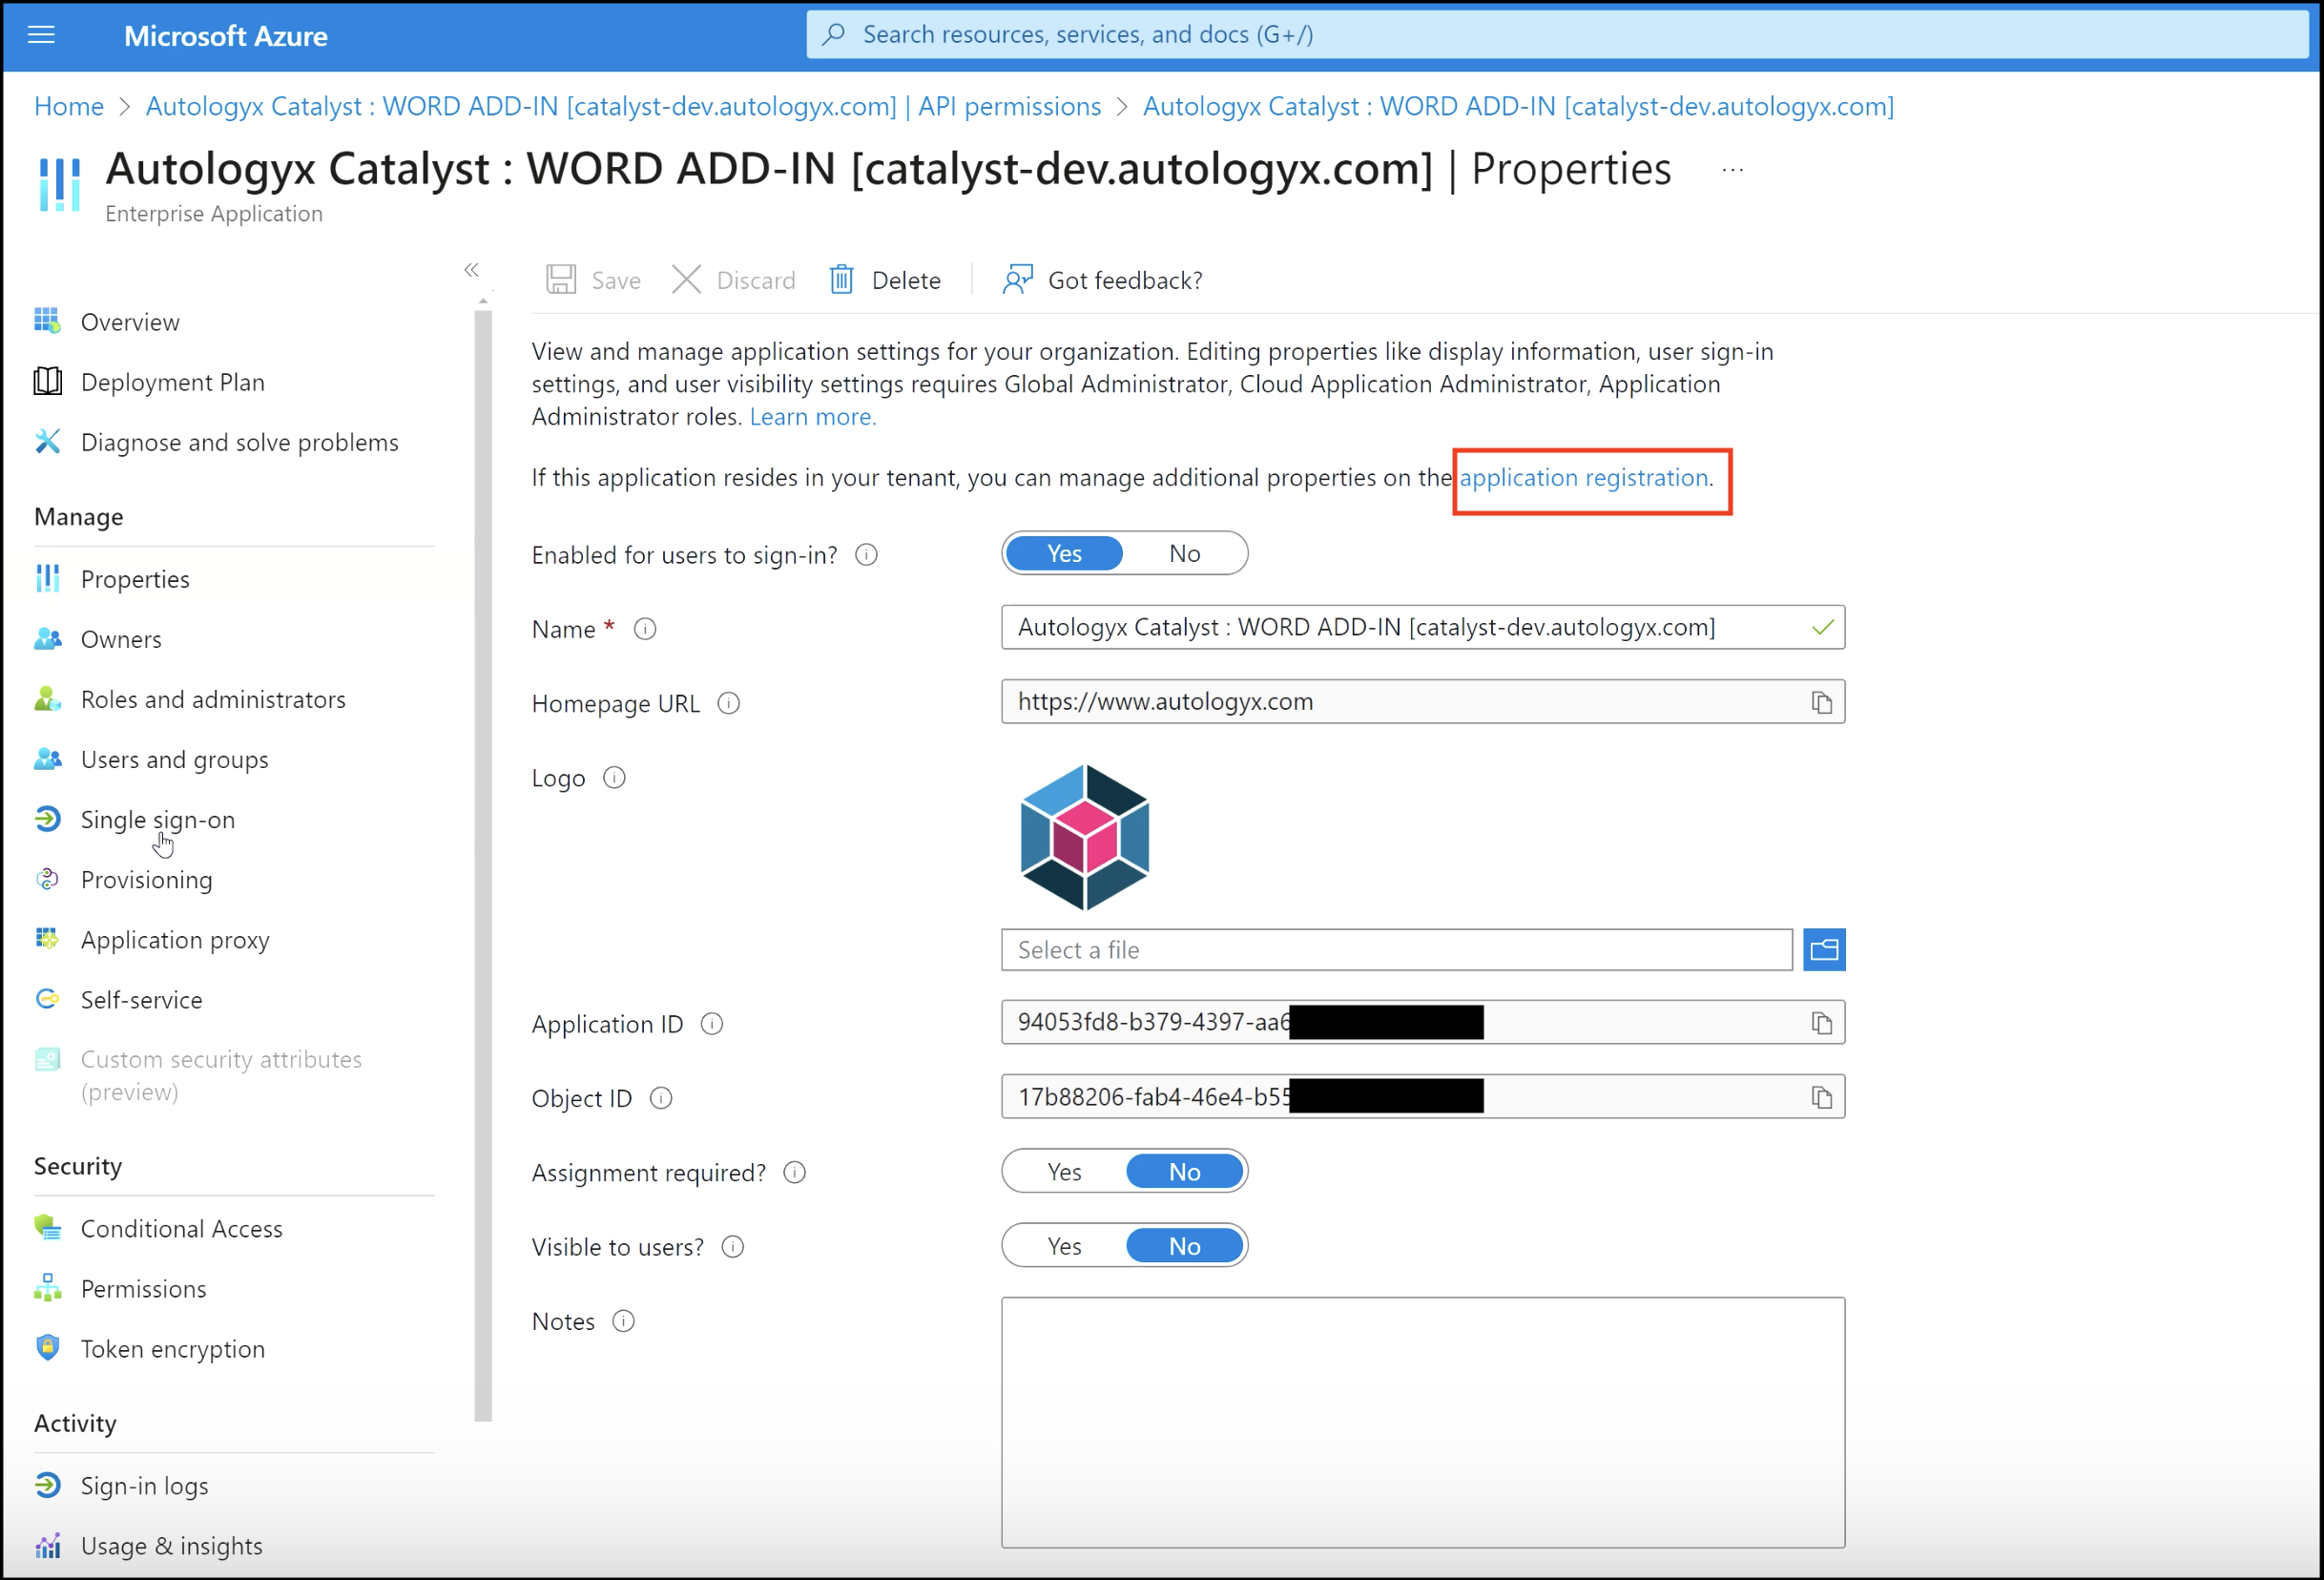
- Go to the Word Add-in Registration in Azure/ Properties, click "Application registration".
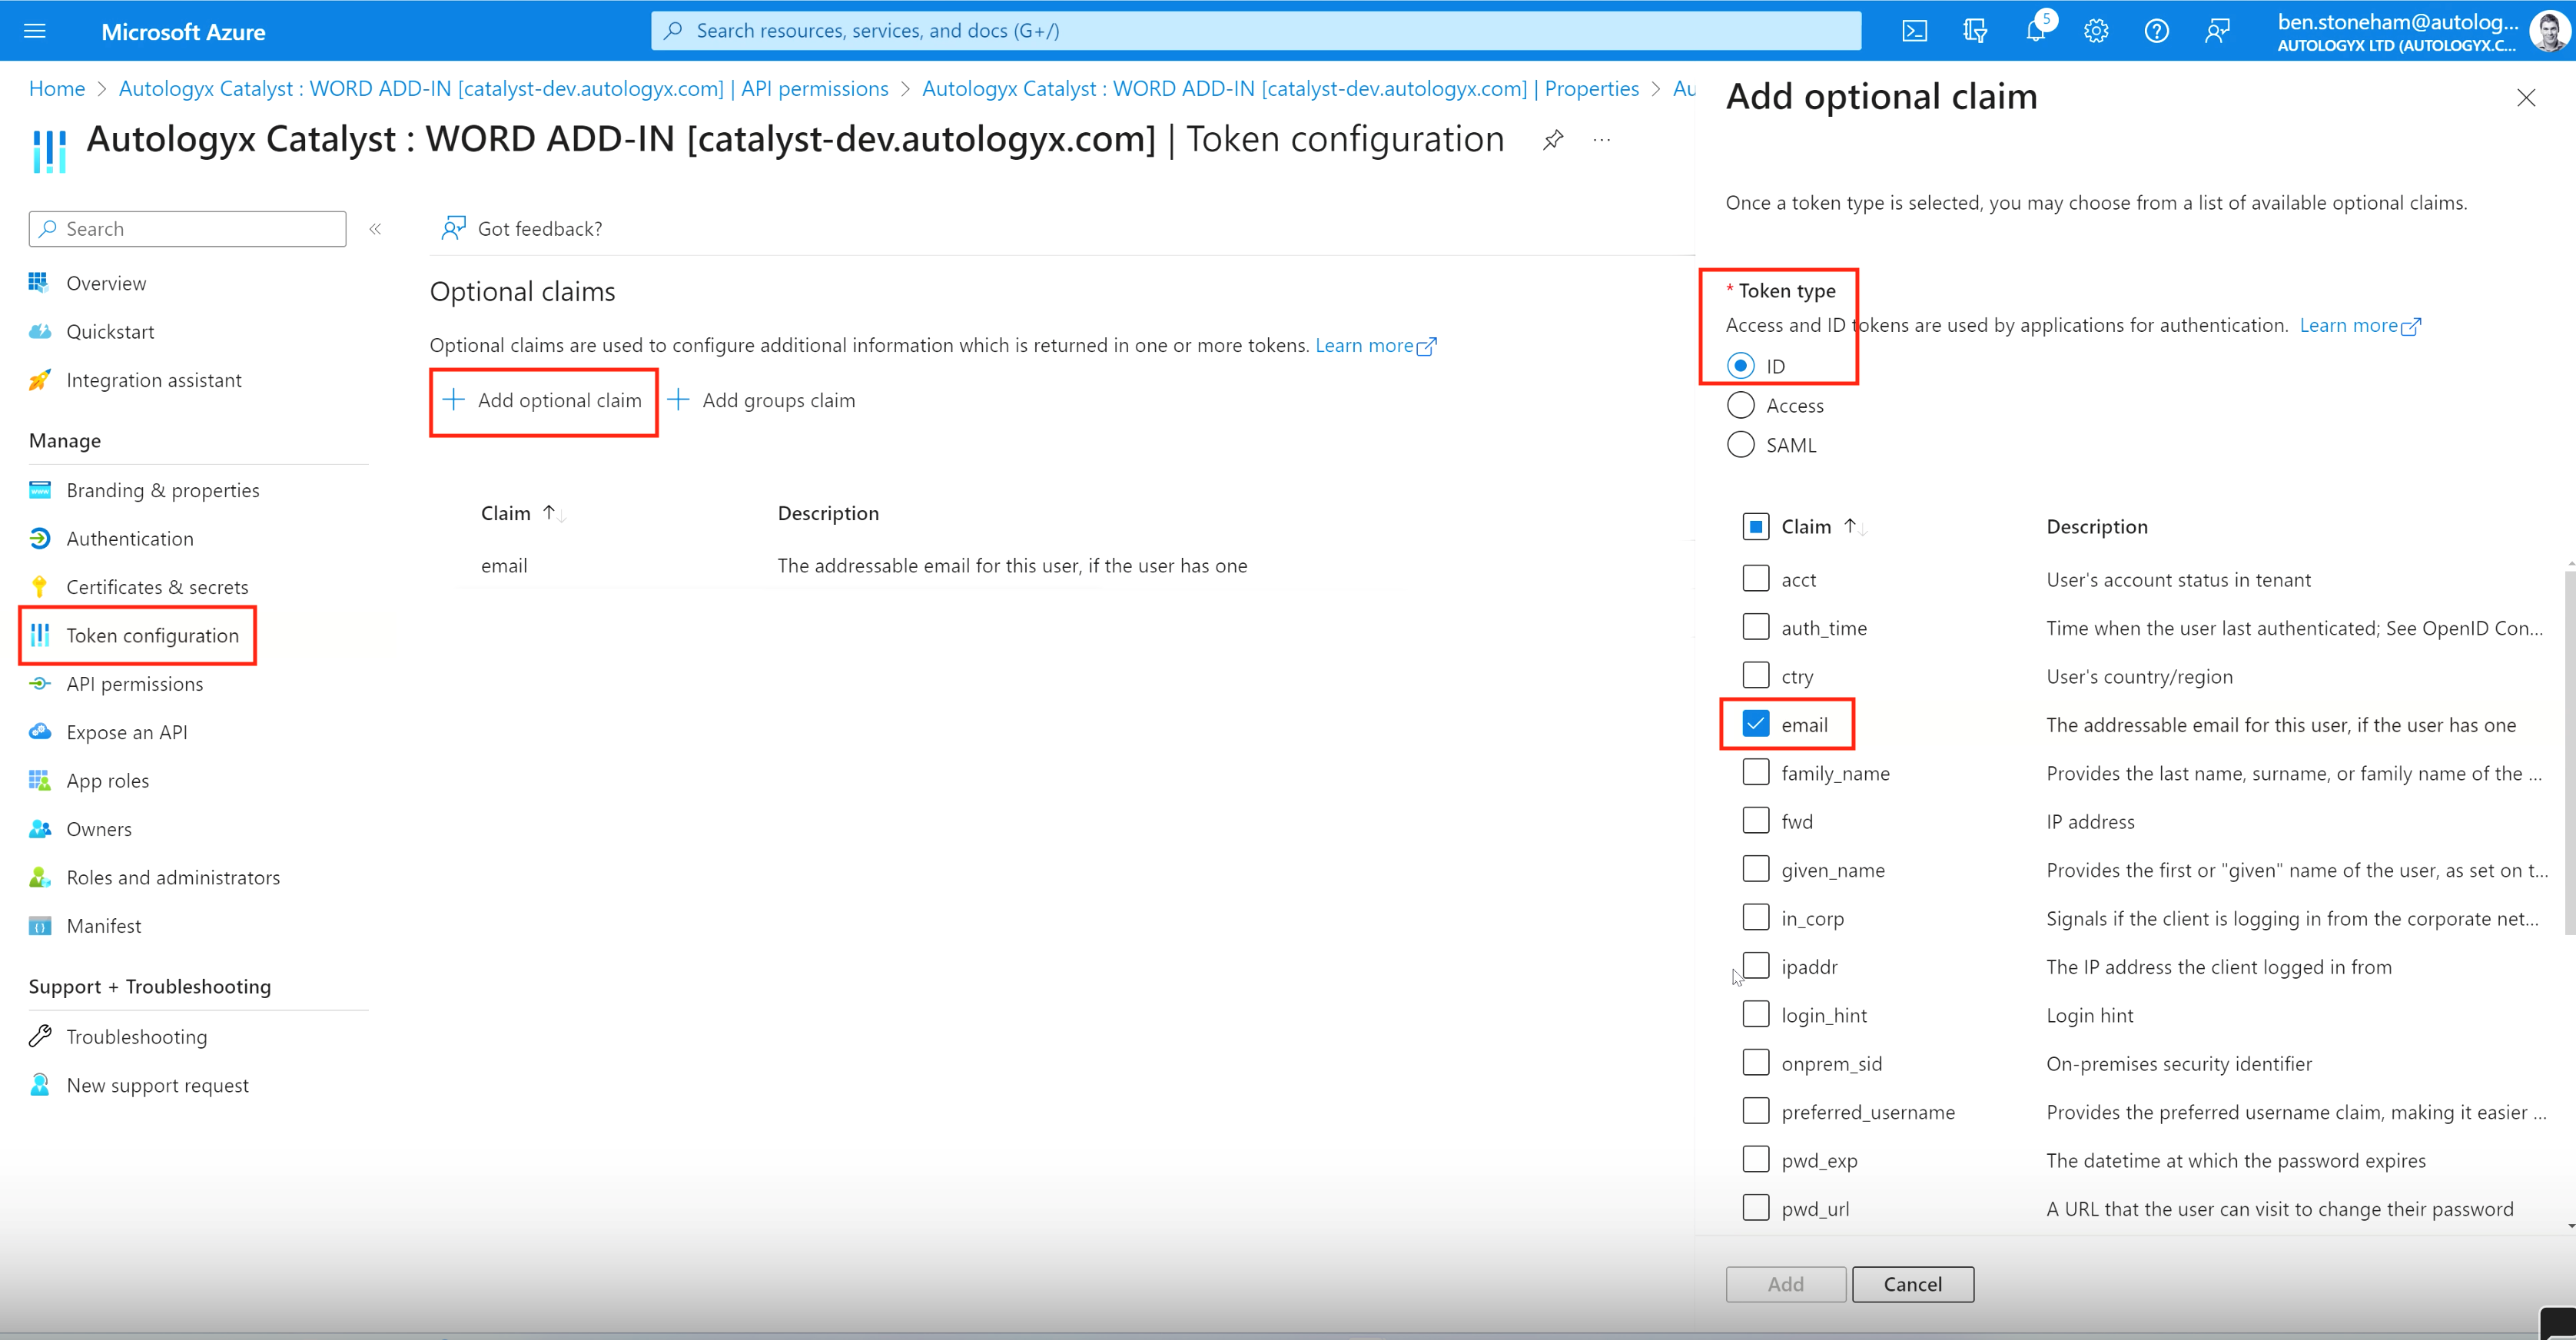
In the left-hand menu, click "Token configuration". You need to add claims for the Token type IDs for email. Click "Add optional claim", which will open a panel on the right-hand side.
Under Token type, click ID. Select the required claims and click Add. Azure system administrators will be familiar with this process.
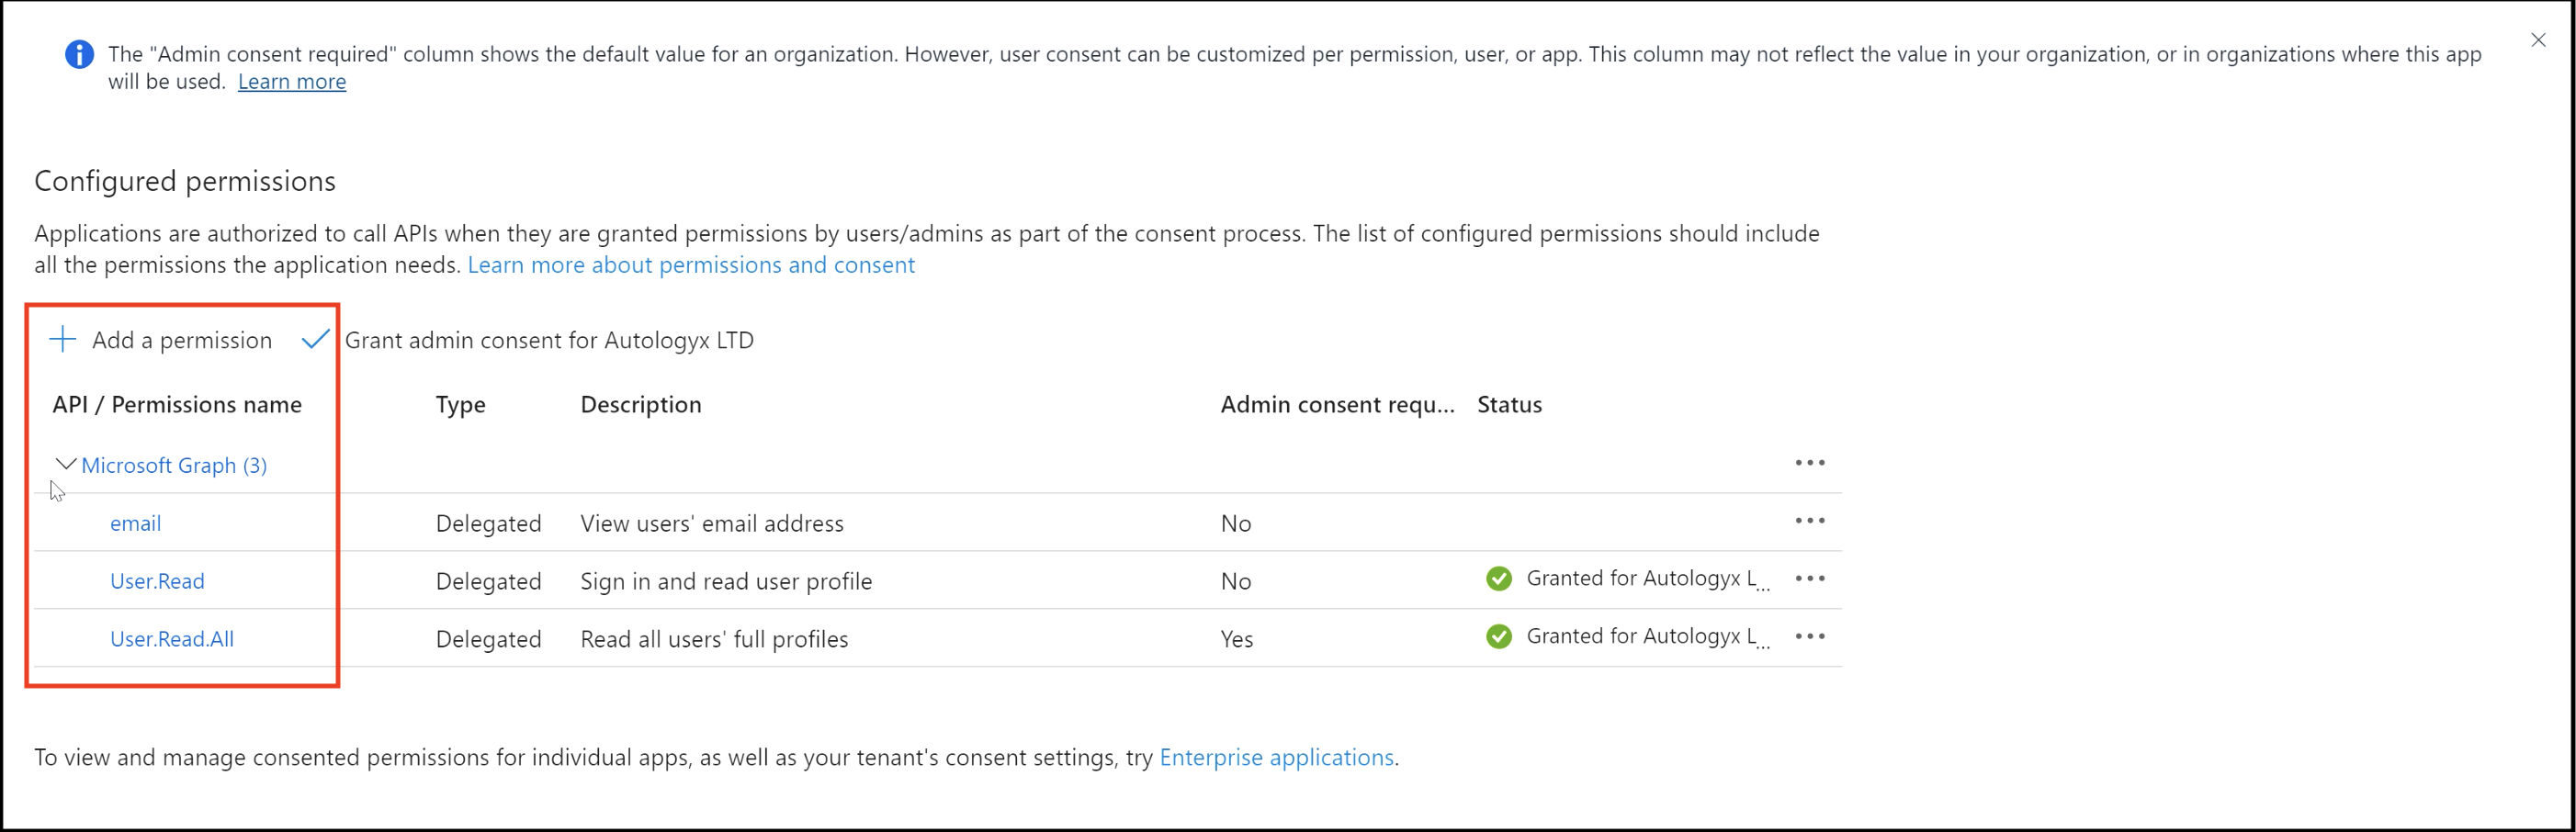
You will be prompted to add API permissions. Click this option in the left-hand navigation menu.
The three API endpoints which require delegated permissions are:
- User.Read
- User.Read.All
These are also required when setting up User Single Sign-on authentication. Again, a detailed explanation of the configuration of these permissions is given HERE.
Because these permissions overlap, you could have one Registration entry in your Azure Directory for both User Single Sign-on and the Word Add-in, if preferred. However, separate Registrations are likely to be easier to manage and provide more flexibility.
- In the left-hand navigation menu, click "Expose an API". At the top of this page is a field called "Application ID URI". Here you must enter the URL which Catalyst exposes to Azure together with the Application (client) ID. The format of the entry for this is:
api://office-addin.autologyx.com/application(client)id
Also, this URL can be found in the manifest.xml file downloaded earlier from the Catalyst application when creating an Authentication Object:

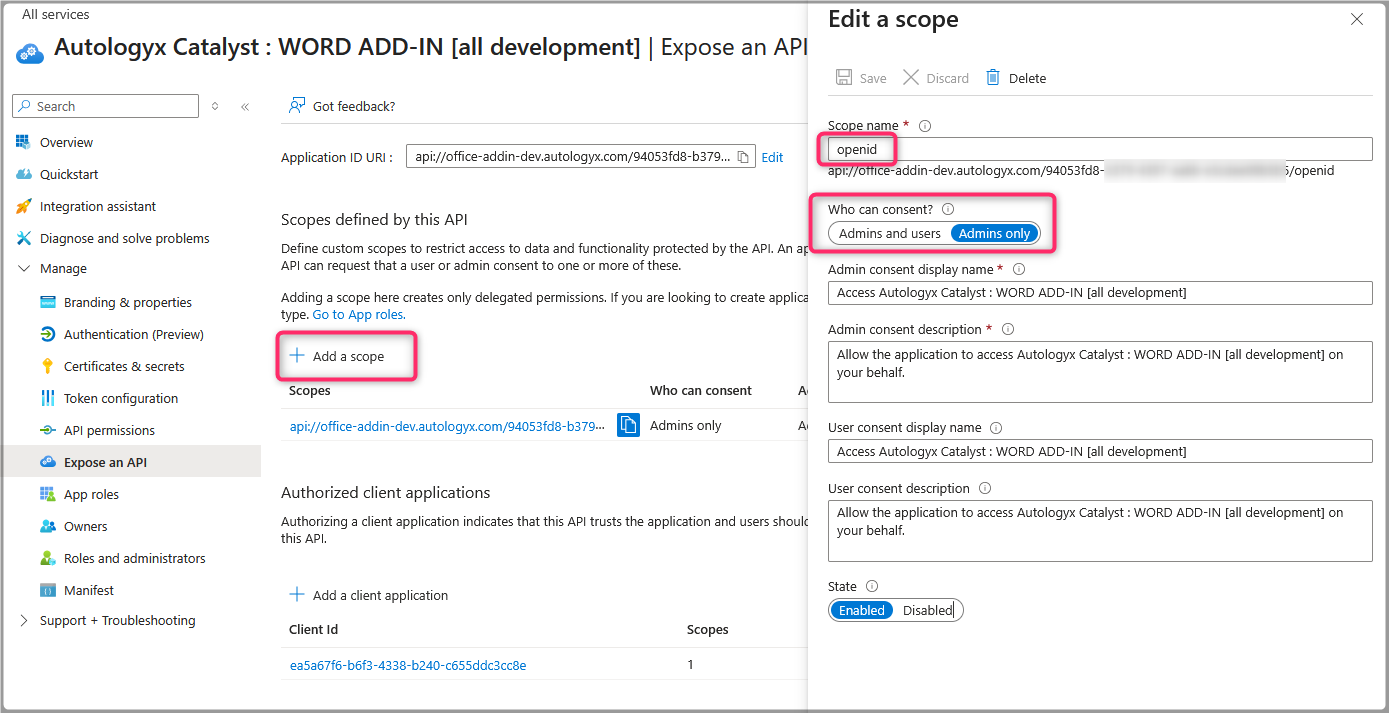
- Further down this page you have a link to add a scope. Click this and a panel will open to the right. Give the scope the name openid and ensure the Admins only option is enabled and then enable the scope itself.
Finally, on this same page, you must grant the client application. This is one of those Microsoft secret source things which isn't particularly obvious.
This grants any Word application which is "talking" to the registration entry permission to be a client to the entry.
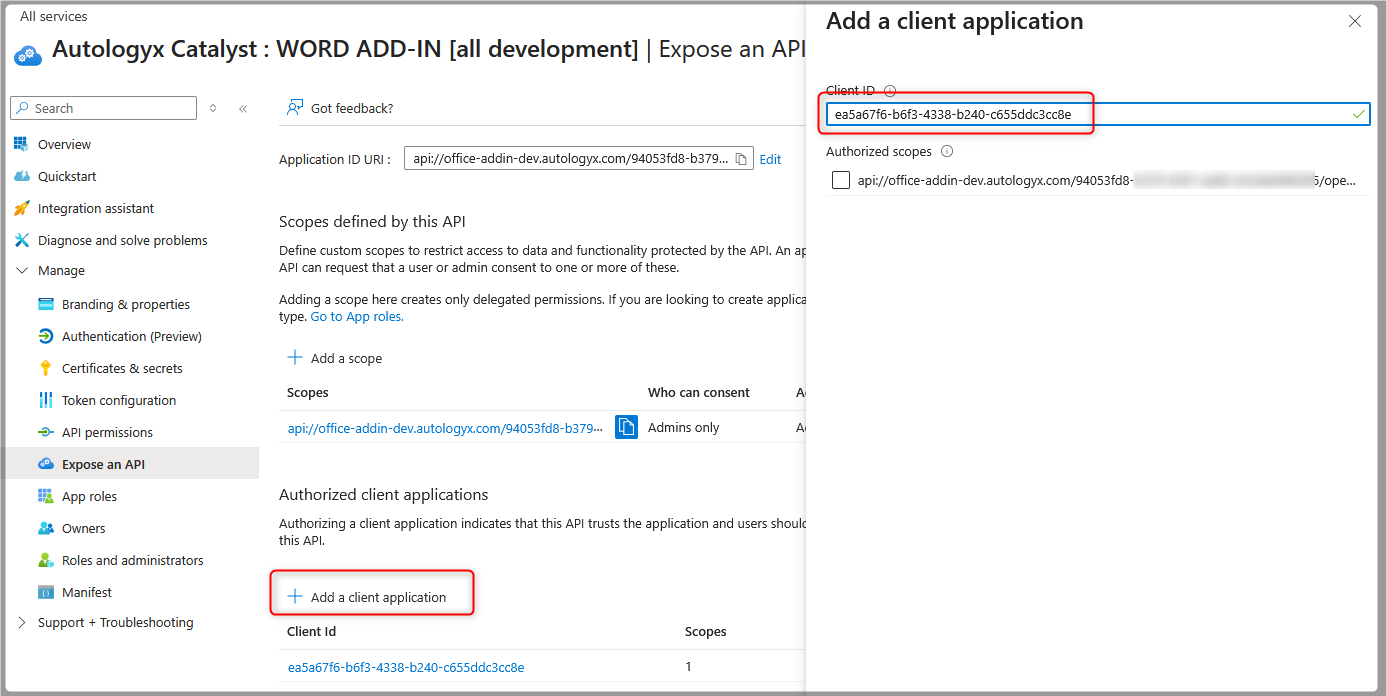
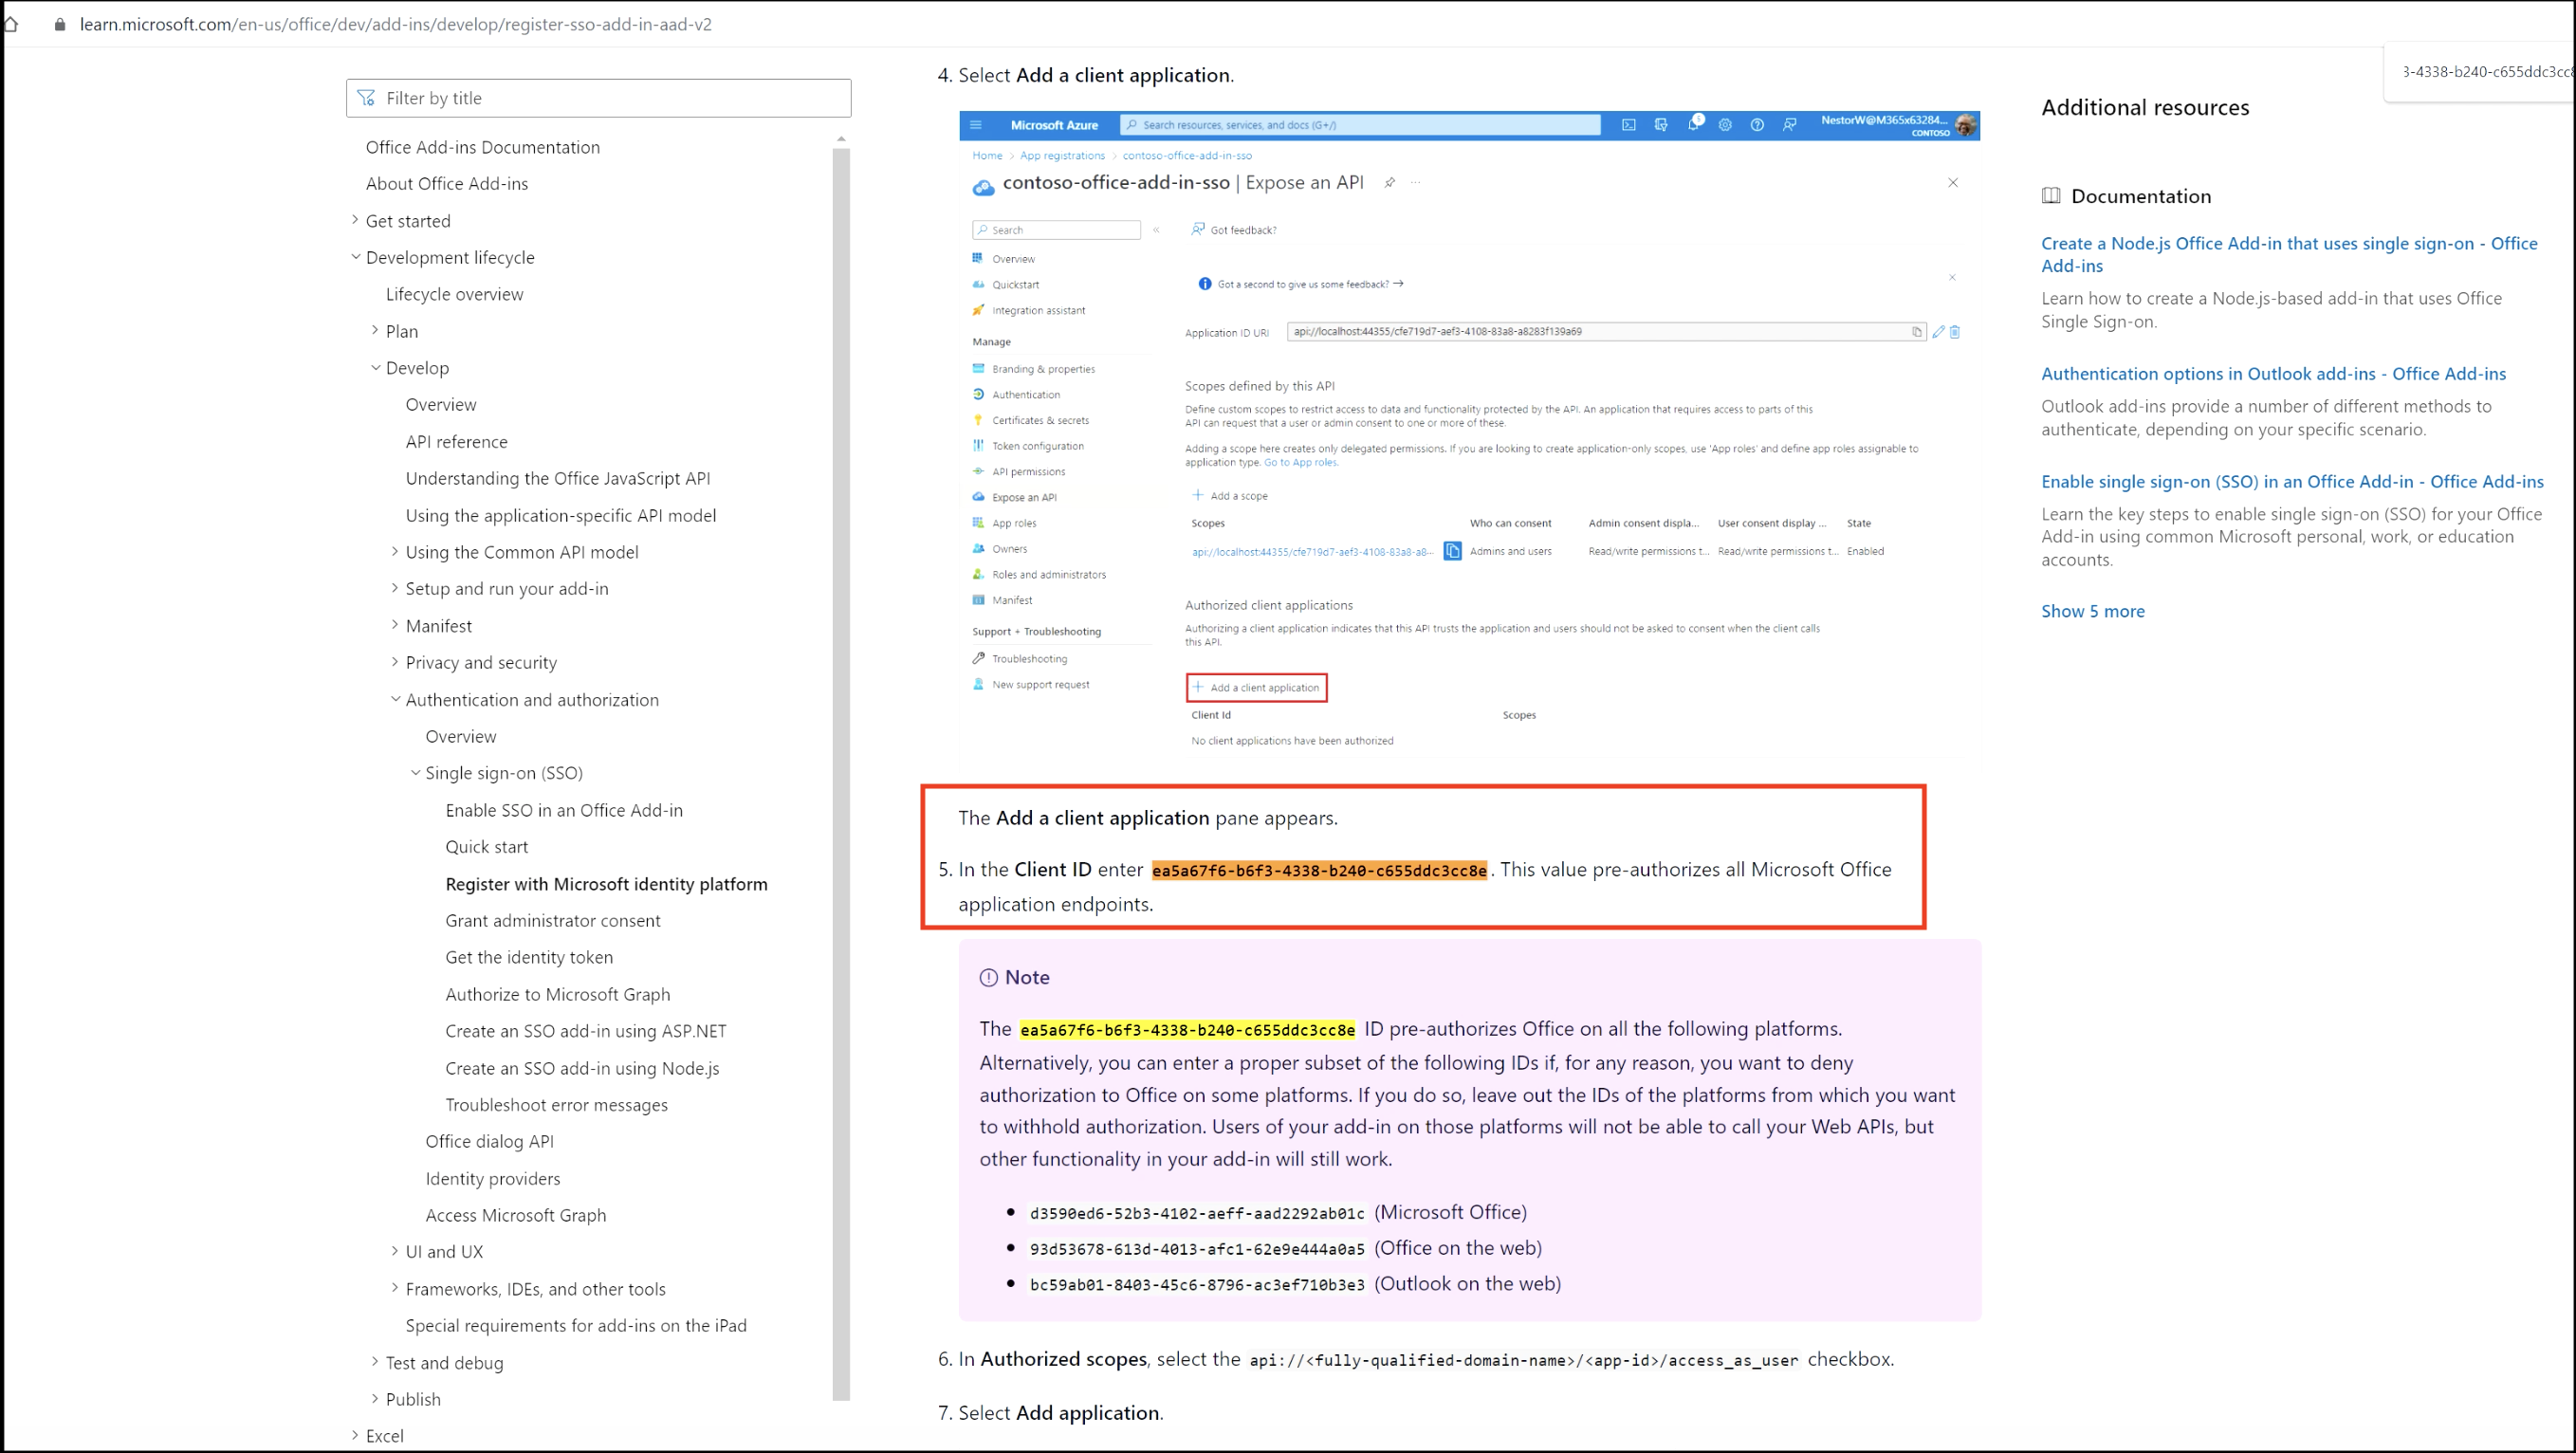
Under "Authorized client applications", click "Add a client application". In the panel which opens on the right you must put in a uuid which pre-authorises Microsoft endpoints. This can be found in Microsoft's documentation as shown in the second of the two screenshots immediately below:
For the Microsoft Office application the Client ID is: ea5a67f6-b6f3-4338-b240-c655ddc3cc8e
A link to Microsoft's own documentation is provided here: https://learn.microsoft.com/en-us/office/dev/add-ins/develop/register-sso-add-in-aad-v2
Add the manifest file to your Microsoft Admin Center
Follow these steps to add the manifest file to your Microsoft Admin Center:
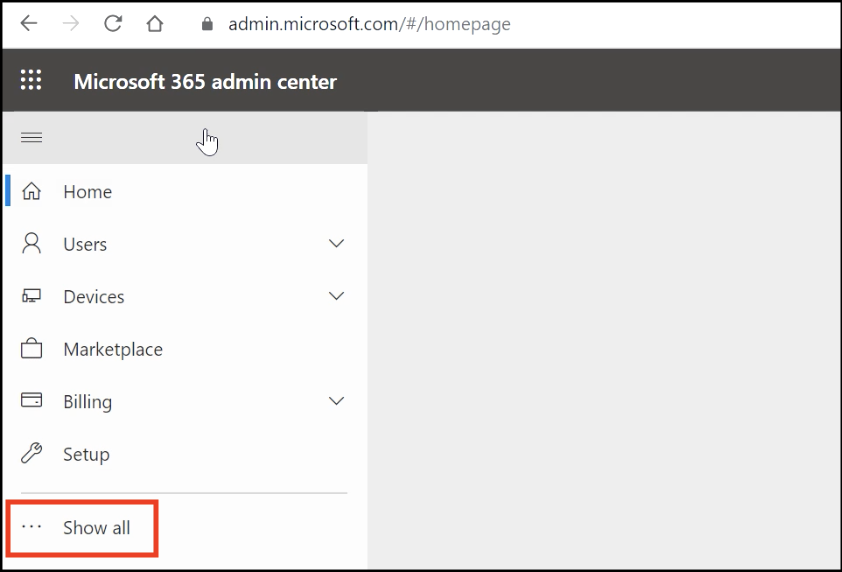
- Sign in to your Microsoft Admin Center. In the left-hand menu, click "Show all".
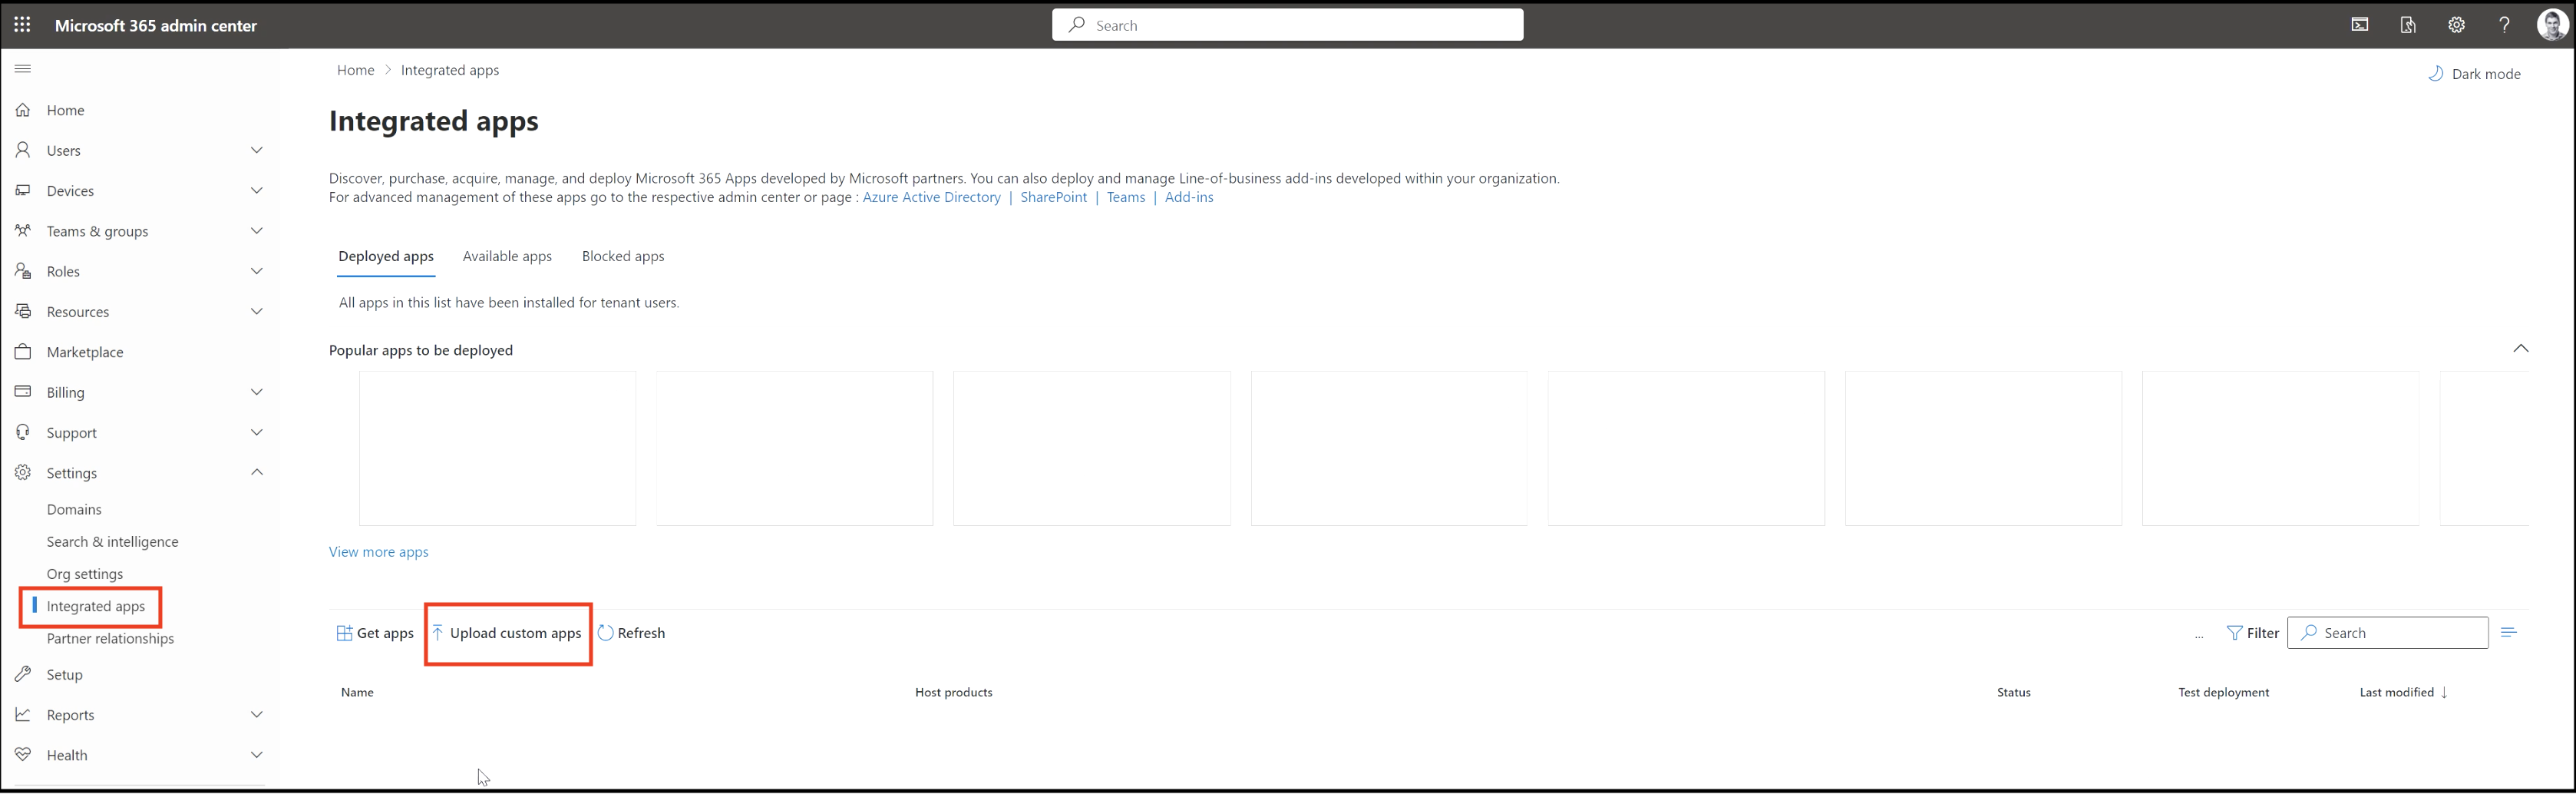
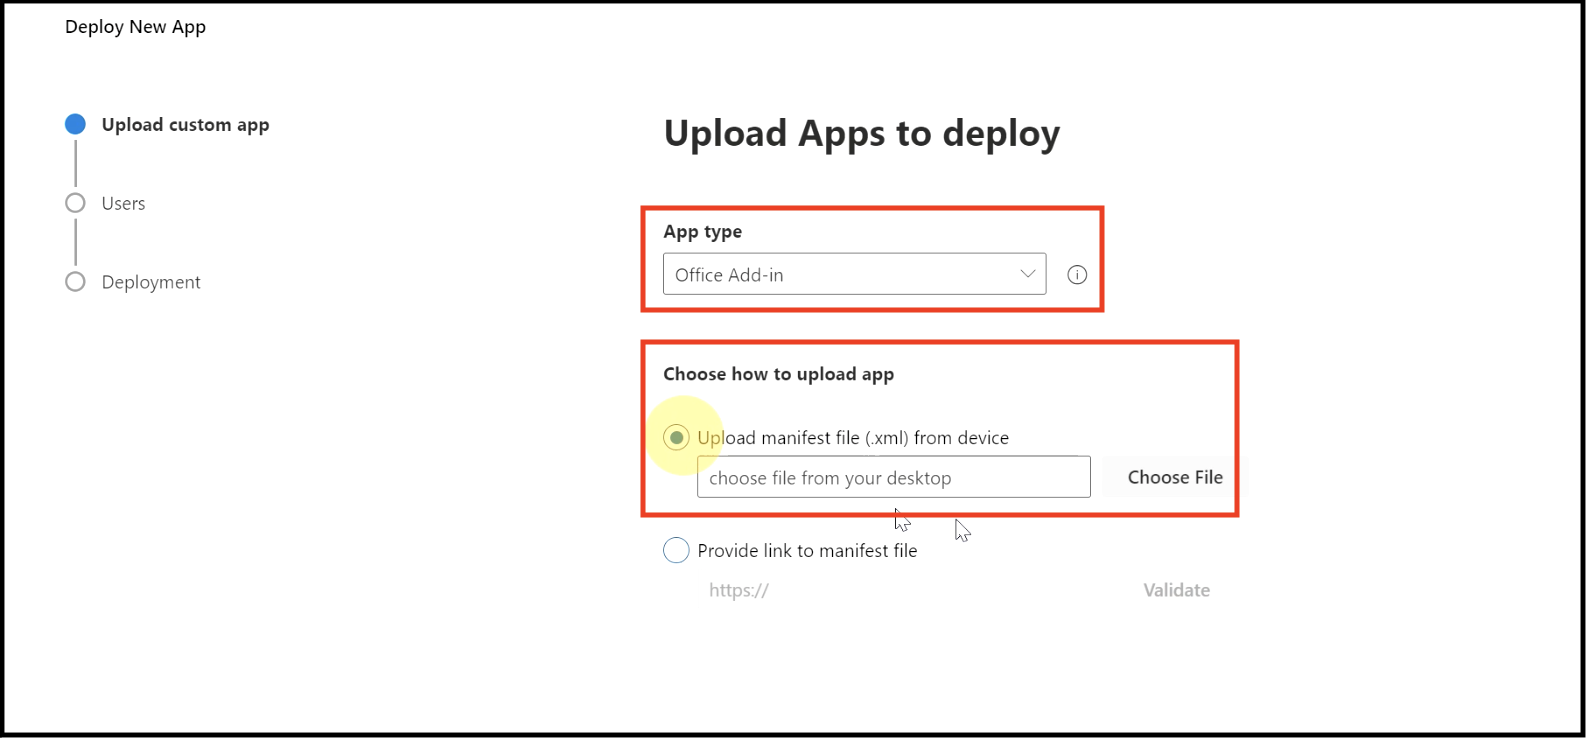
- From there, click Settings/ Integrated apps. There is an option for "Upload custom apps".
- In "App type", choose "Office Add-in". In "Choose how to upload app", select "Upload manifest file(.xml) from device" and upload the file you downloaded from the link in your Catalyst application.
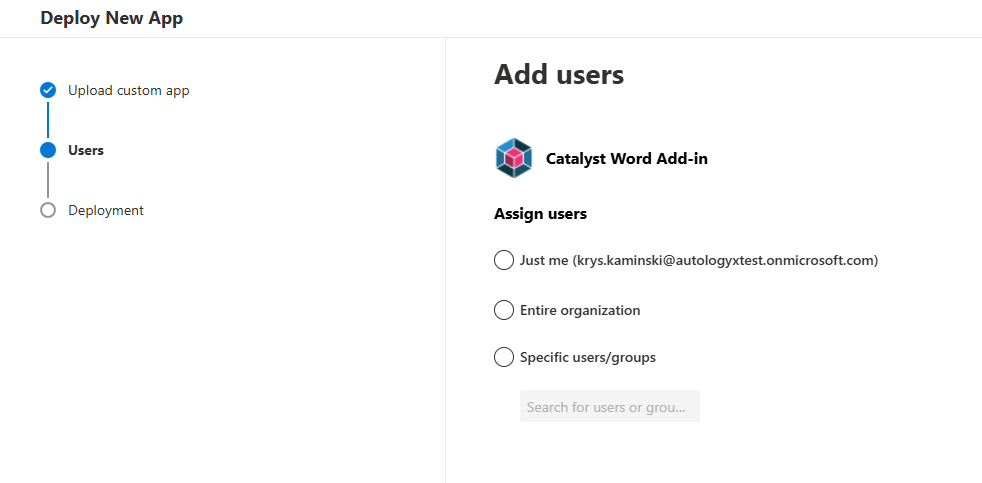
- Decide which users would have the Word Add-in available:
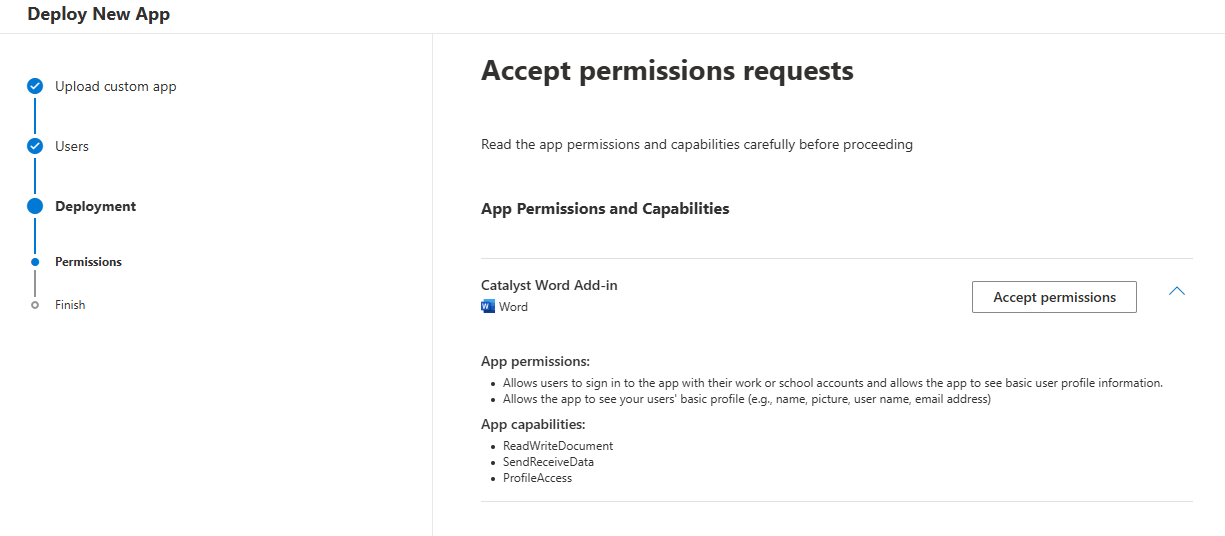
- Accept permissions:
Insert the Add-in in Microsoft Word
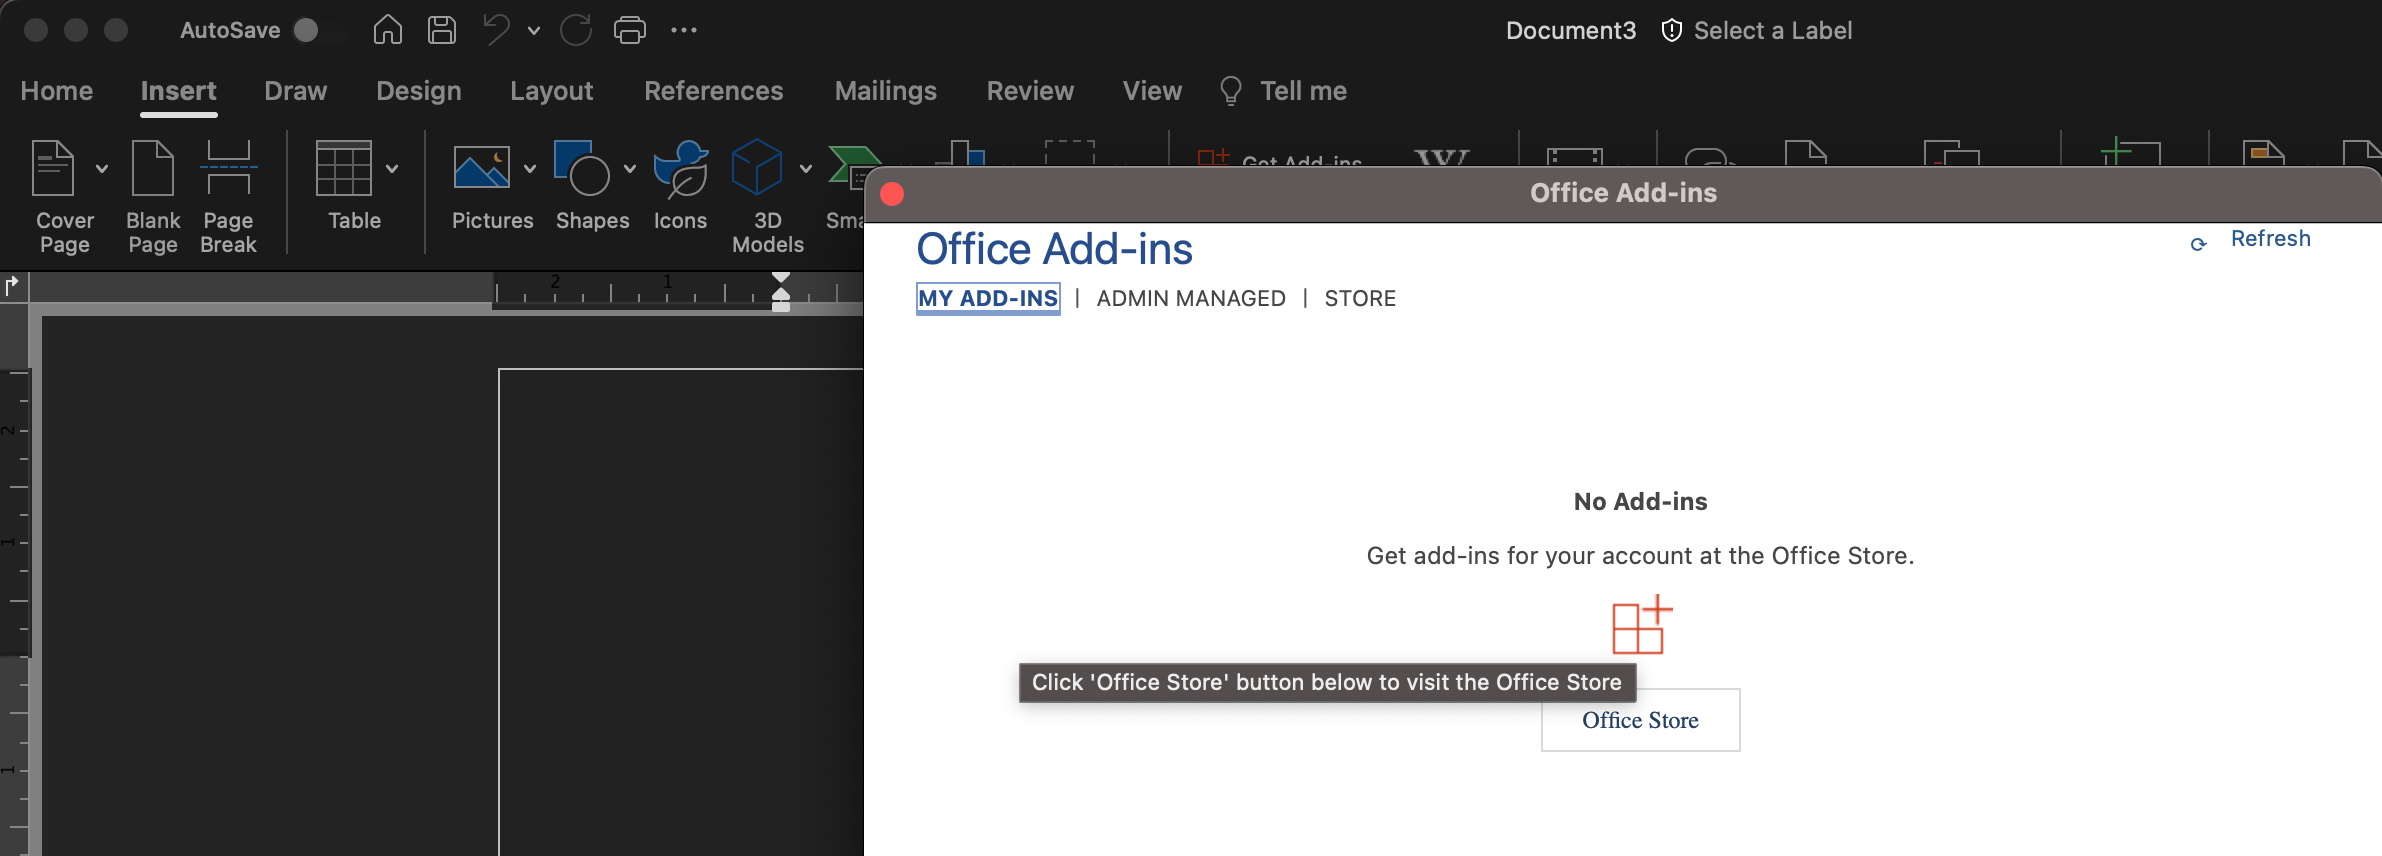
- Open Word and create a new document. In the main menu, select "Insert". Go to My Add-ins/ Admin Managed and you should see the Catalyst Word Add in.
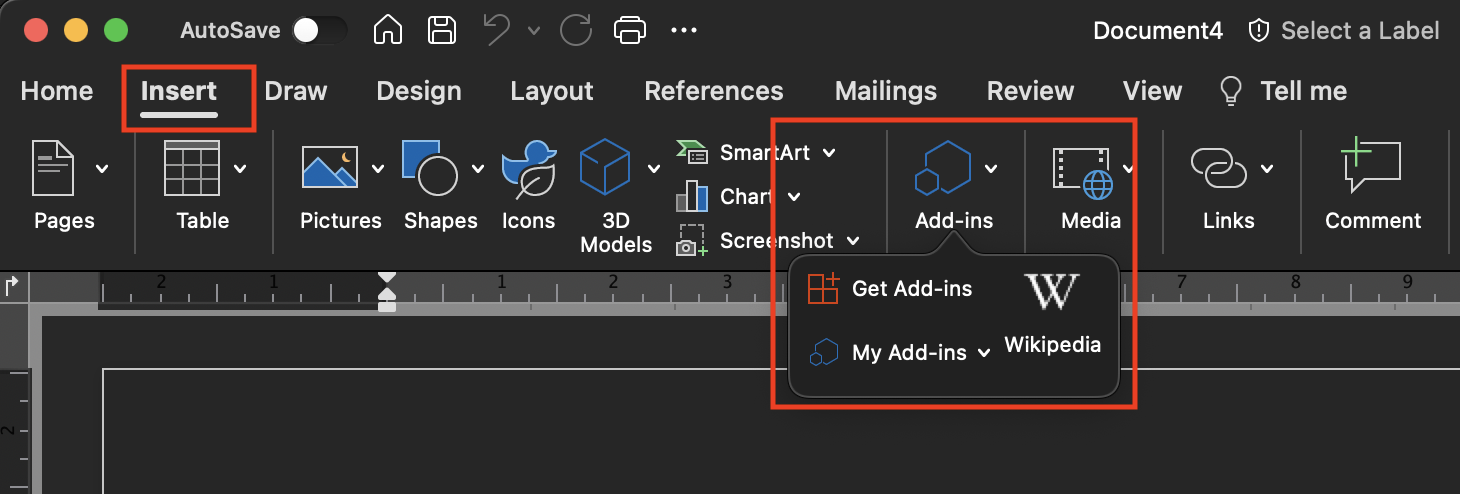
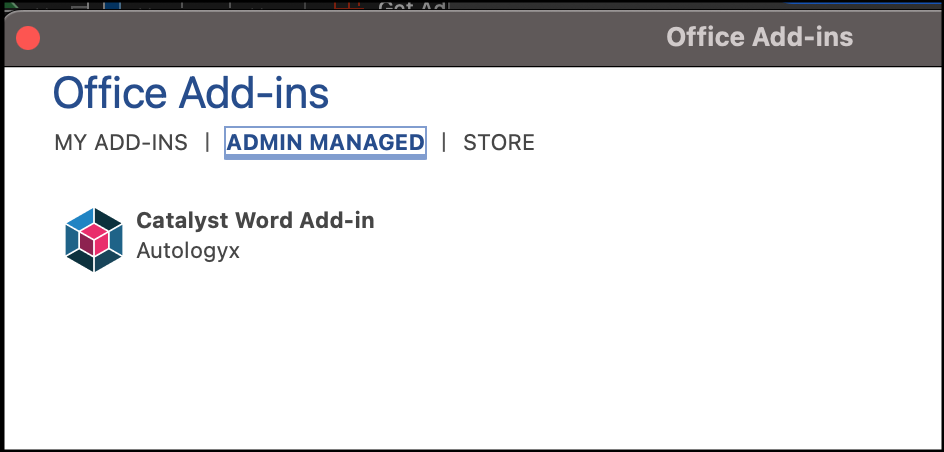
- Select this and click Add. The Add-in will then be visible at the far right of the Home menu.
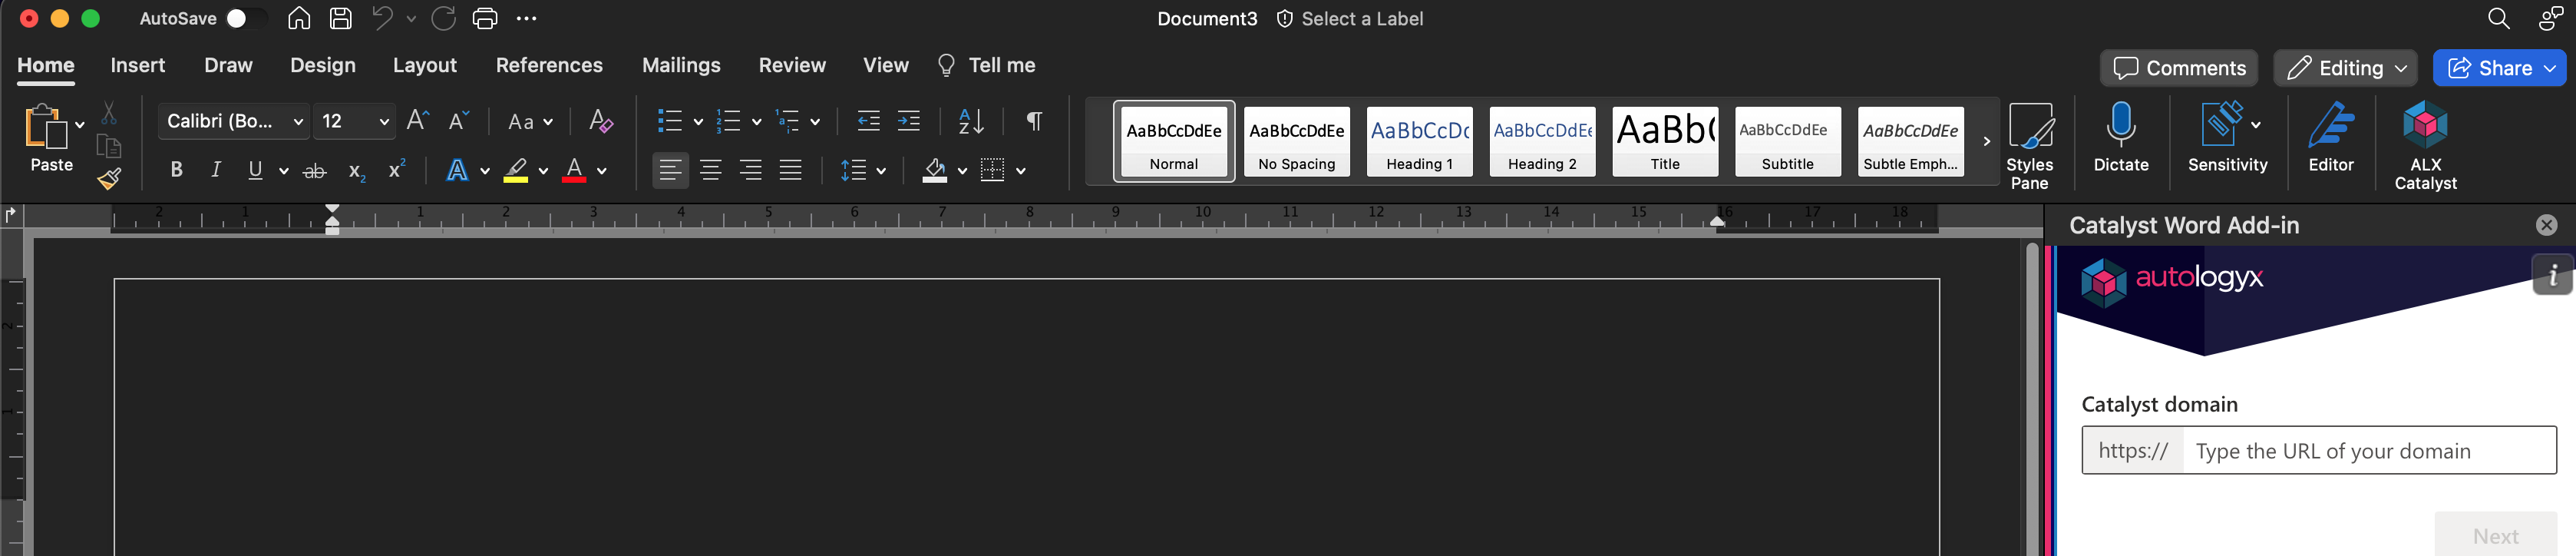
In the Catalyst domain enter the domain only, without the https prefix, for example: catalyst-staging.autologyx.com
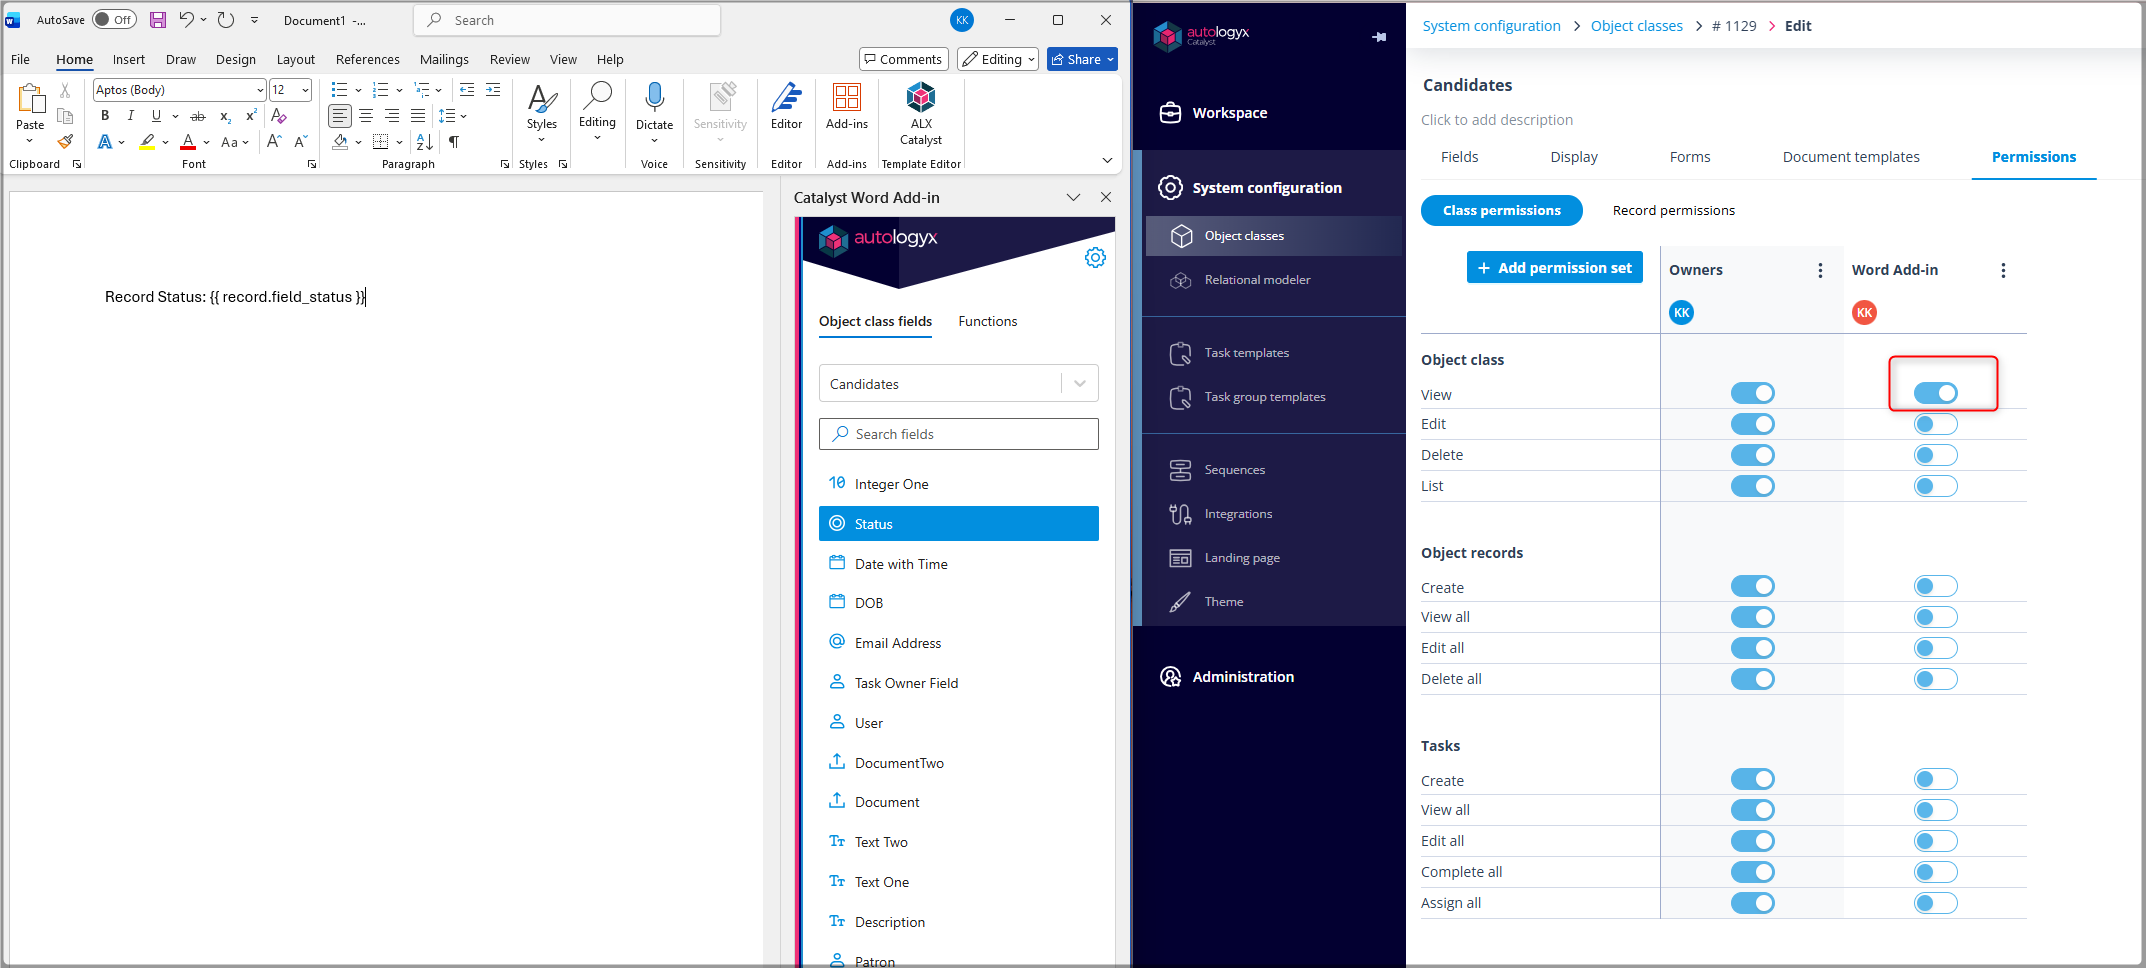
In order for users to be able to select Object record fields, they should have at least the View permission enabled:
A separate article will be made available to explain how to use the Word Add-in.
Useful info
Only Word documents with a .docx file extension can be used as a document template.
Up to 25 SSO configurations can be created in your Catalyst application.