How do I configure single sign-on for users?
Single sign-on (SSO) means users do not need a separate username and password for Catalyst. Users can sign in using their organisation's SSO credentials on any device or supported web browser, while helping your organisation manage access securely.
This article describes how to set up single sign-on in Microsoft Azure using OpenID Connect.
Access and prerequisites
Single sign-on settings in Catalyst can be found under Administration in the main menu.
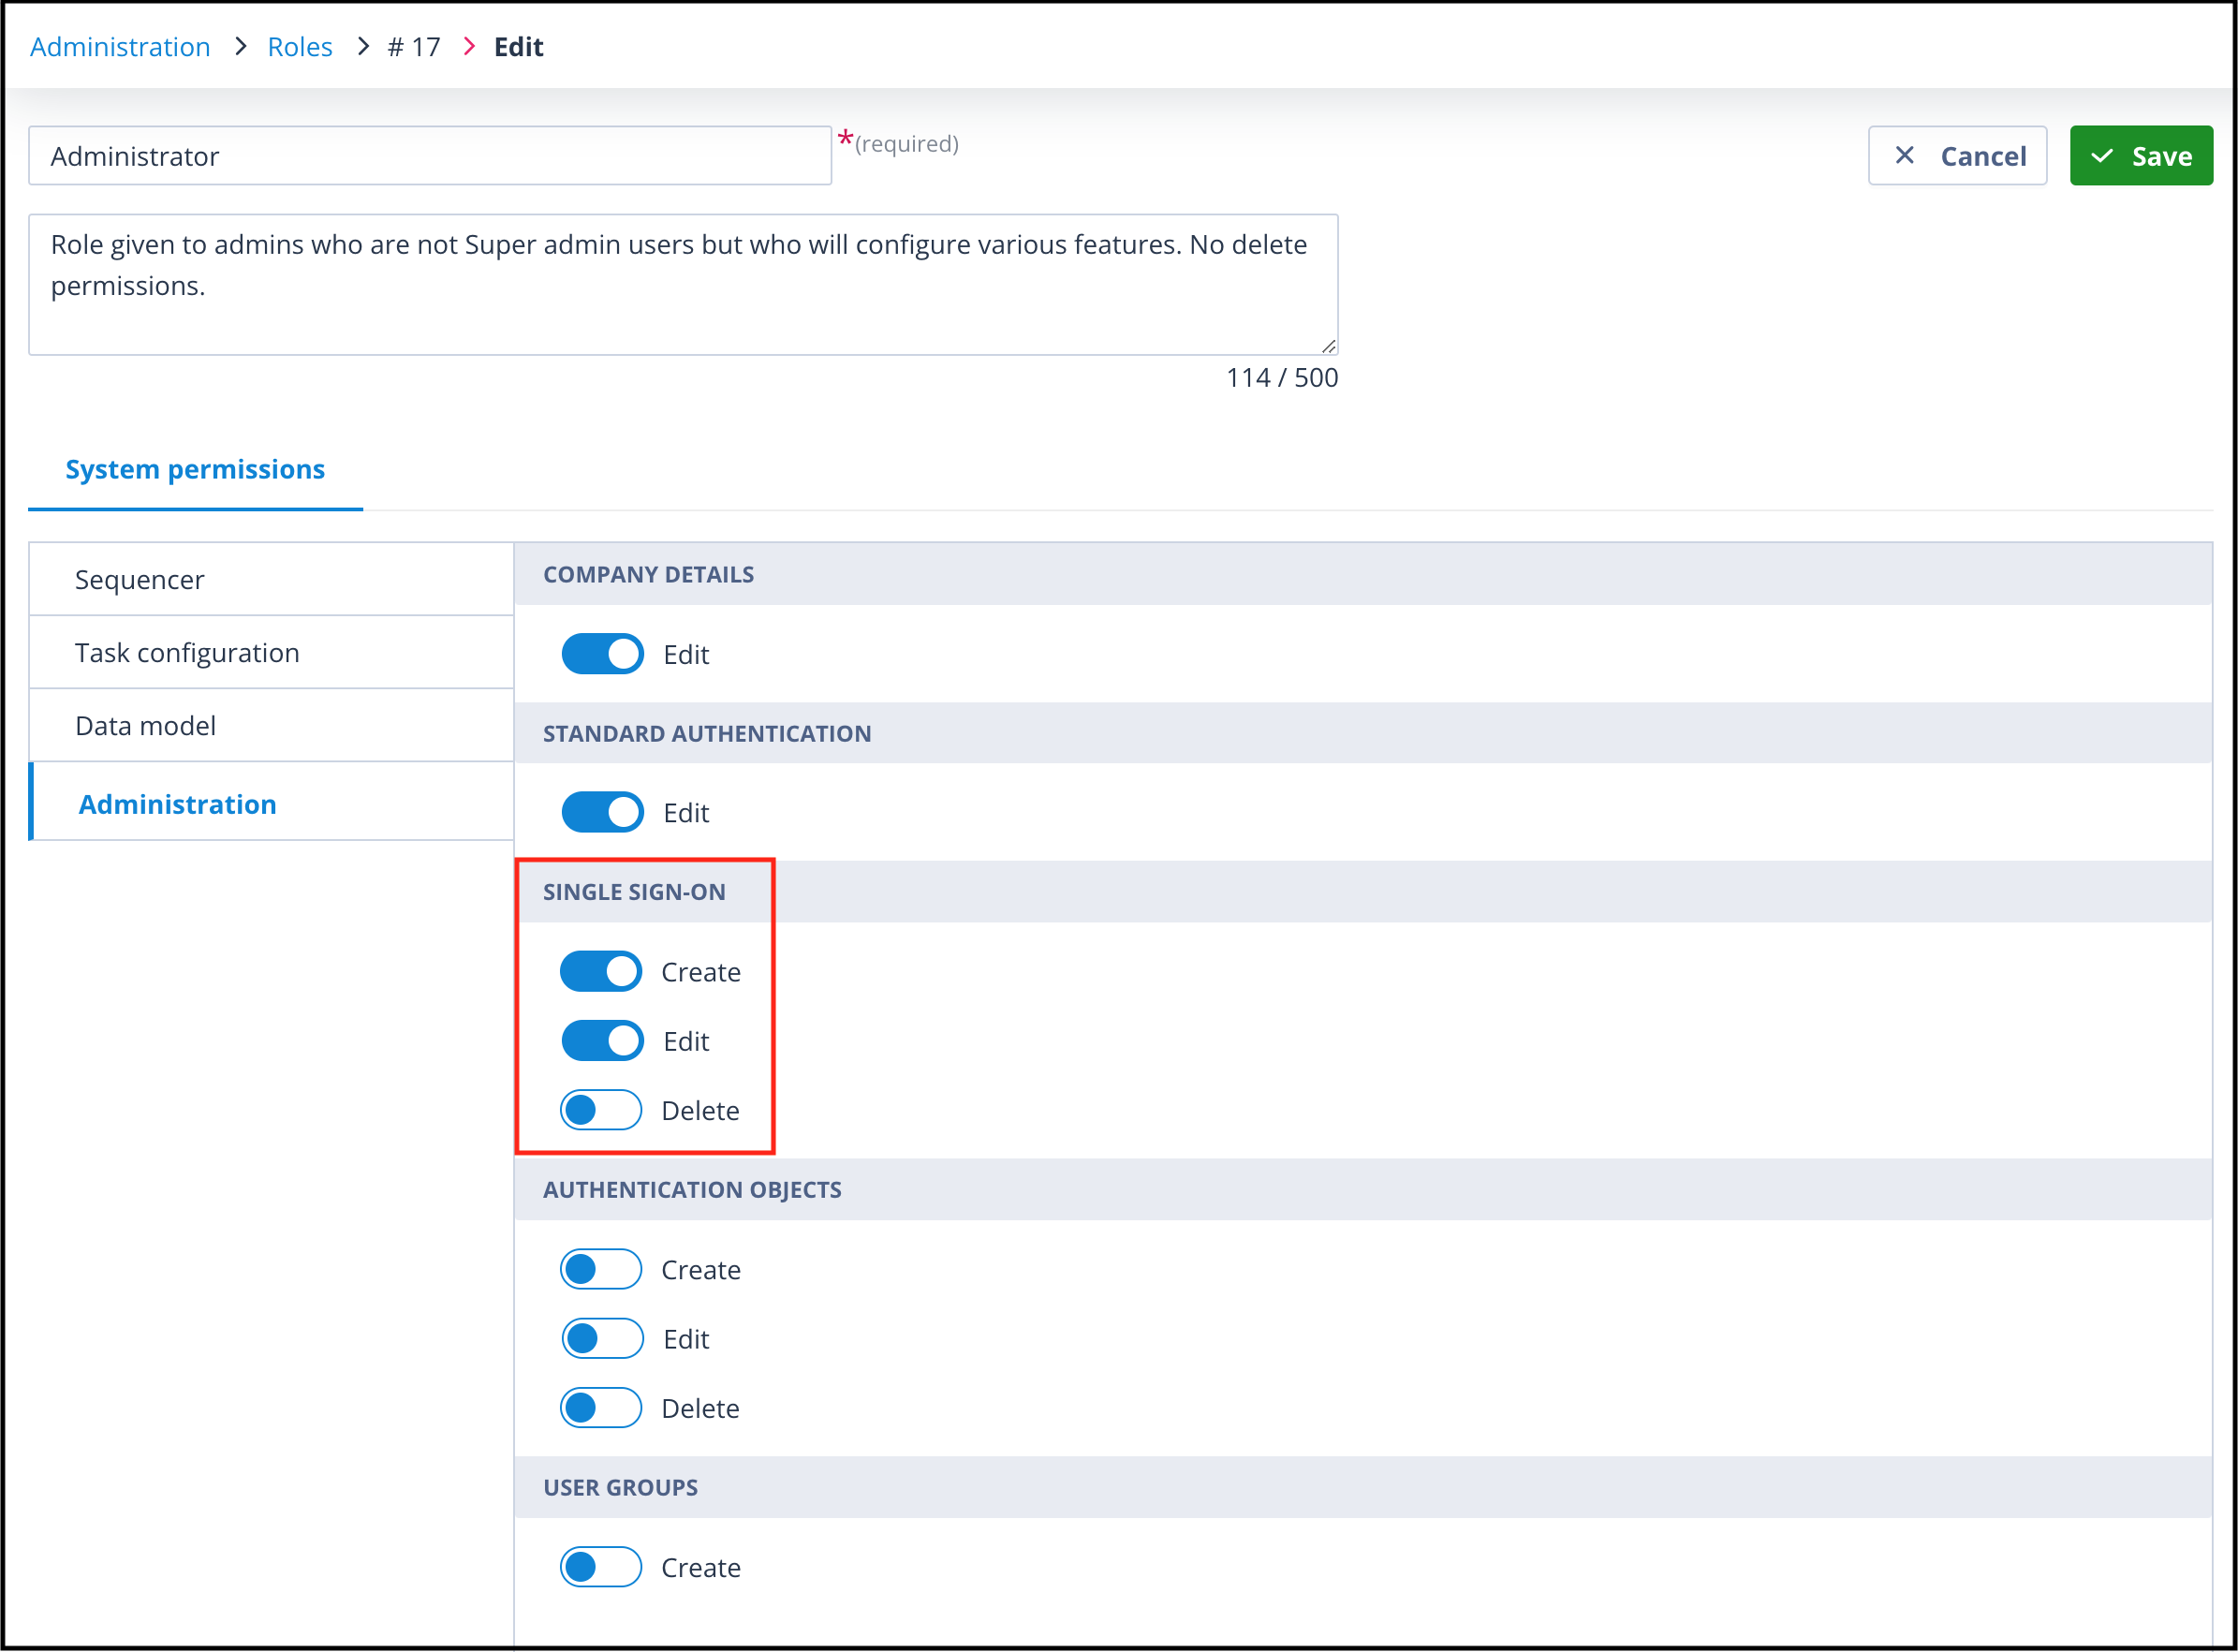
Only the following users have access to this page:
- users with a Super admin account type;
- users with a Role where the create and edit permissions for single sign-on have been enabled on the Administration tab.
You will also need access to your Microsoft Azure domain administration area. This is usually managed by IT, so you may need help from someone in that team.
Create the single sign-on configuration in Catalyst
In Catalyst, go to Administration > Single sign-on settings.
The list page will be blank when single sign-on has not been configured.
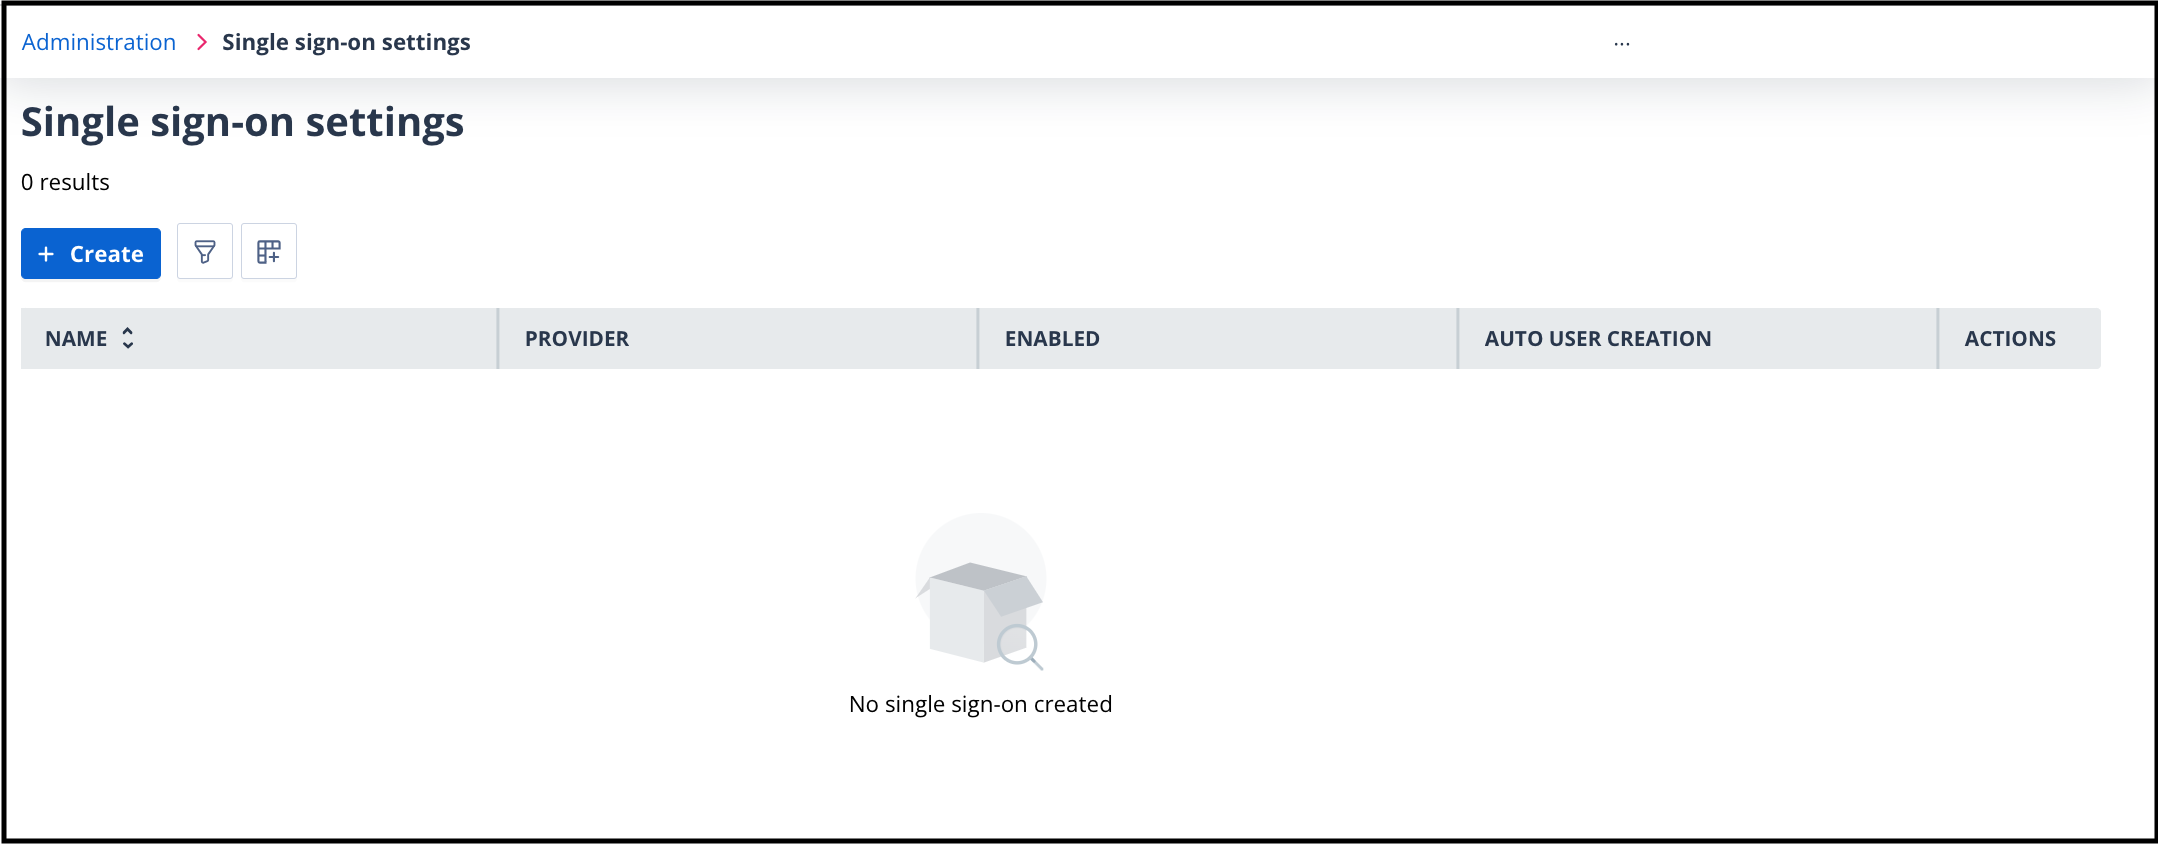
Click + Create to get started.
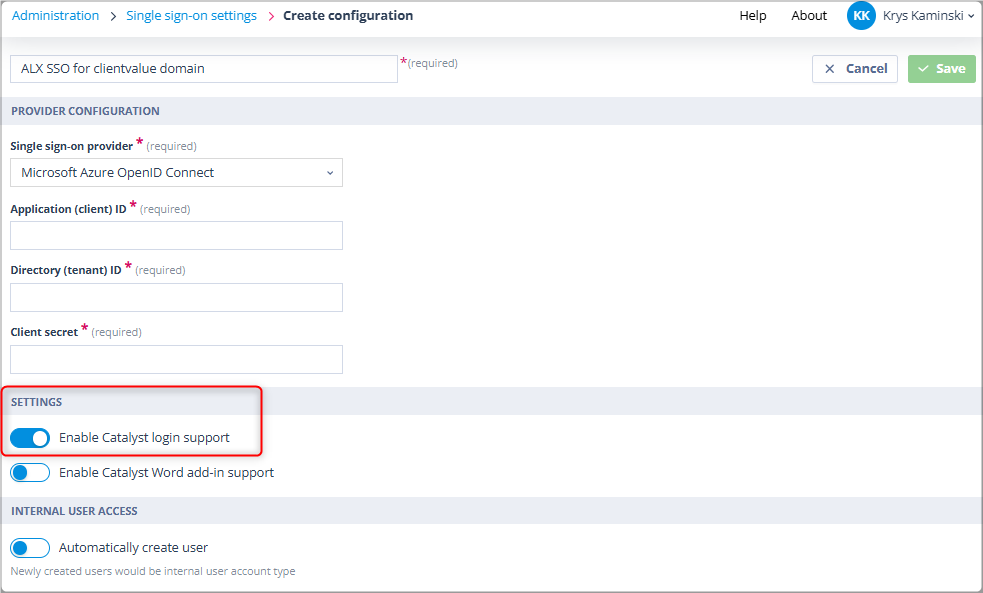
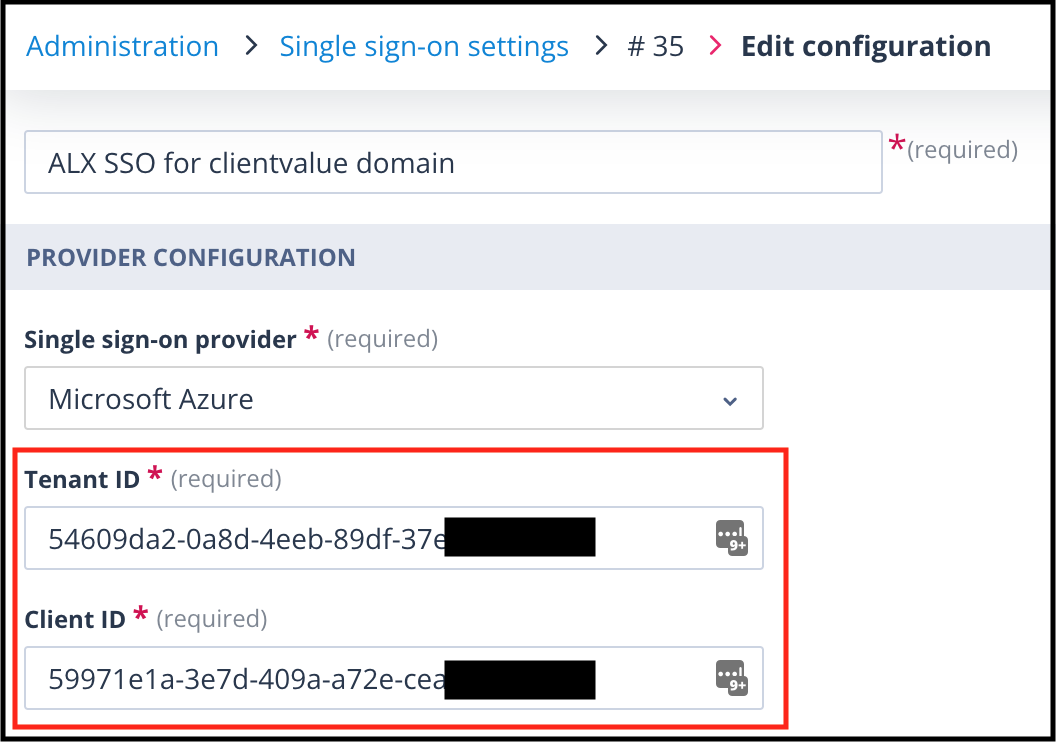
Microsoft Azure OpenID Connect is currently the default and only provider available. All fields are mandatory.
The Tenant ID, Client ID, and Client secret can only be obtained from your Microsoft Azure admin account. You will return to these fields after creating the Azure application registration.
Additional settings
There are two settings at the bottom of the page. Both are disabled by default:
- Enable Catalyst login support: enable this to allow users to log in via single sign-on.
- Enable Catalyst Word add-in support: enable this if you also want to support the Catalyst Word add-in. See MS Word Add-in - configuration for more information.
The permissions required for Catalyst login support and Word add-in support are different. You can use one Azure registration for both user single sign-on and the Word Add-in, but separate registrations may be easier to manage and give you more flexibility.
In the Internal user access section, the Automatically create user option allows users who do not already have an account in Catalyst to be created the first time they use single sign-on.
Users created in this way are given an Internal user account type.
Create the Azure application registration
To populate the Tenant ID and Client ID fields, you need to create a registration entry on your Azure tenancy.
In Microsoft Azure, go to Enterprise applications and click + New application.
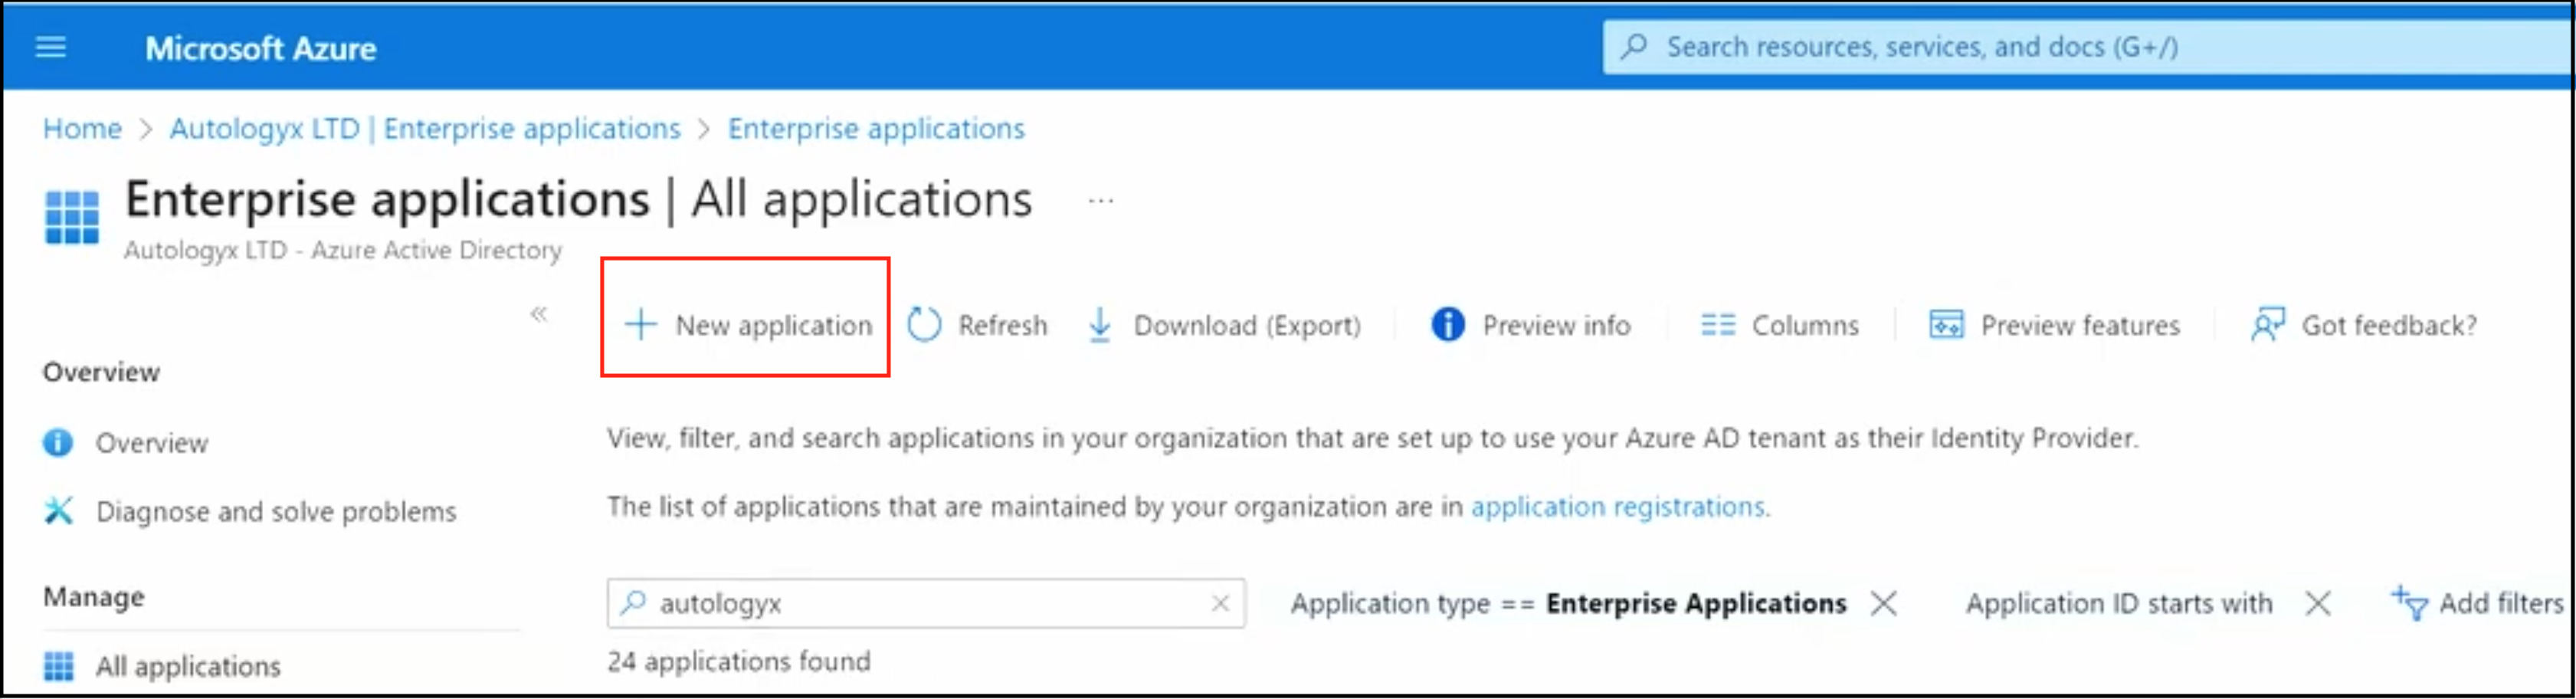
The page may show pre-existing third-party applications.
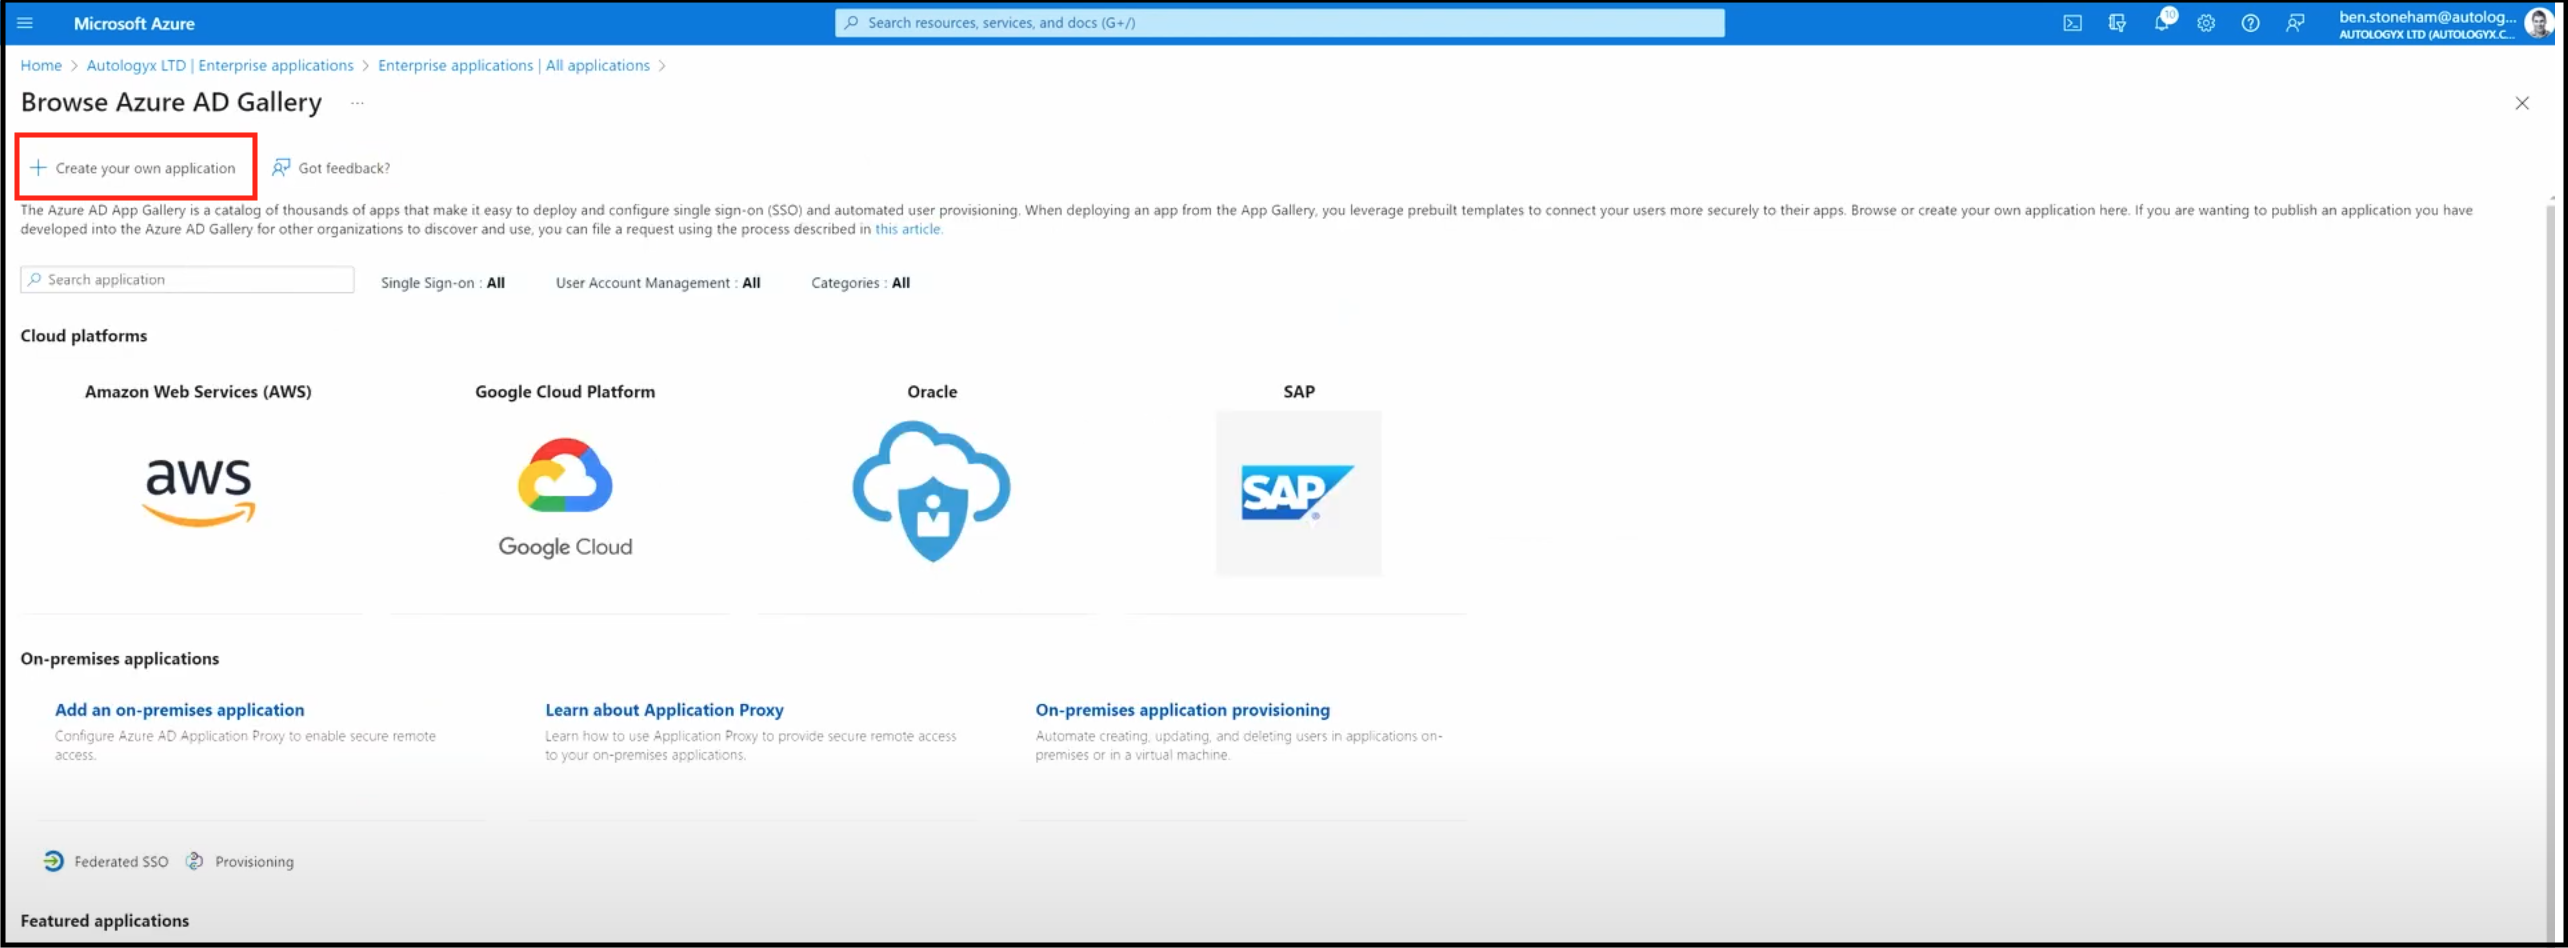
You will not use these applications. Instead, create your own new application.
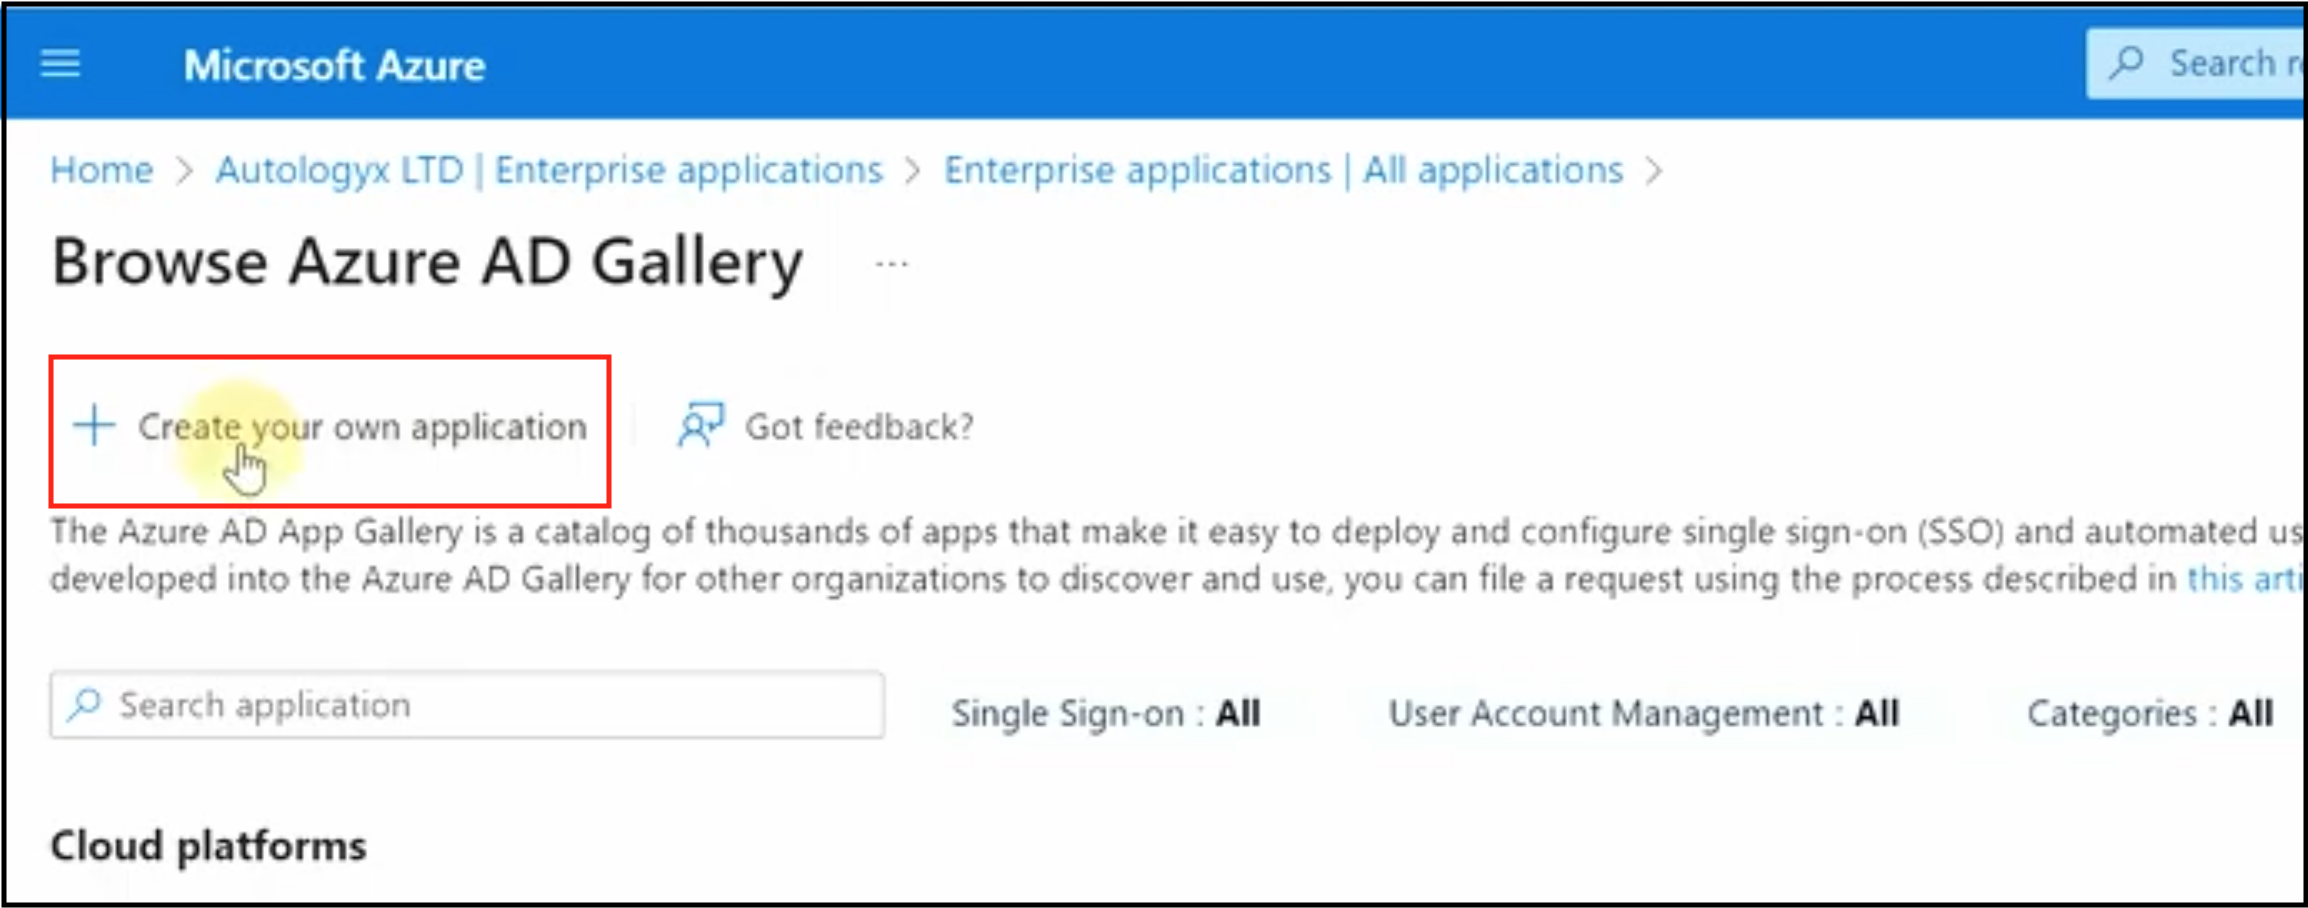
Click Create your own application.
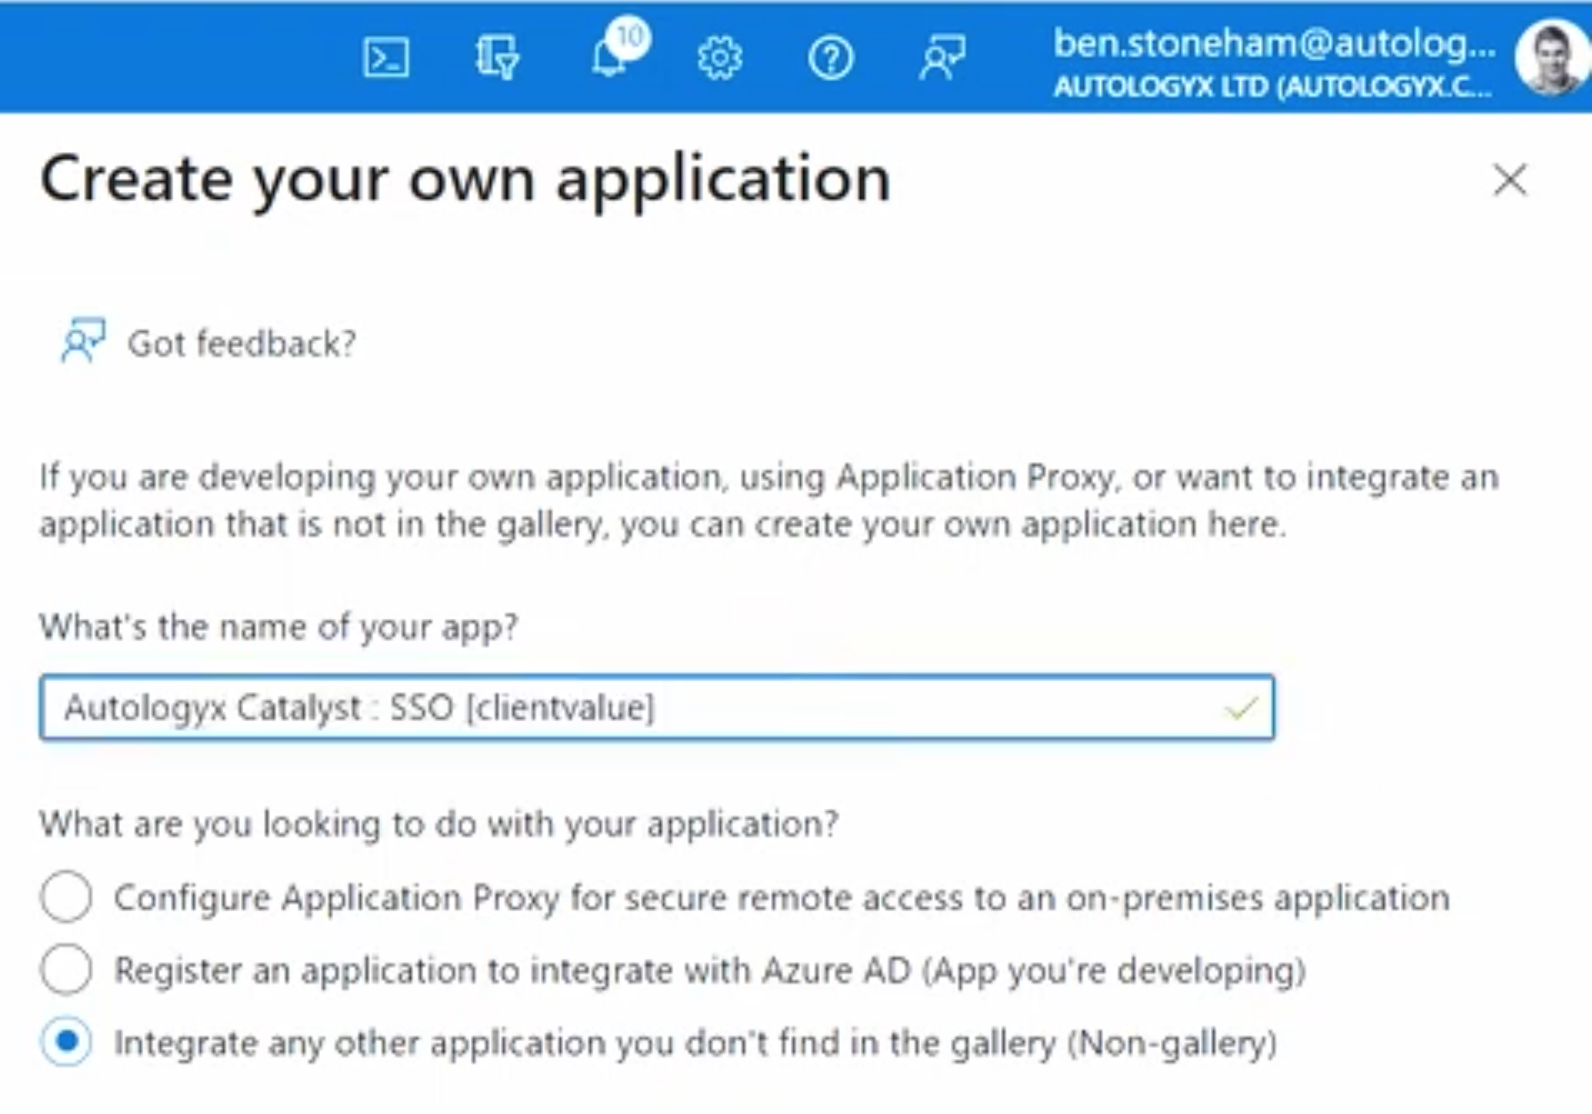
Give the application a name, leave the setting as defaulted, and click Create.
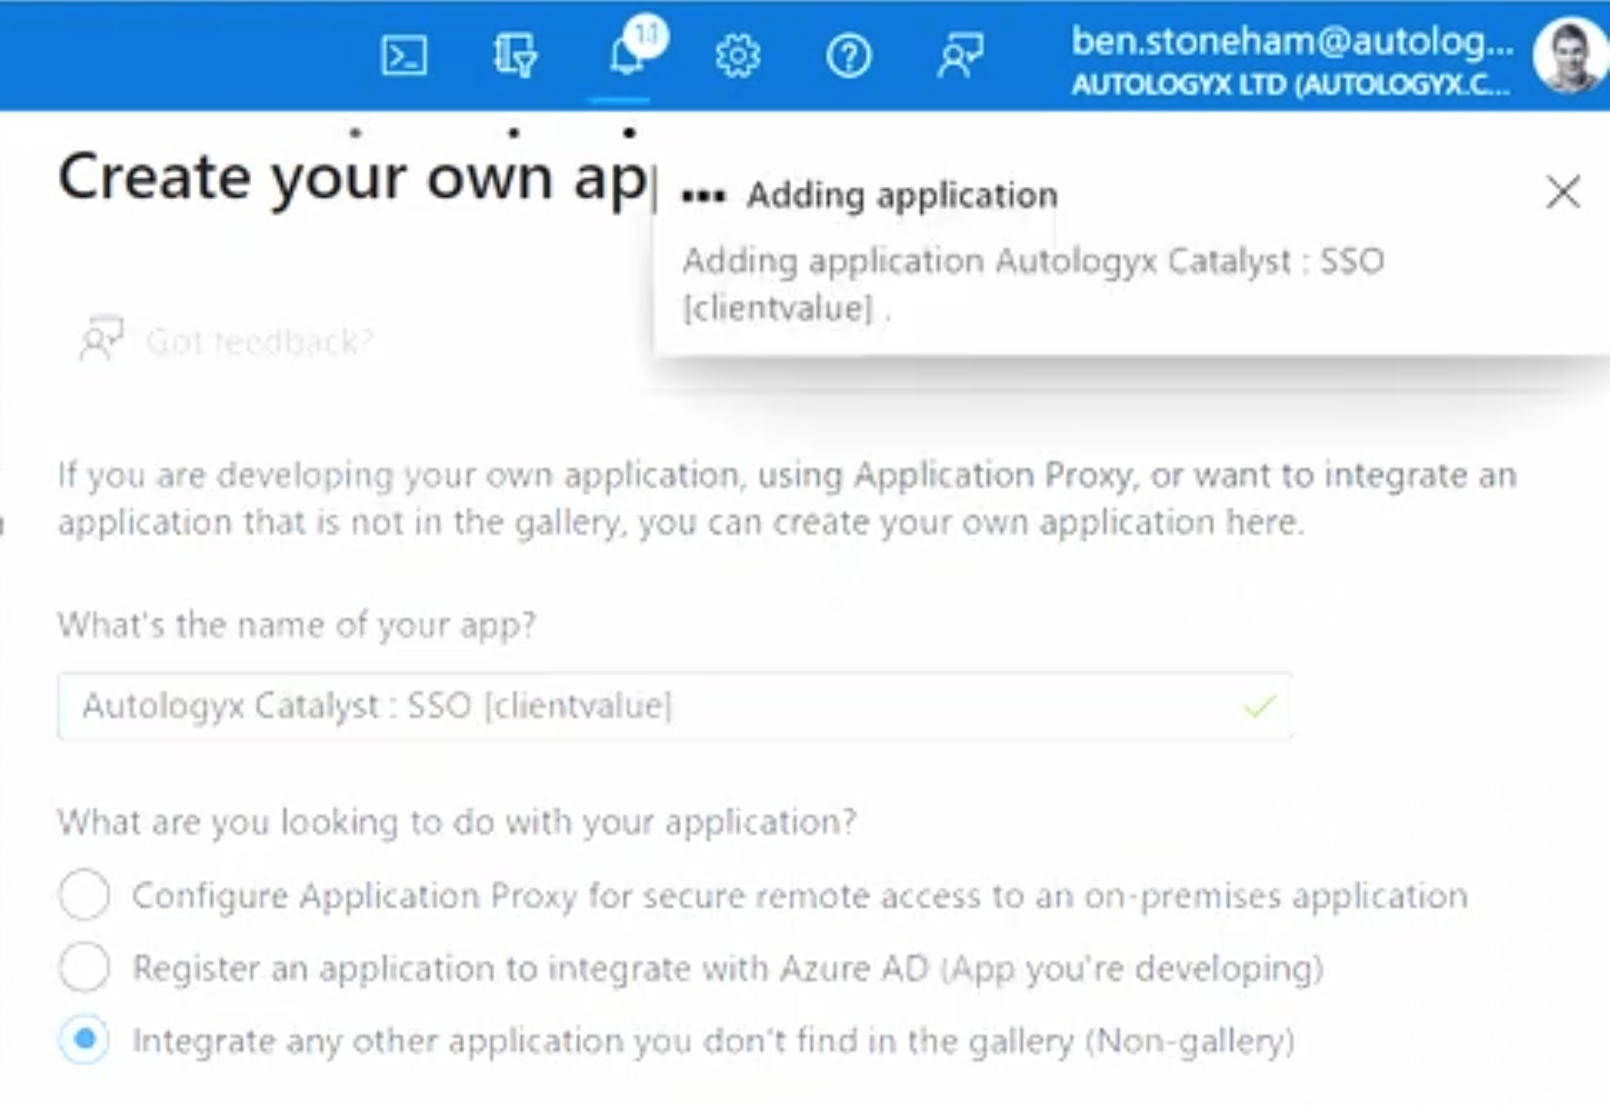
Creation of the application in the directory can take a few seconds. When it is done, you are taken to the Overview page.
From here, click Properties in the left-hand menu.
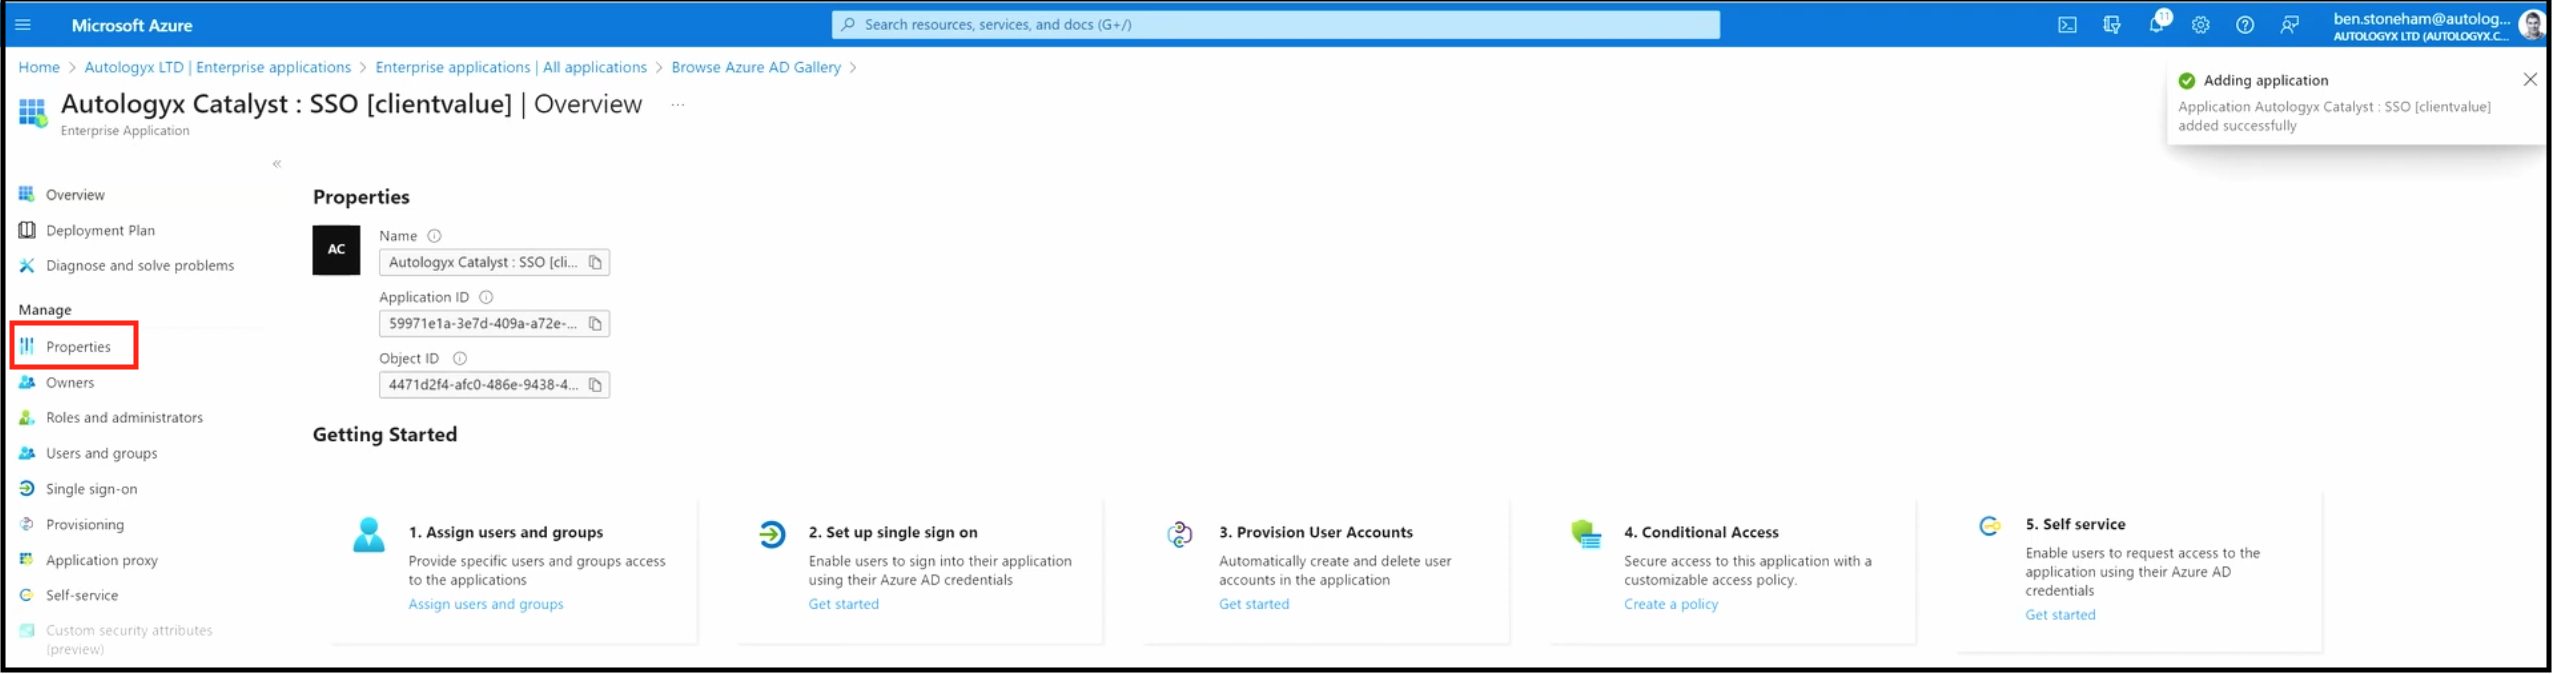
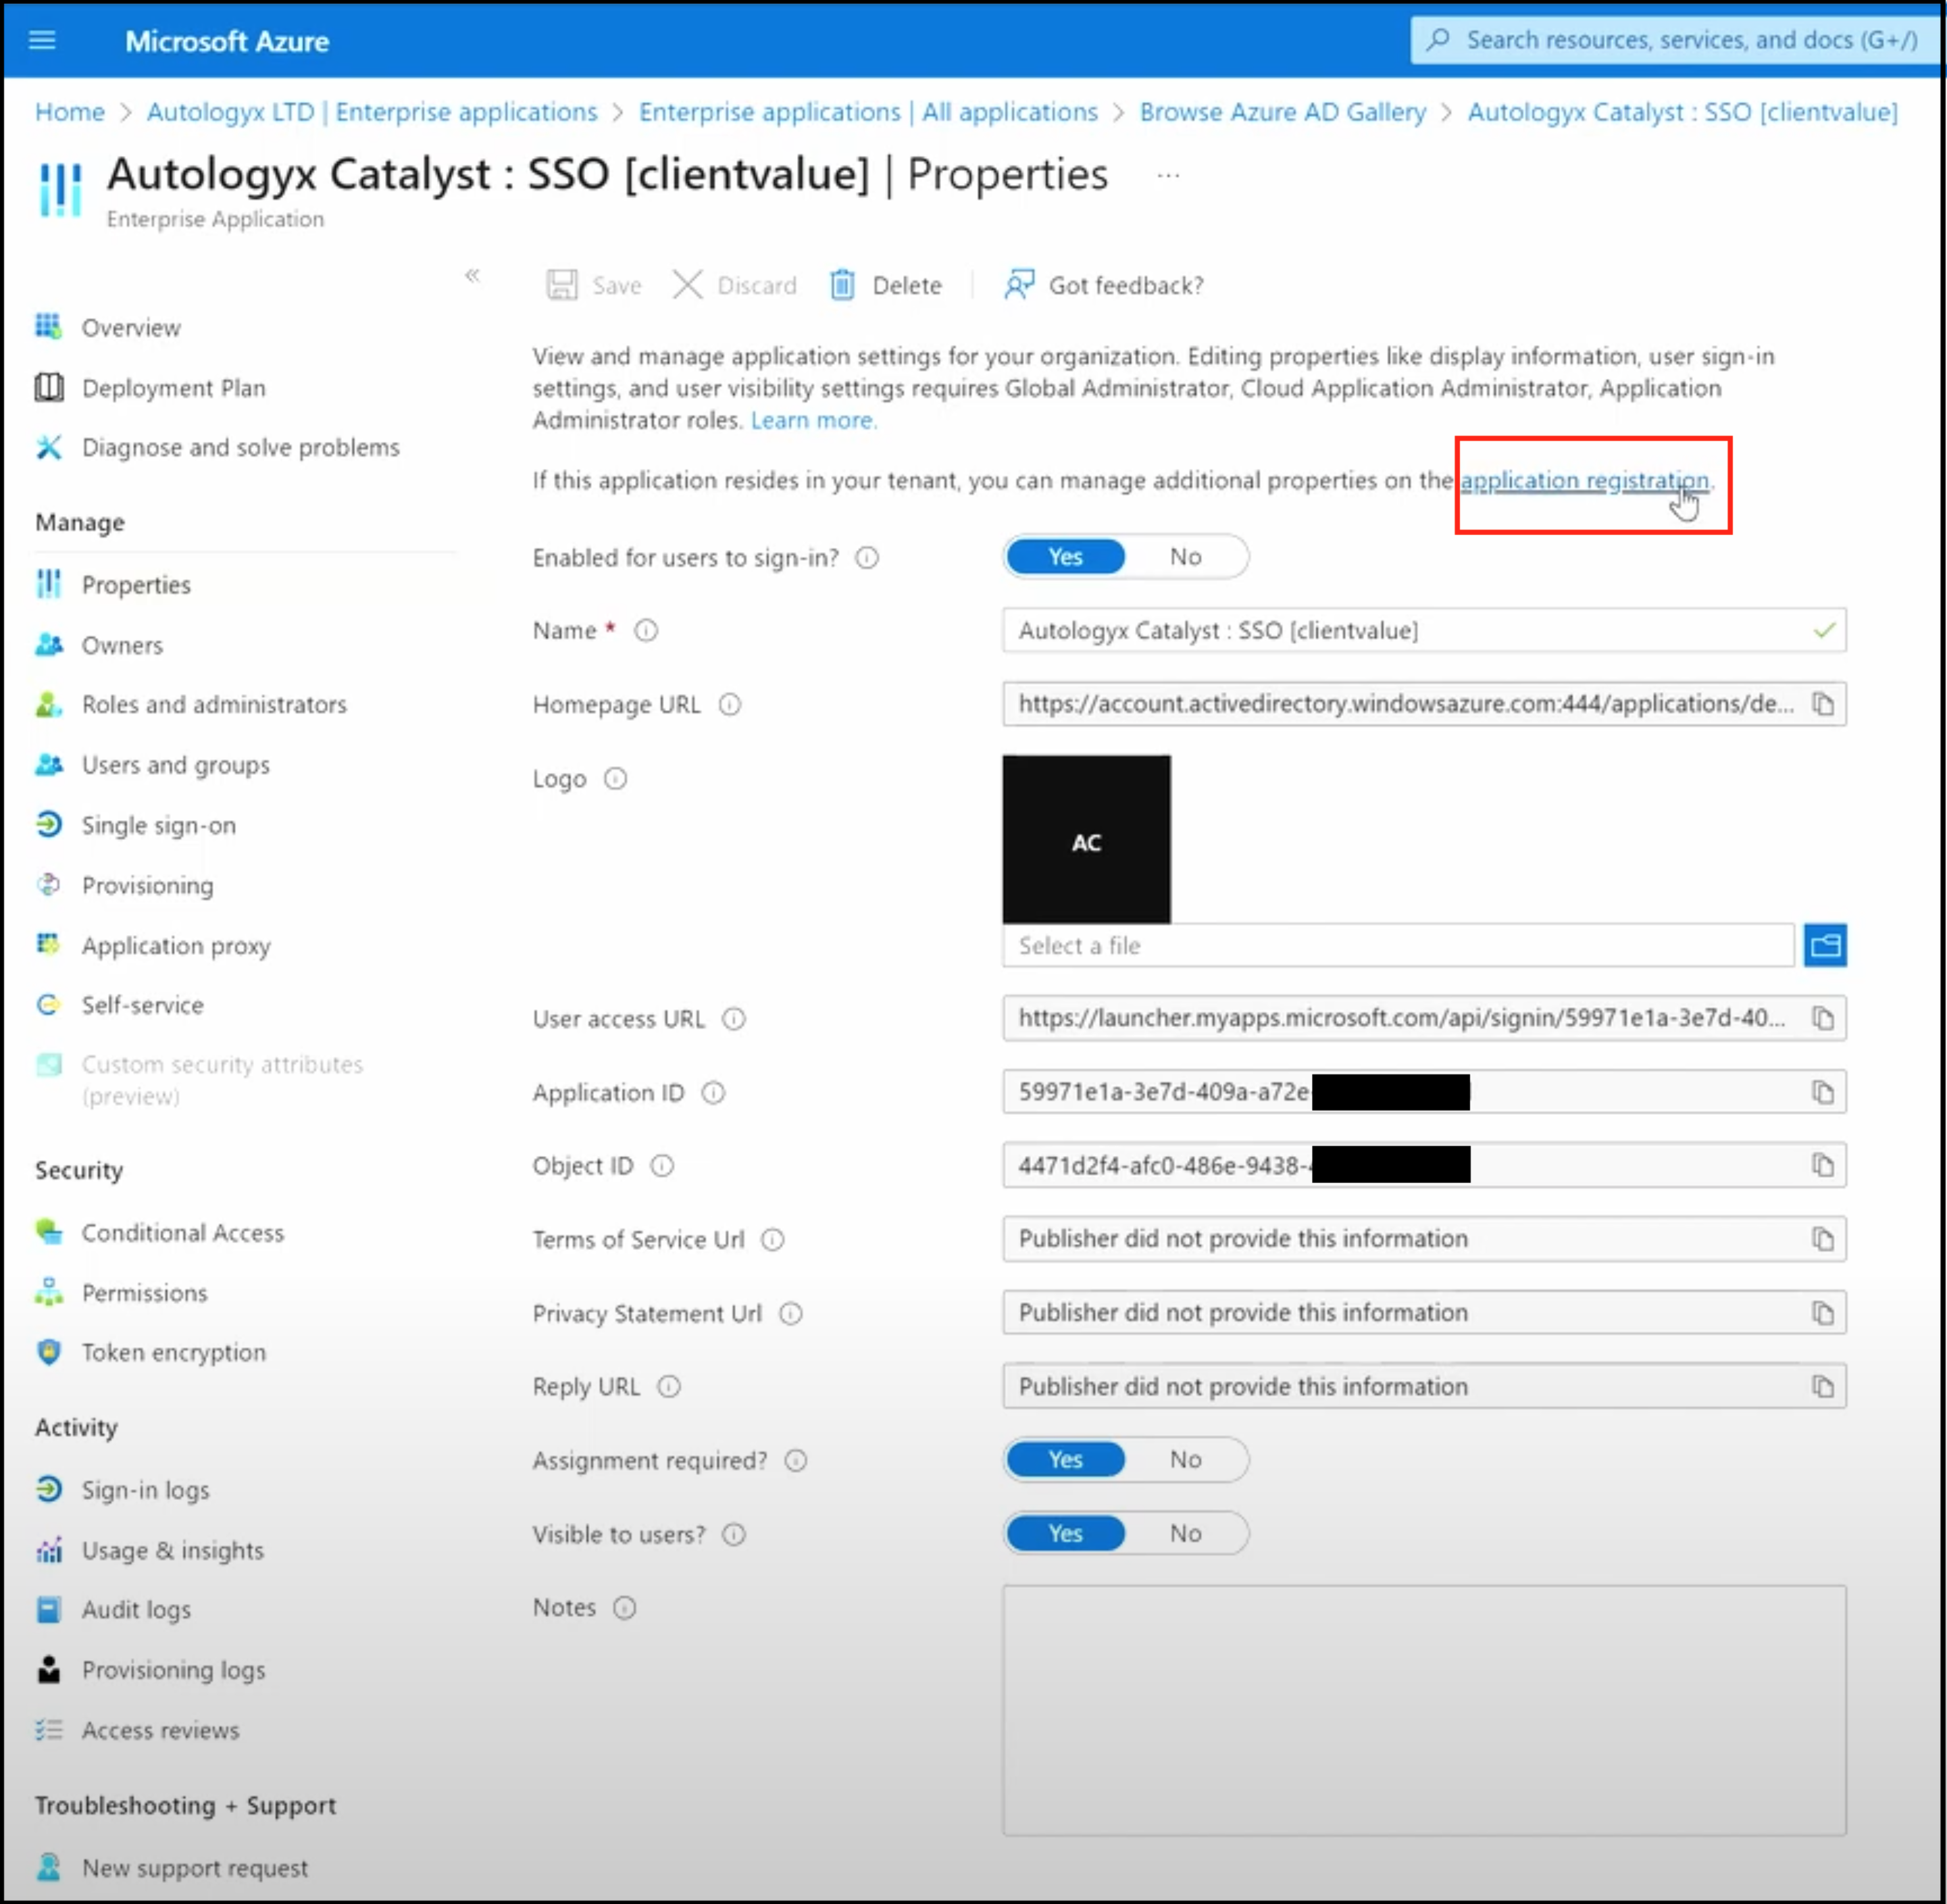
On the properties page, click the application registration link.
Copy the Tenant ID and Client ID
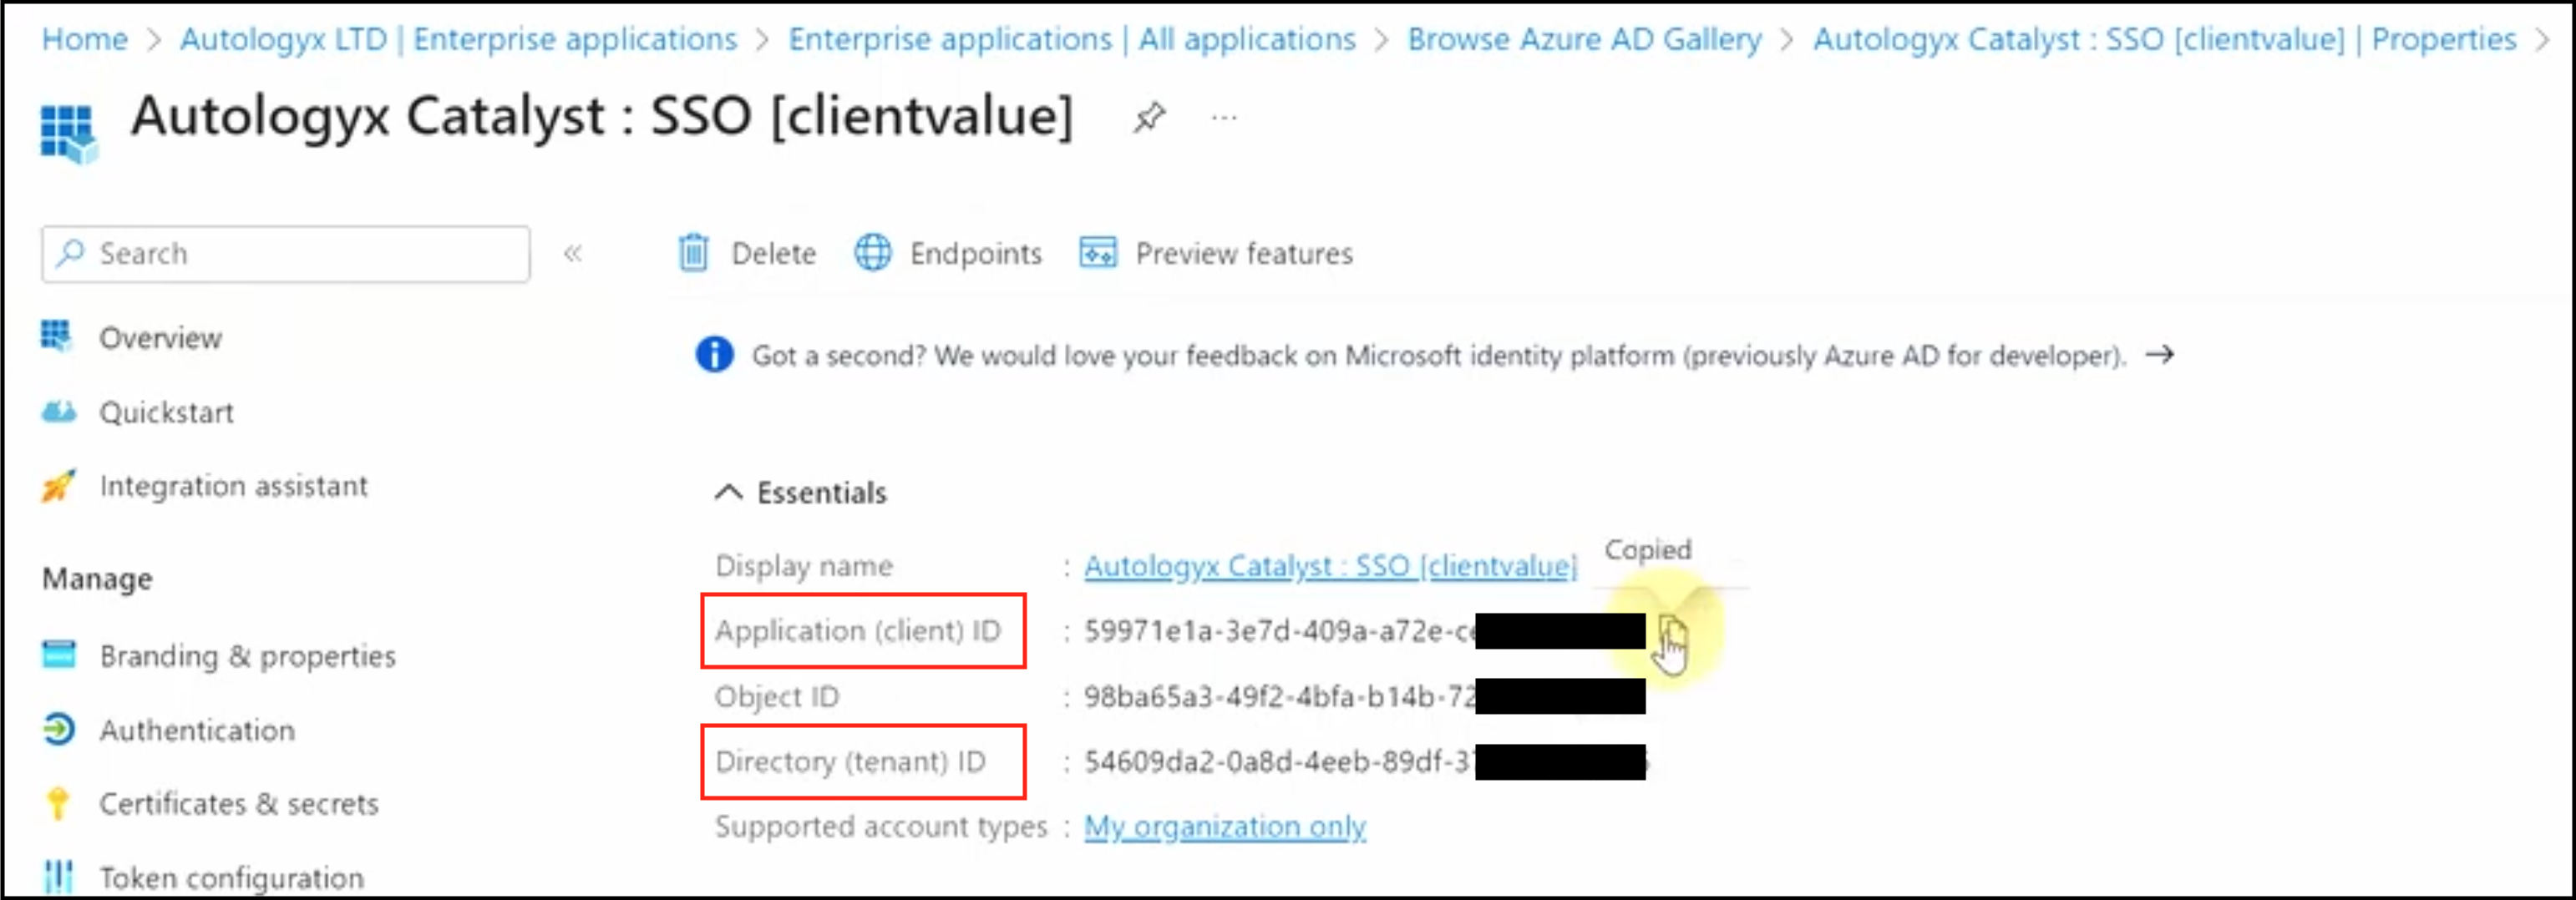
From the application registration page, click Overview in the left-hand menu.
This page gives you the Tenant ID and Client ID, which should be copied and pasted into the appropriate fields in your Catalyst single sign-on configuration.
Create and copy the Client secret
The next piece of information needed is the Client secret.
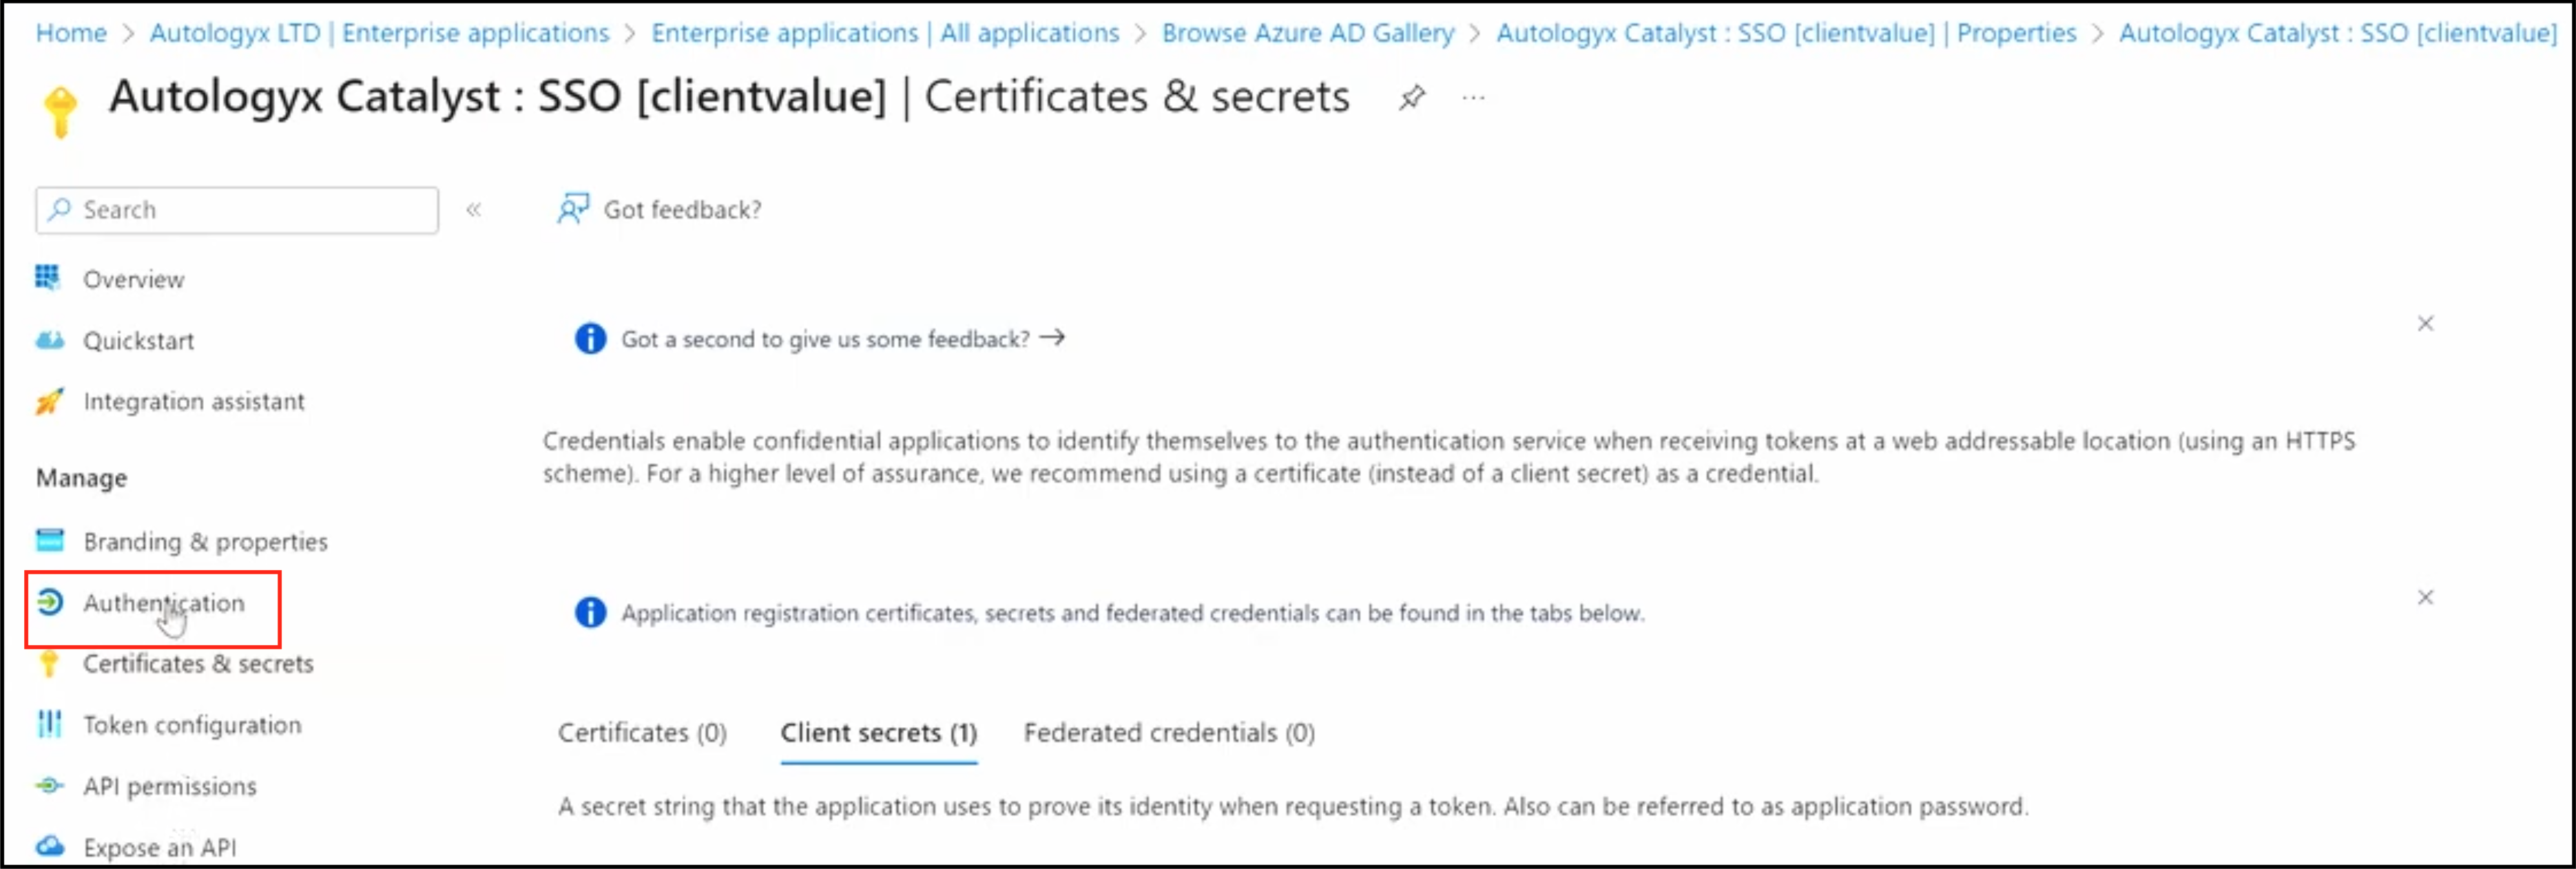
Return to the Azure application properties page and click Certificates & secrets in the left-hand menu.
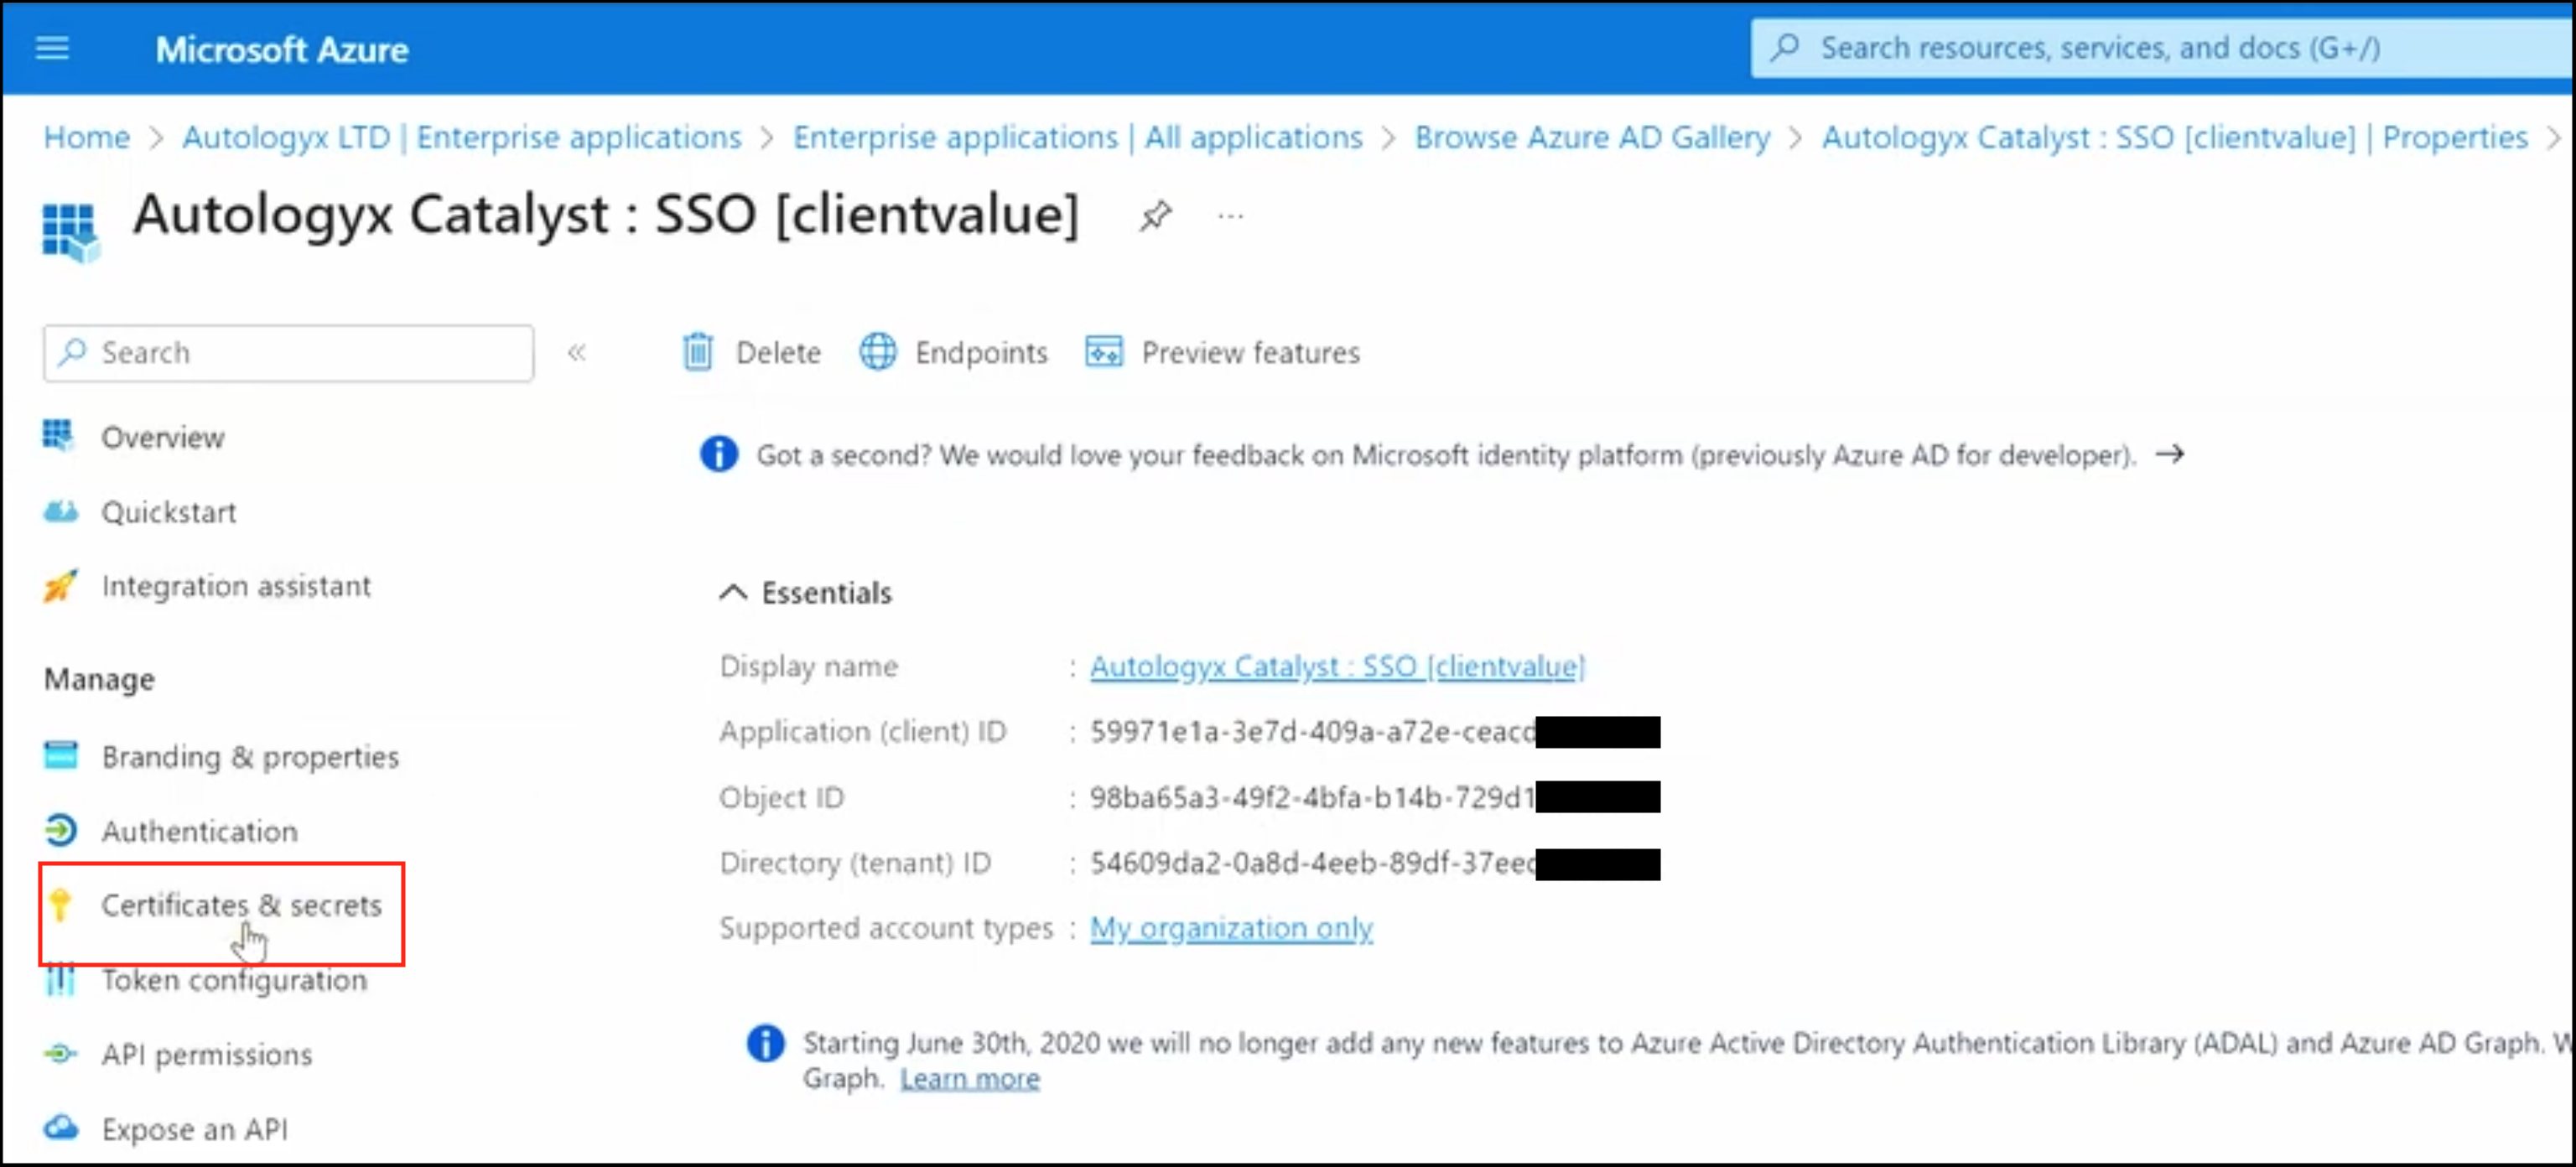
On the Certificates & secrets page, click + New client secret.
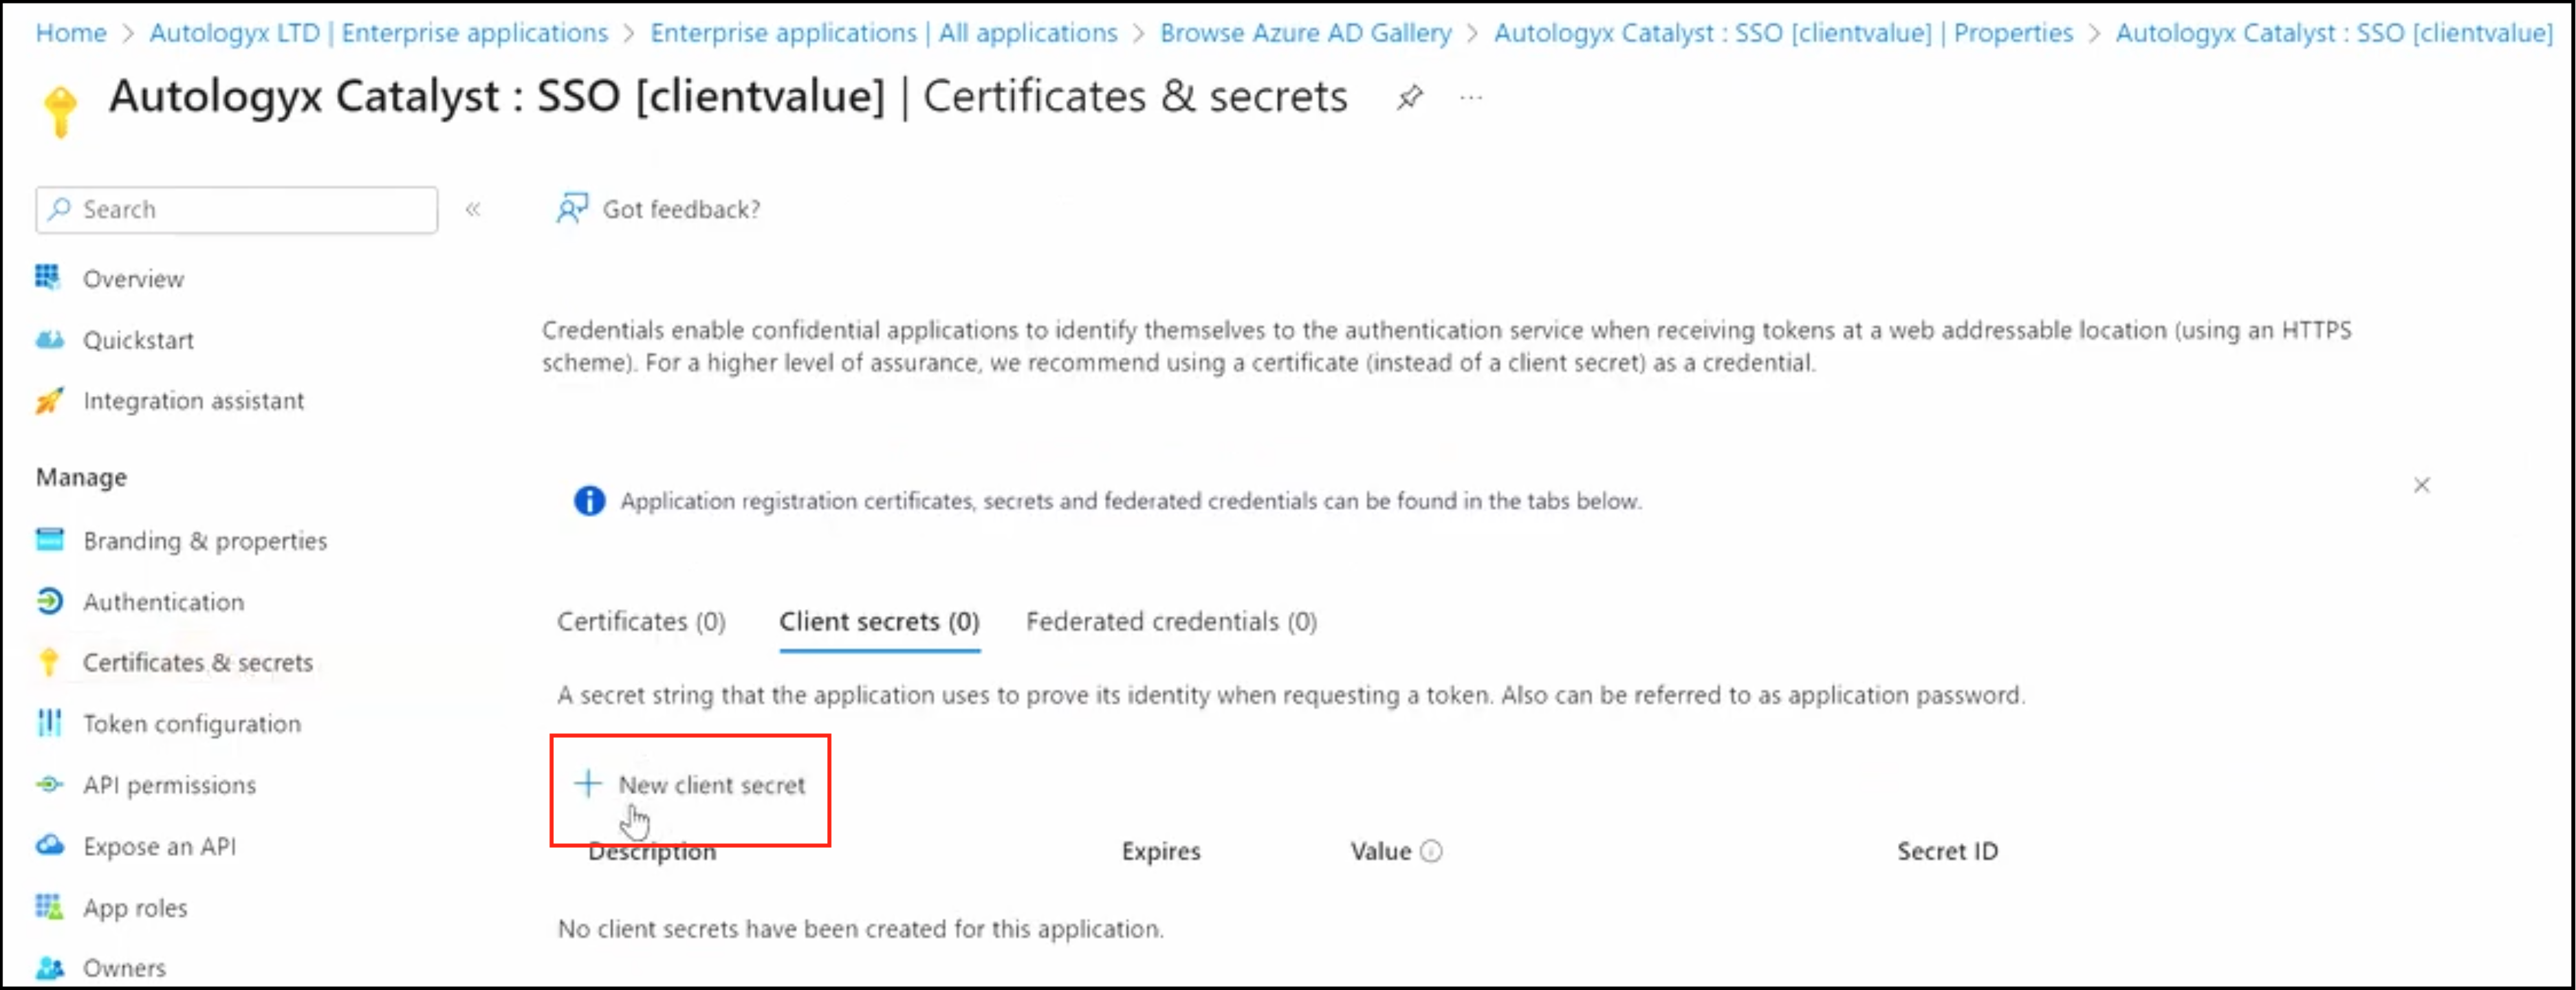
Give the secret a description and select an expiry period.
Make sure the expiry date is recorded in whichever system you use to track configuration credentials. A new secret must be entered into Catalyst before this one expires.
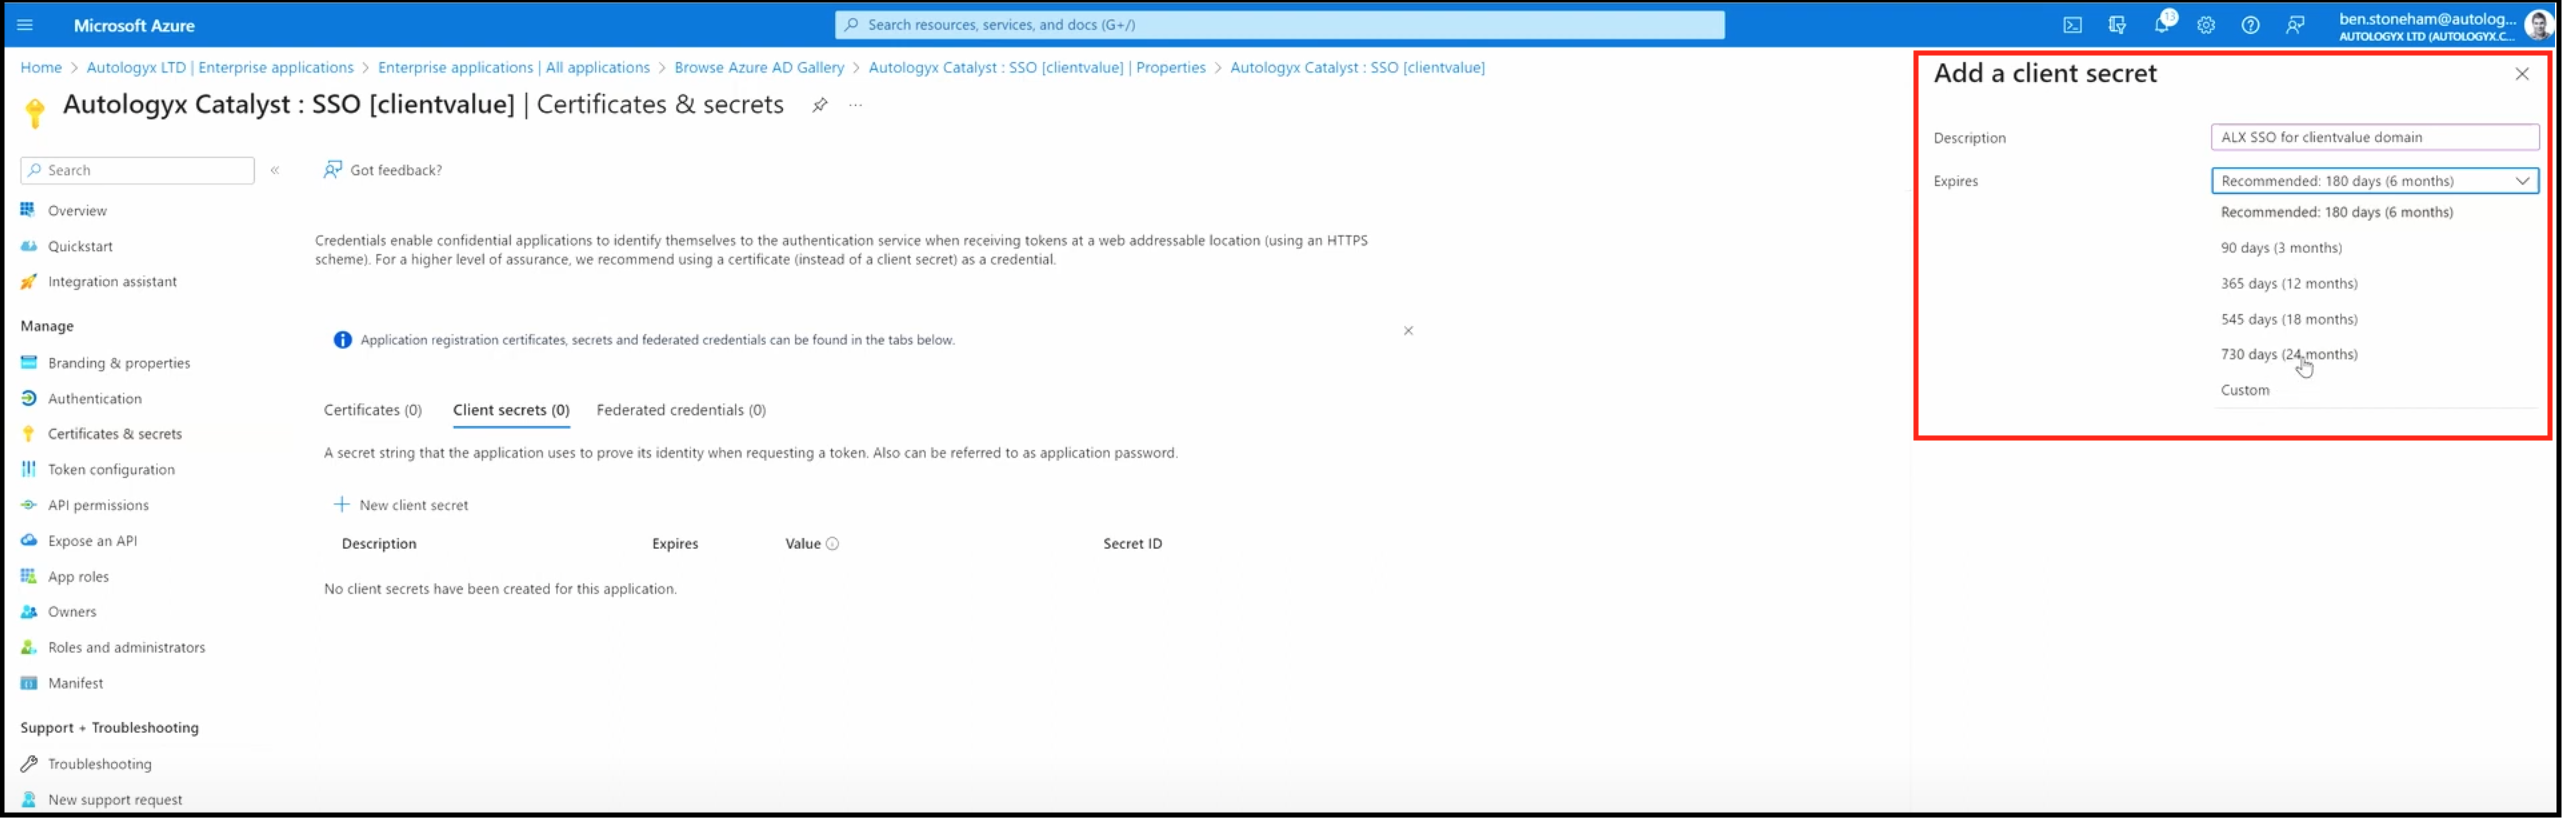
Click Add.
You will then see an entry for your new client secret. You have a short time to copy the secret value and paste it into the Client secret field in Catalyst. The secret value is removed from the Azure page automatically.

Paste the secret into the Client secret field in the single sign-on configuration in Catalyst and click Save. The client secret is saved into a secure vault.
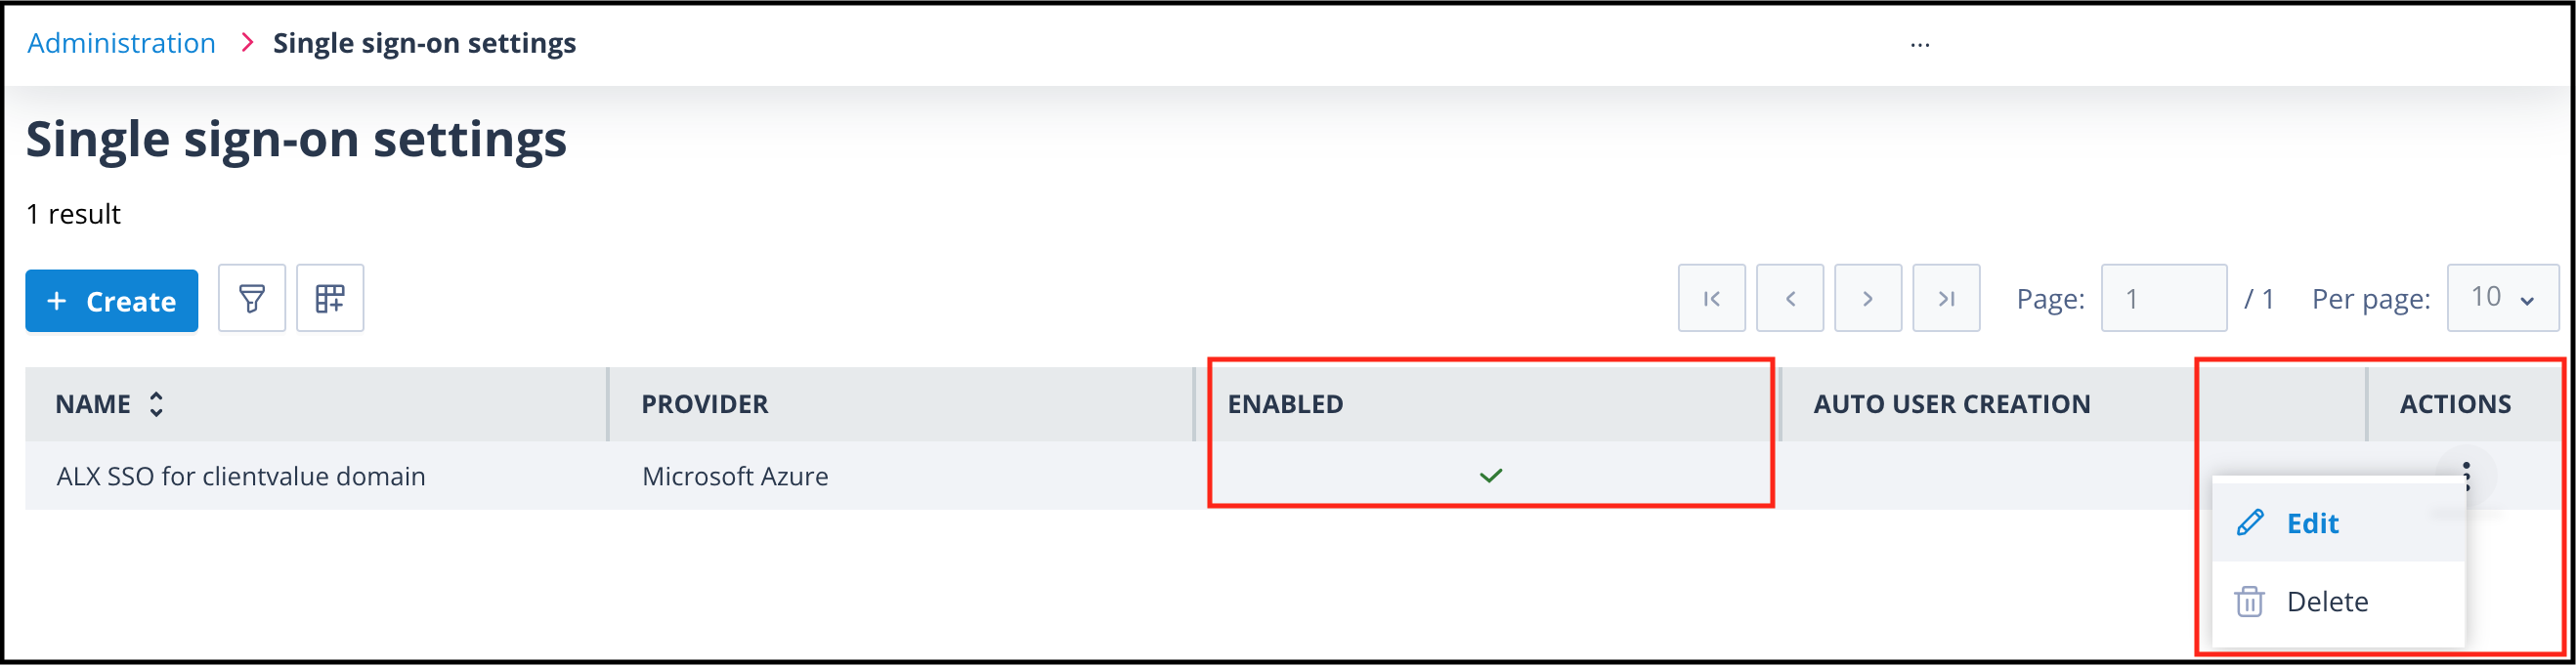
You are taken back to the single sign-on listing page. Like all list pages, this page can be configured to show different column headers and filtered to show relevant listings.
If the single sign-on configuration has been enabled, the Enabled column shows a green tick. If Auto user creation has been enabled, that column also shows a green tick.
Add the Redirect URI and Logout URL in Azure
Edit the Catalyst single sign-on configuration to get the final information you need to add to Azure.
Catalyst generates URL values in the background. These URLs must be added to the Azure application so that Azure knows where to send callbacks for users who have been successfully authenticated.
In edit mode, the Client secret has been replaced with asterisks and will be removed if any user tries to edit that field.
The Redirect / Callback URI and Logout URL fields have also been created and populated with the required URLs. These are read only fields.
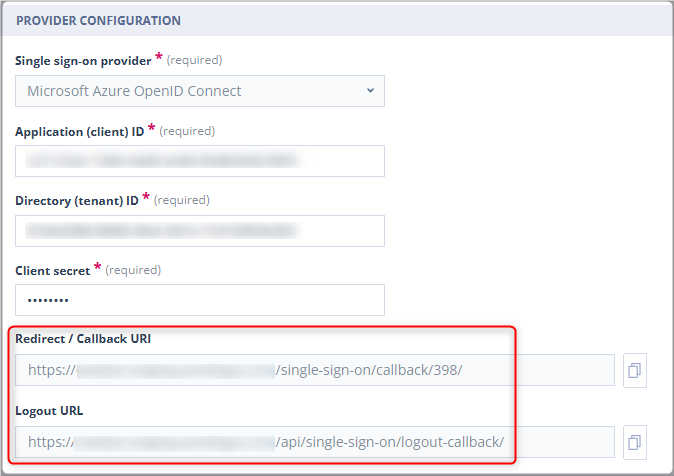
Copy these URLs.
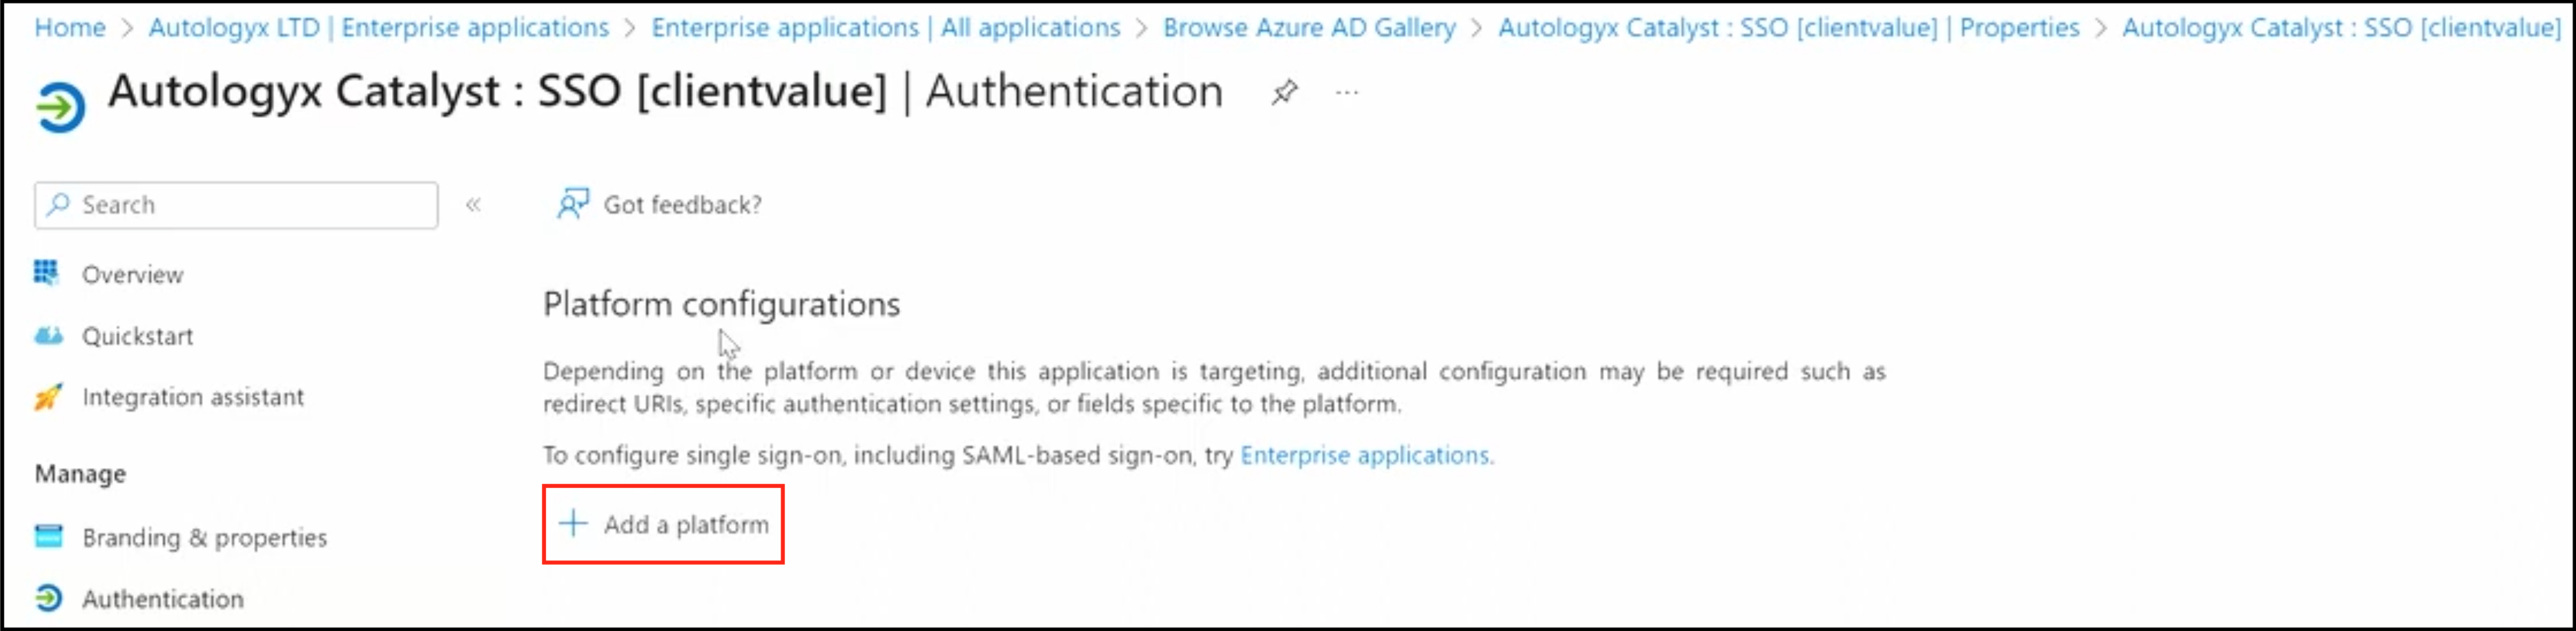
In your Azure application, click Authentication in the left-hand menu.
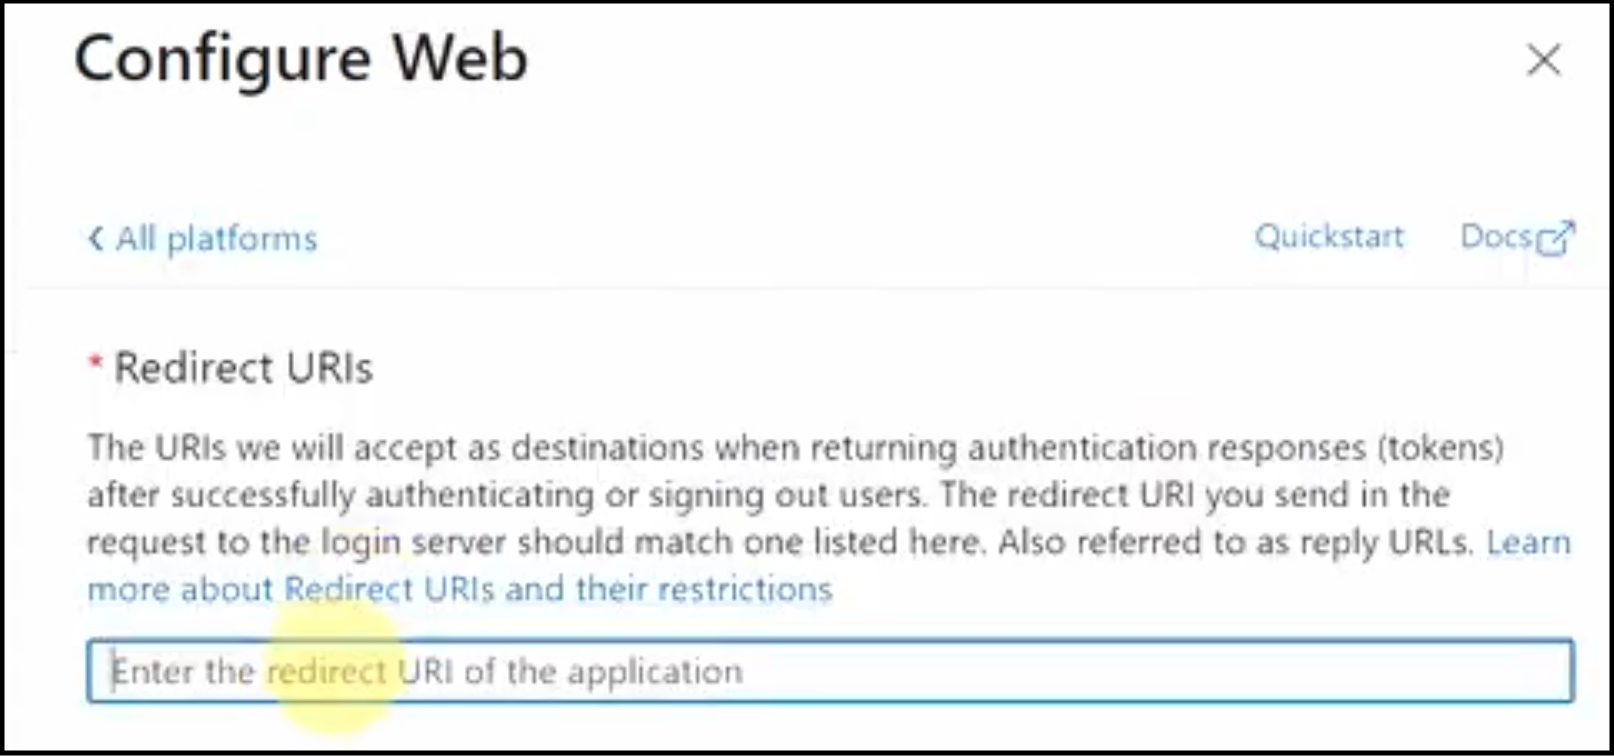
On the Authentication page, click + Add a platform.
The Configure platforms options are shown on the right-hand side of the page. Click Web.
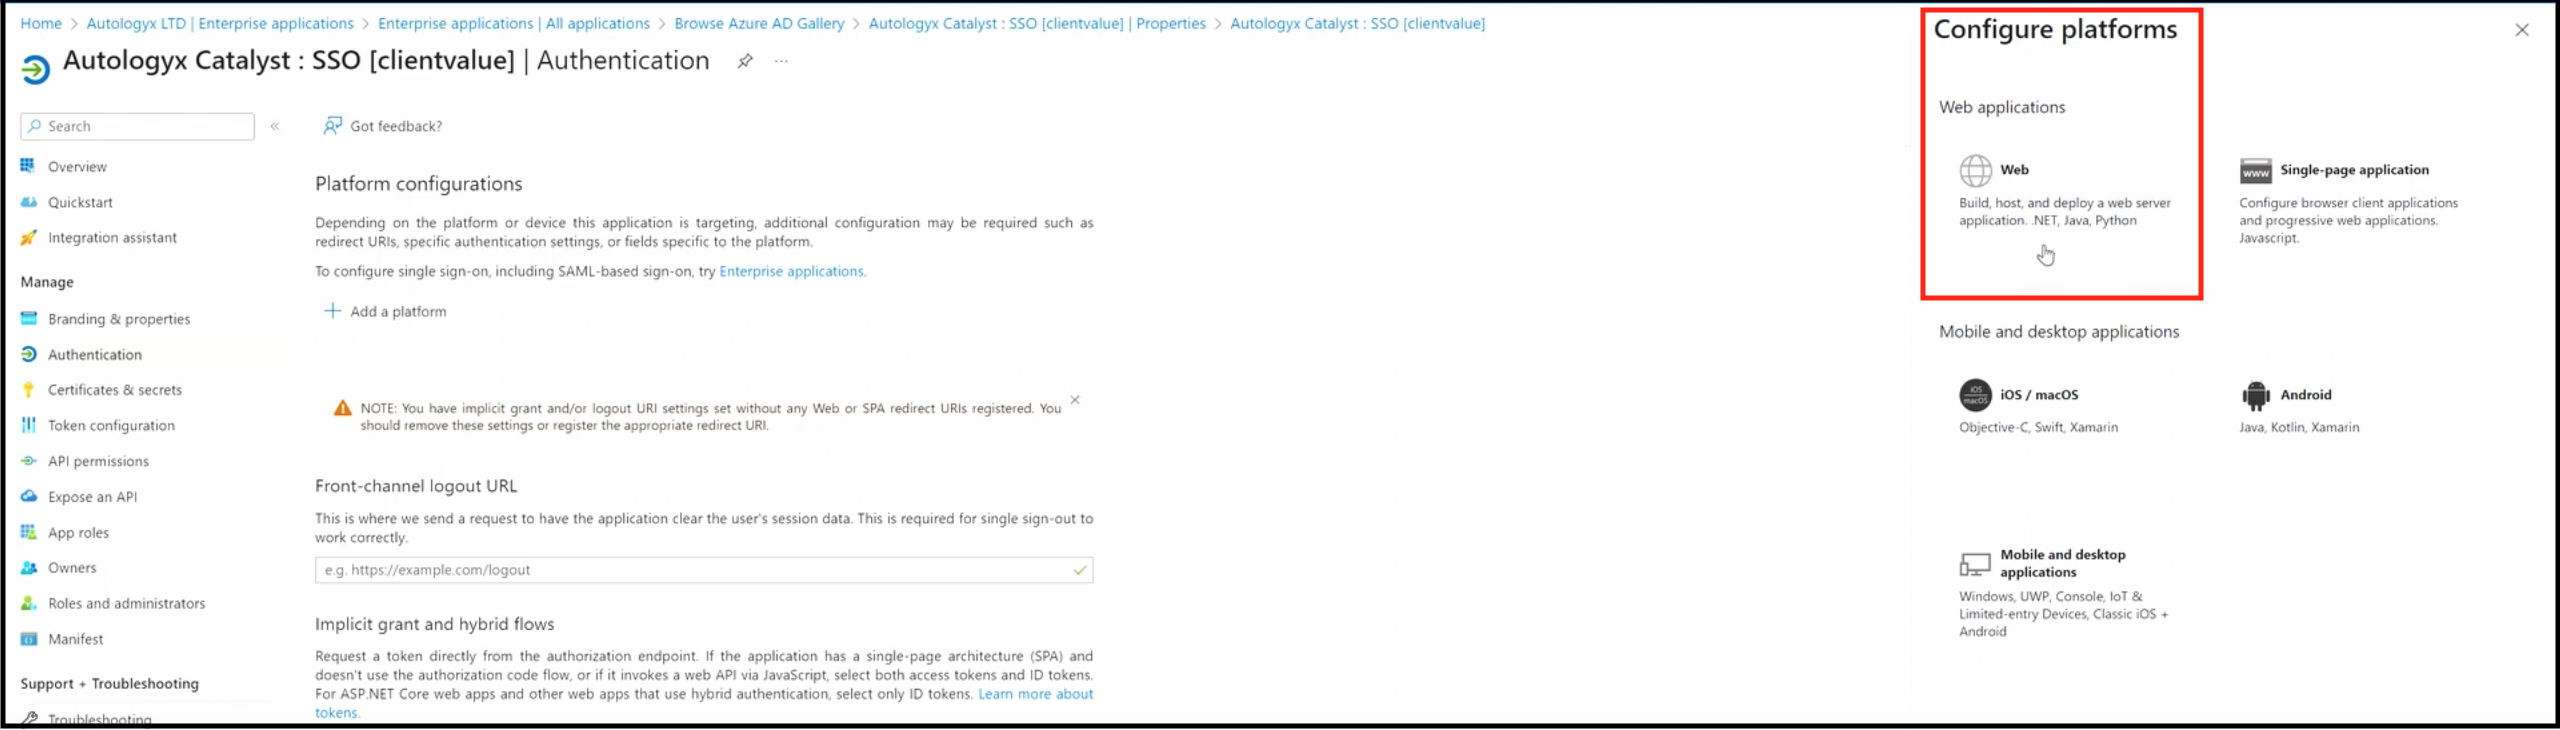
Paste the Redirect / Callback URI from Catalyst into the Redirect URIs field.
In the Front-channel logout URL field, enter the Logout URL from Catalyst.
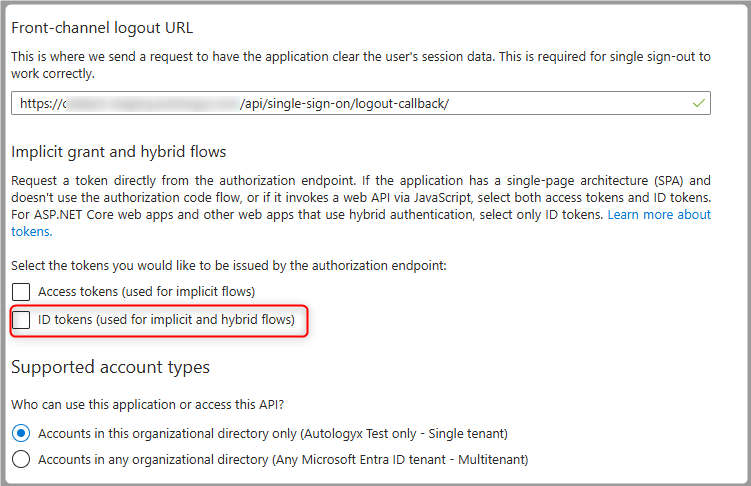
Untick ID tokens (used for implicit and hybrid flows).
Click Save.
The following page is displayed.
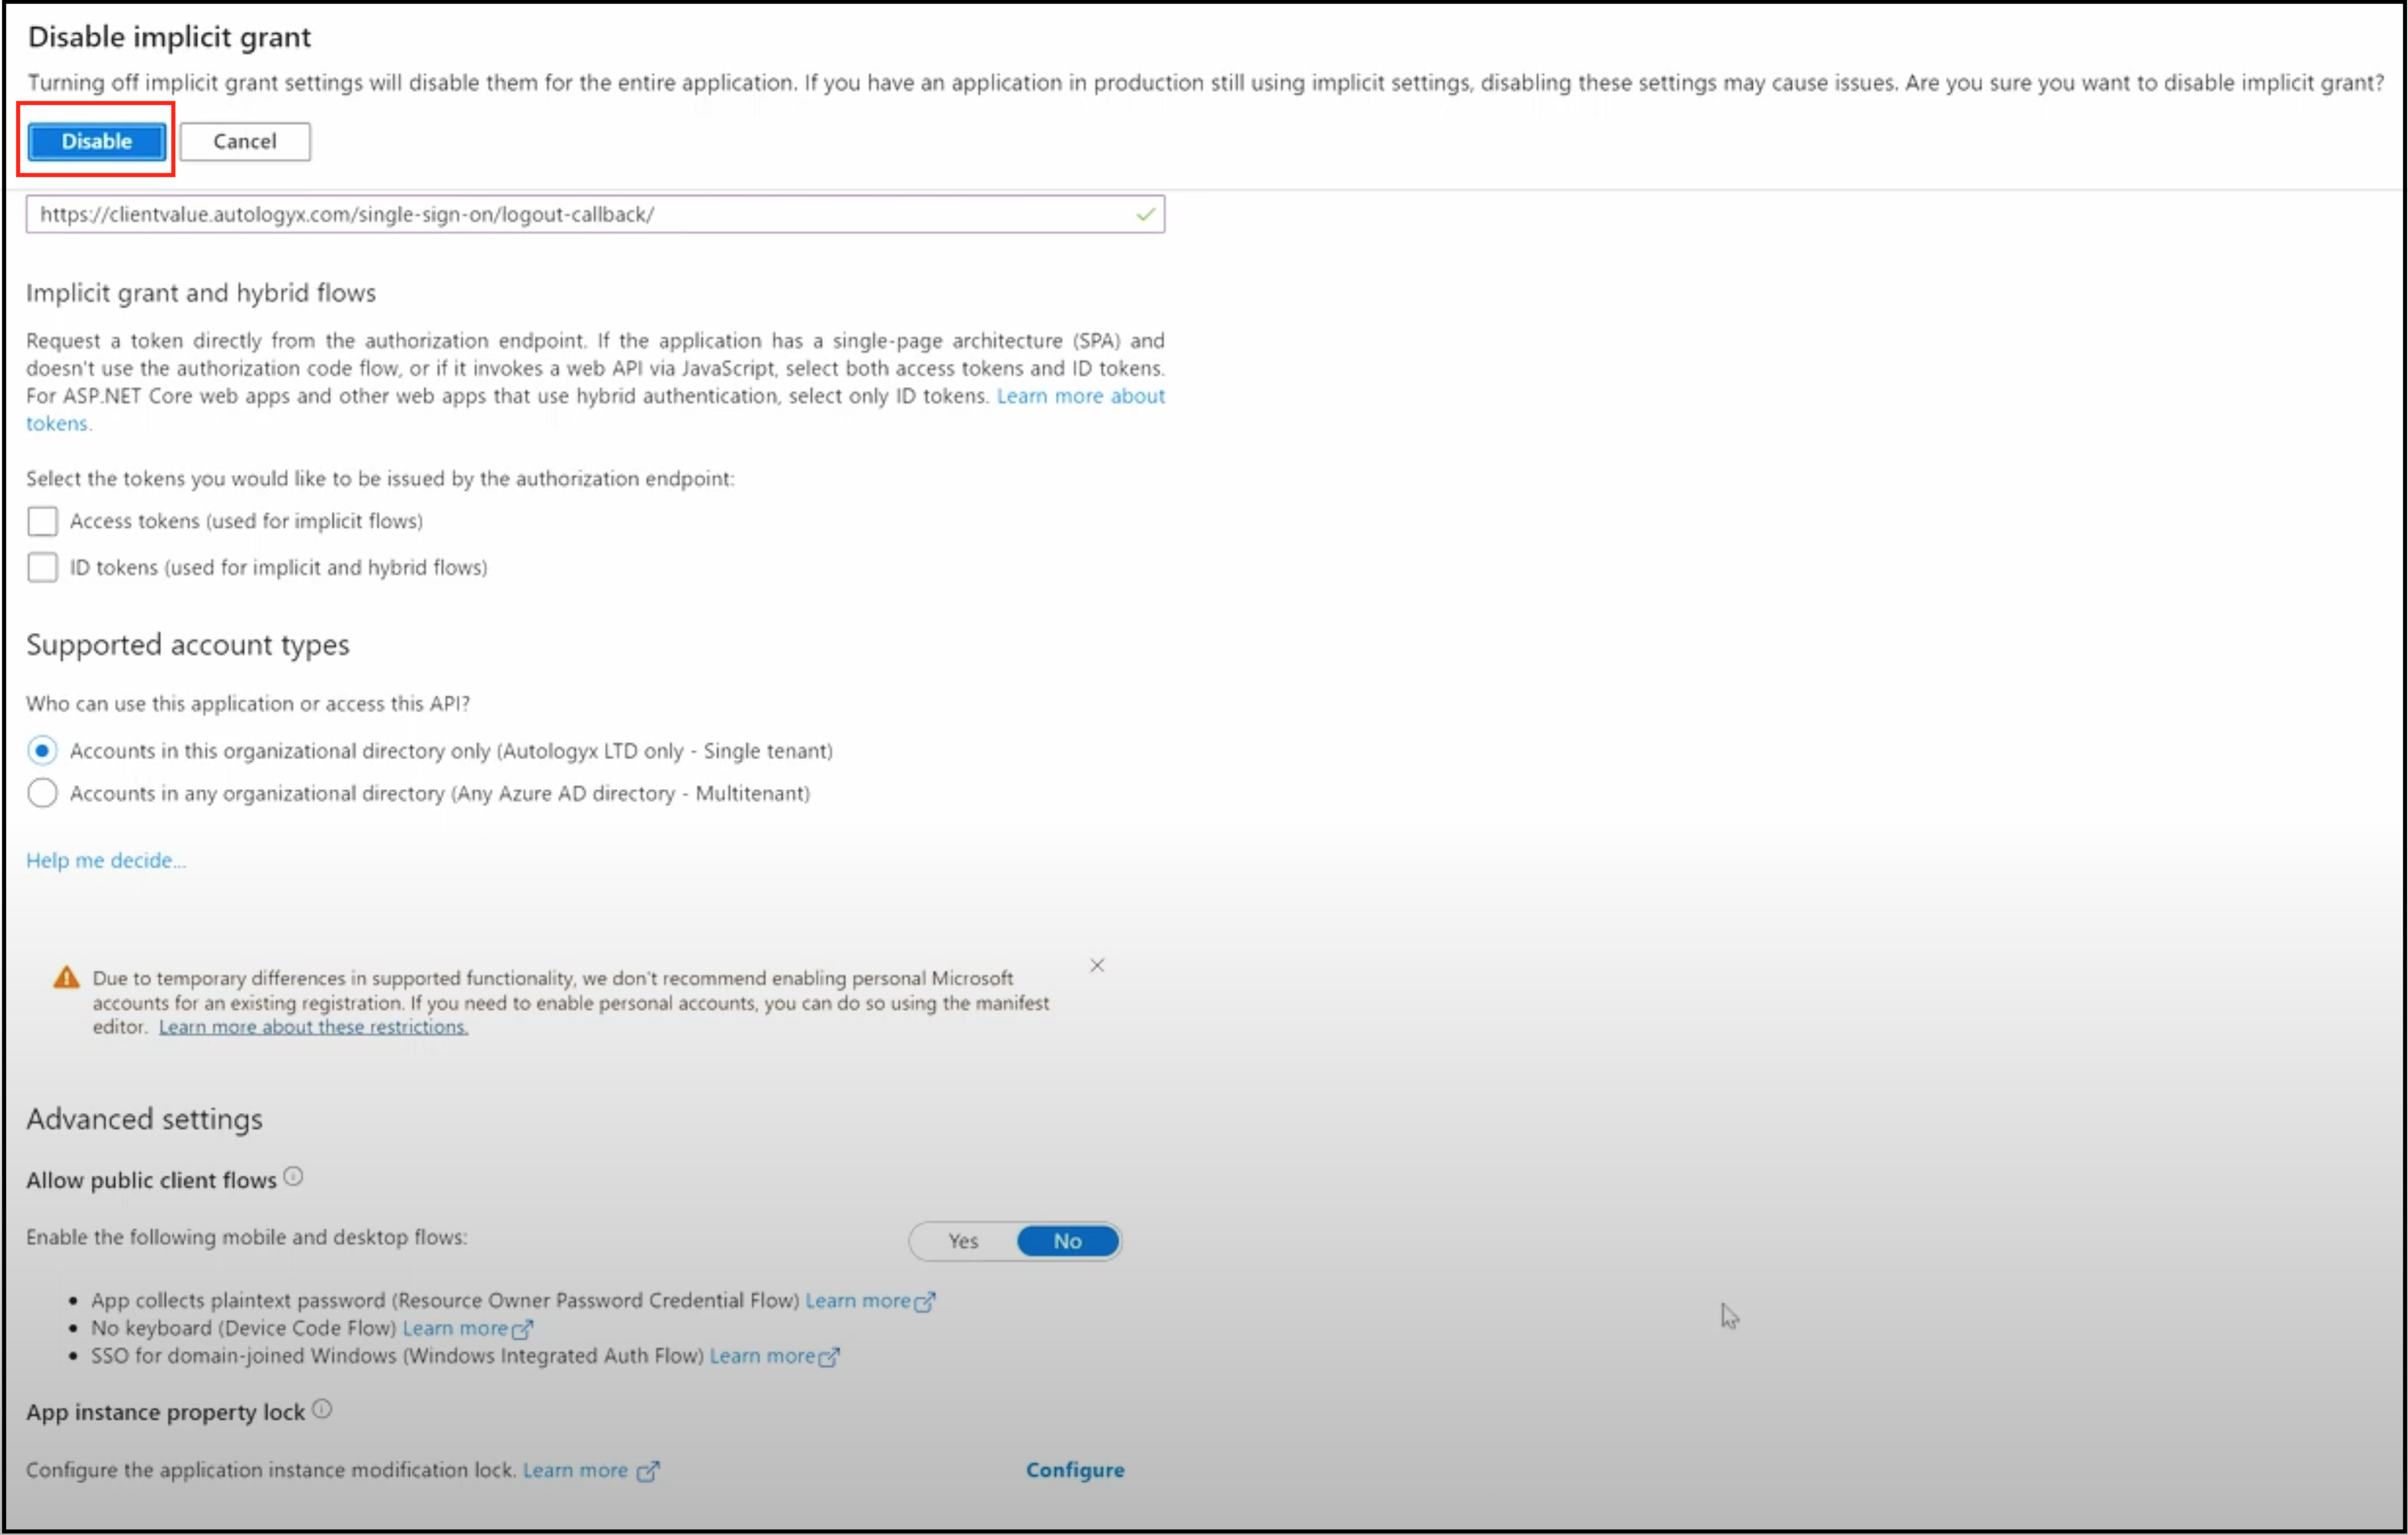
Click Disable. You are taken back to the Authentication page showing the Front-channel logout URL.
Configure Azure API permissions
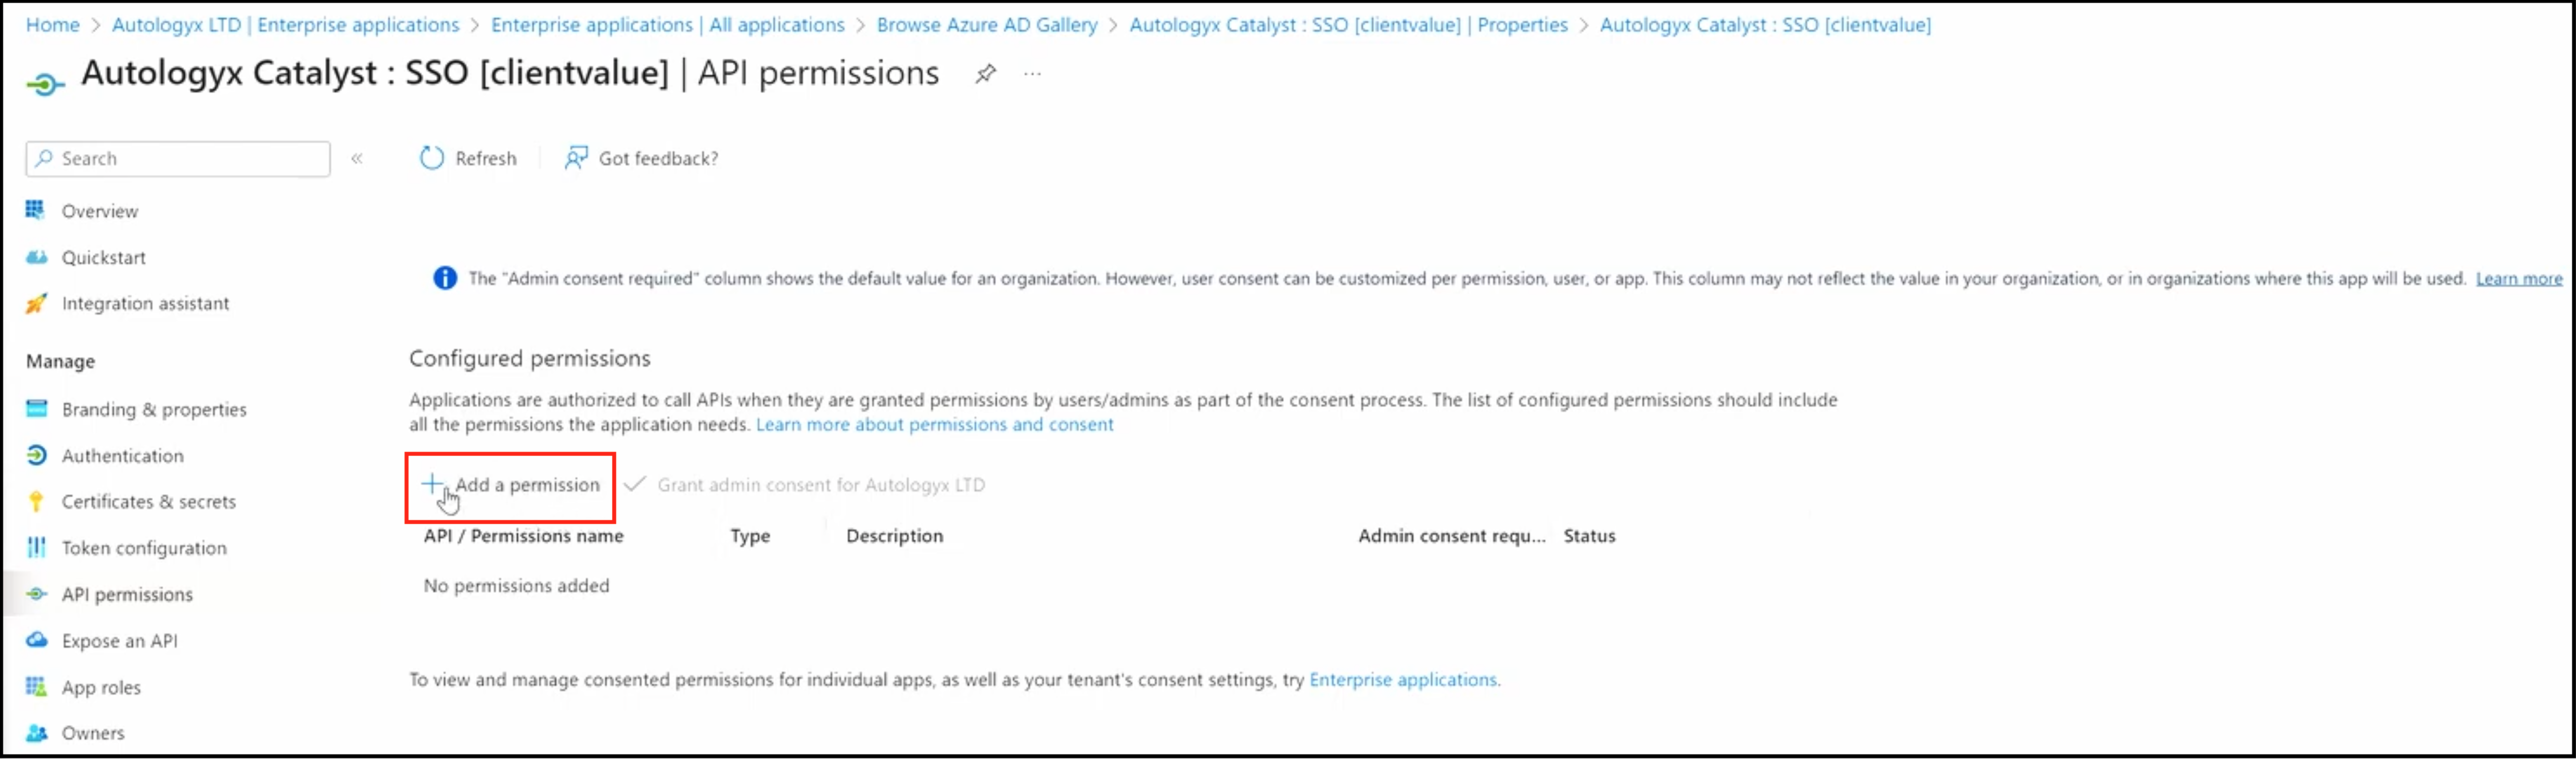
Finally, you need to give the application in Azure permissions to access users' details so that Catalyst can authenticate them.
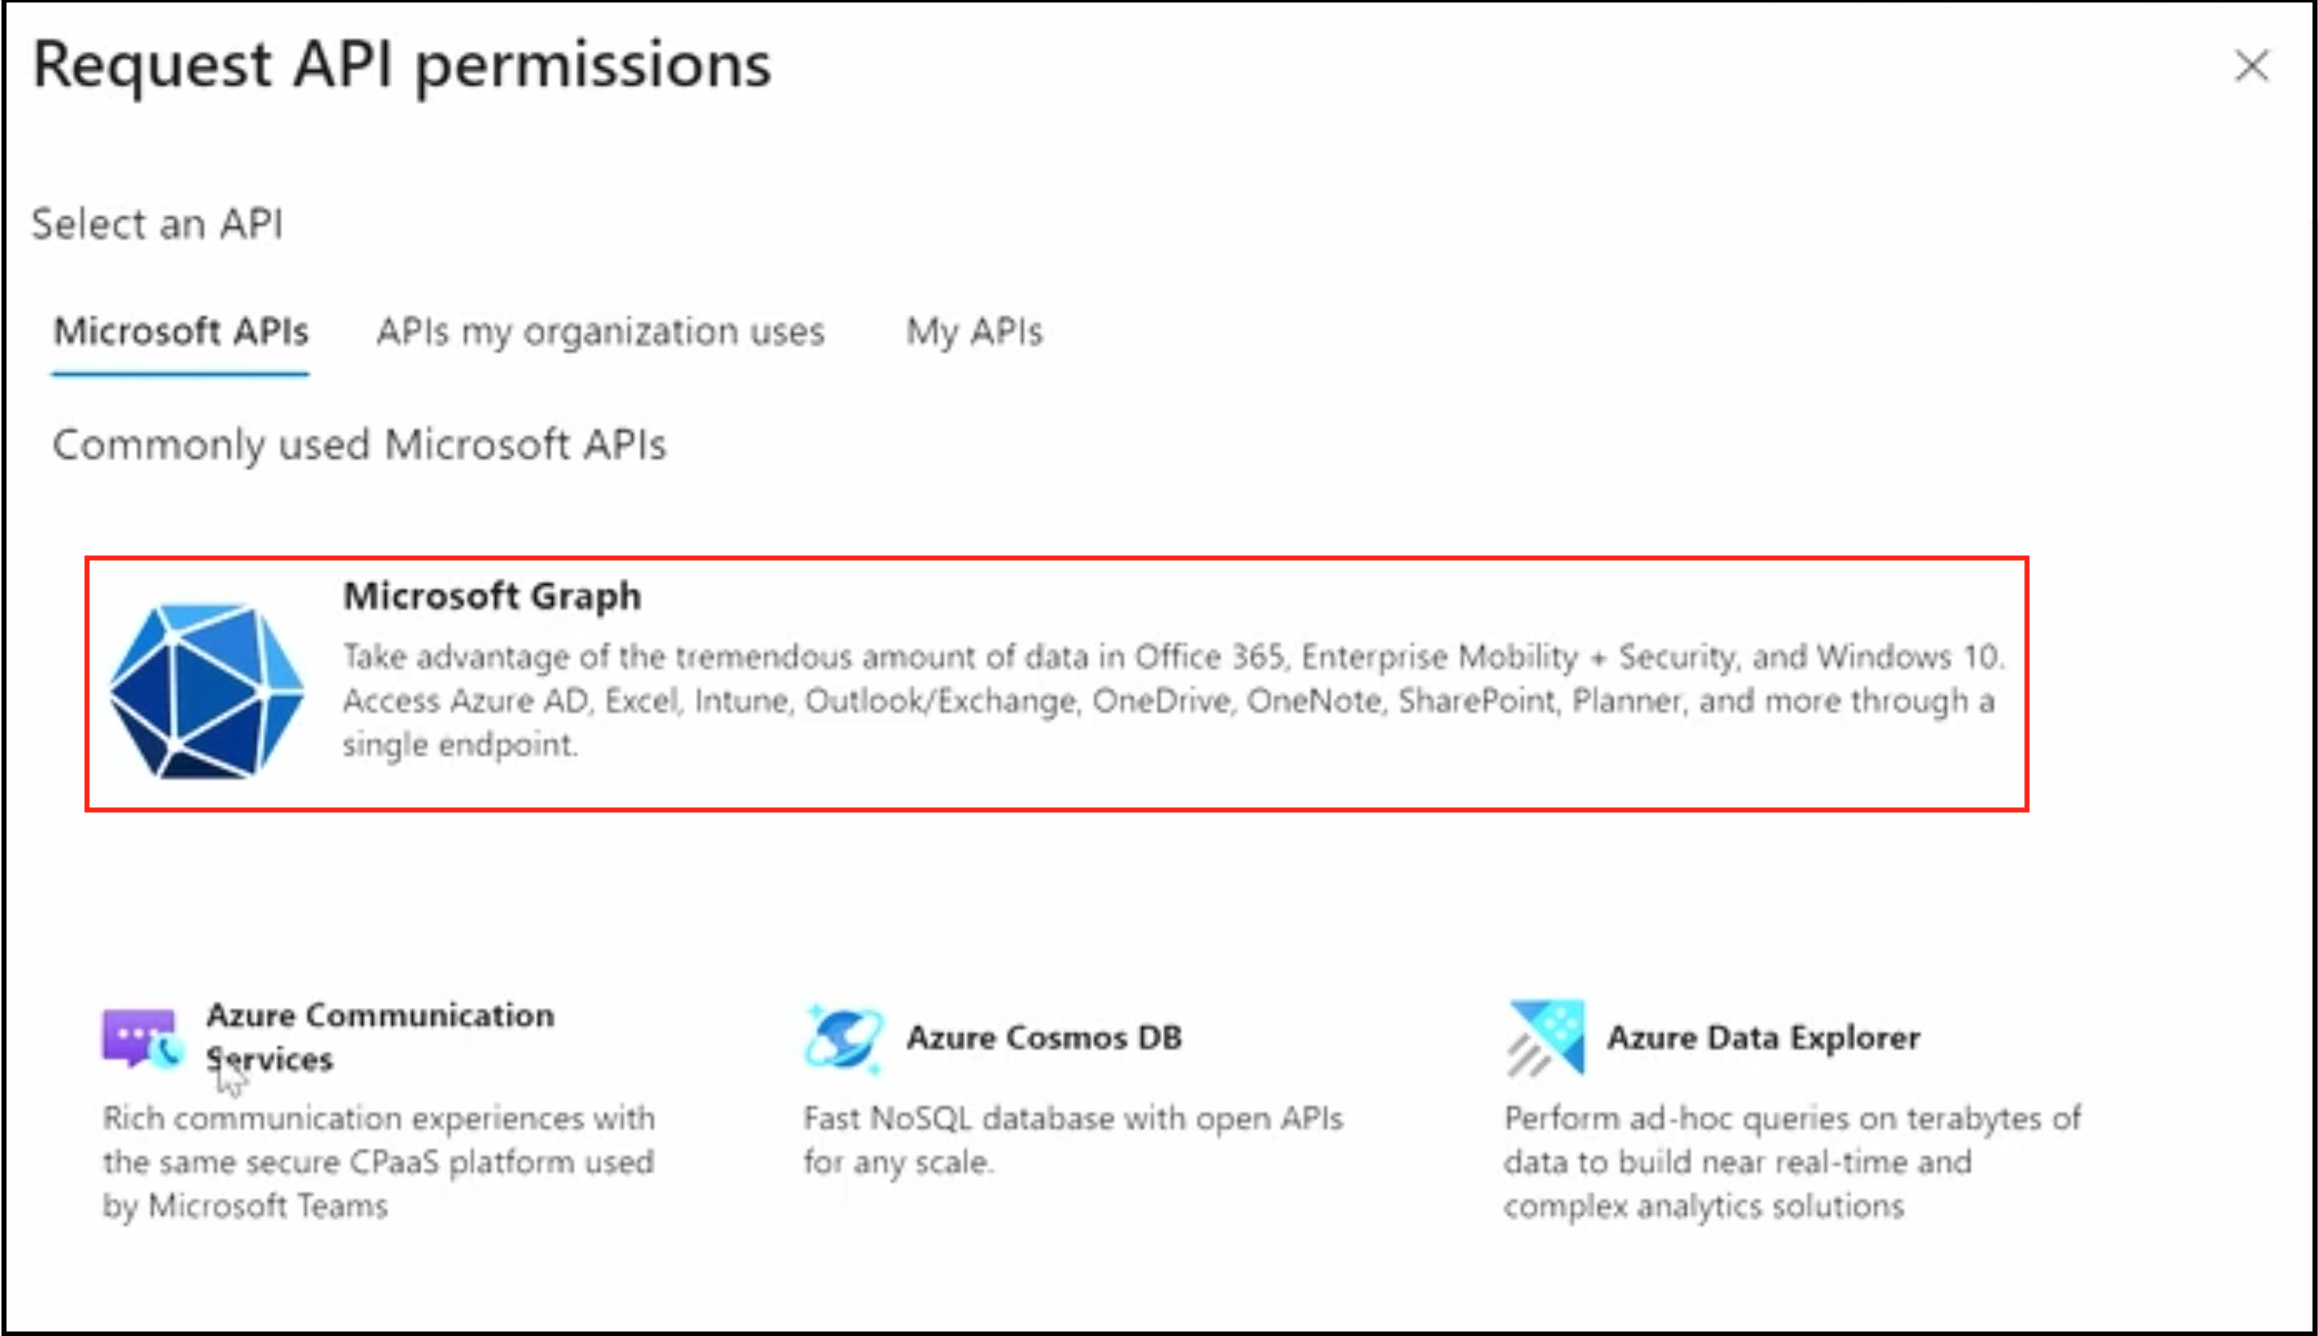
Click API permissions in the left-hand menu. Then click + Add a permission.
The API permission options are displayed on the right-hand side. Click Microsoft Graph.
You will see two options on the next display:
- Delegated permissions
- Application permissions
You only need Delegated permissions. Click this option to open the permissions.
Tick email and profile.
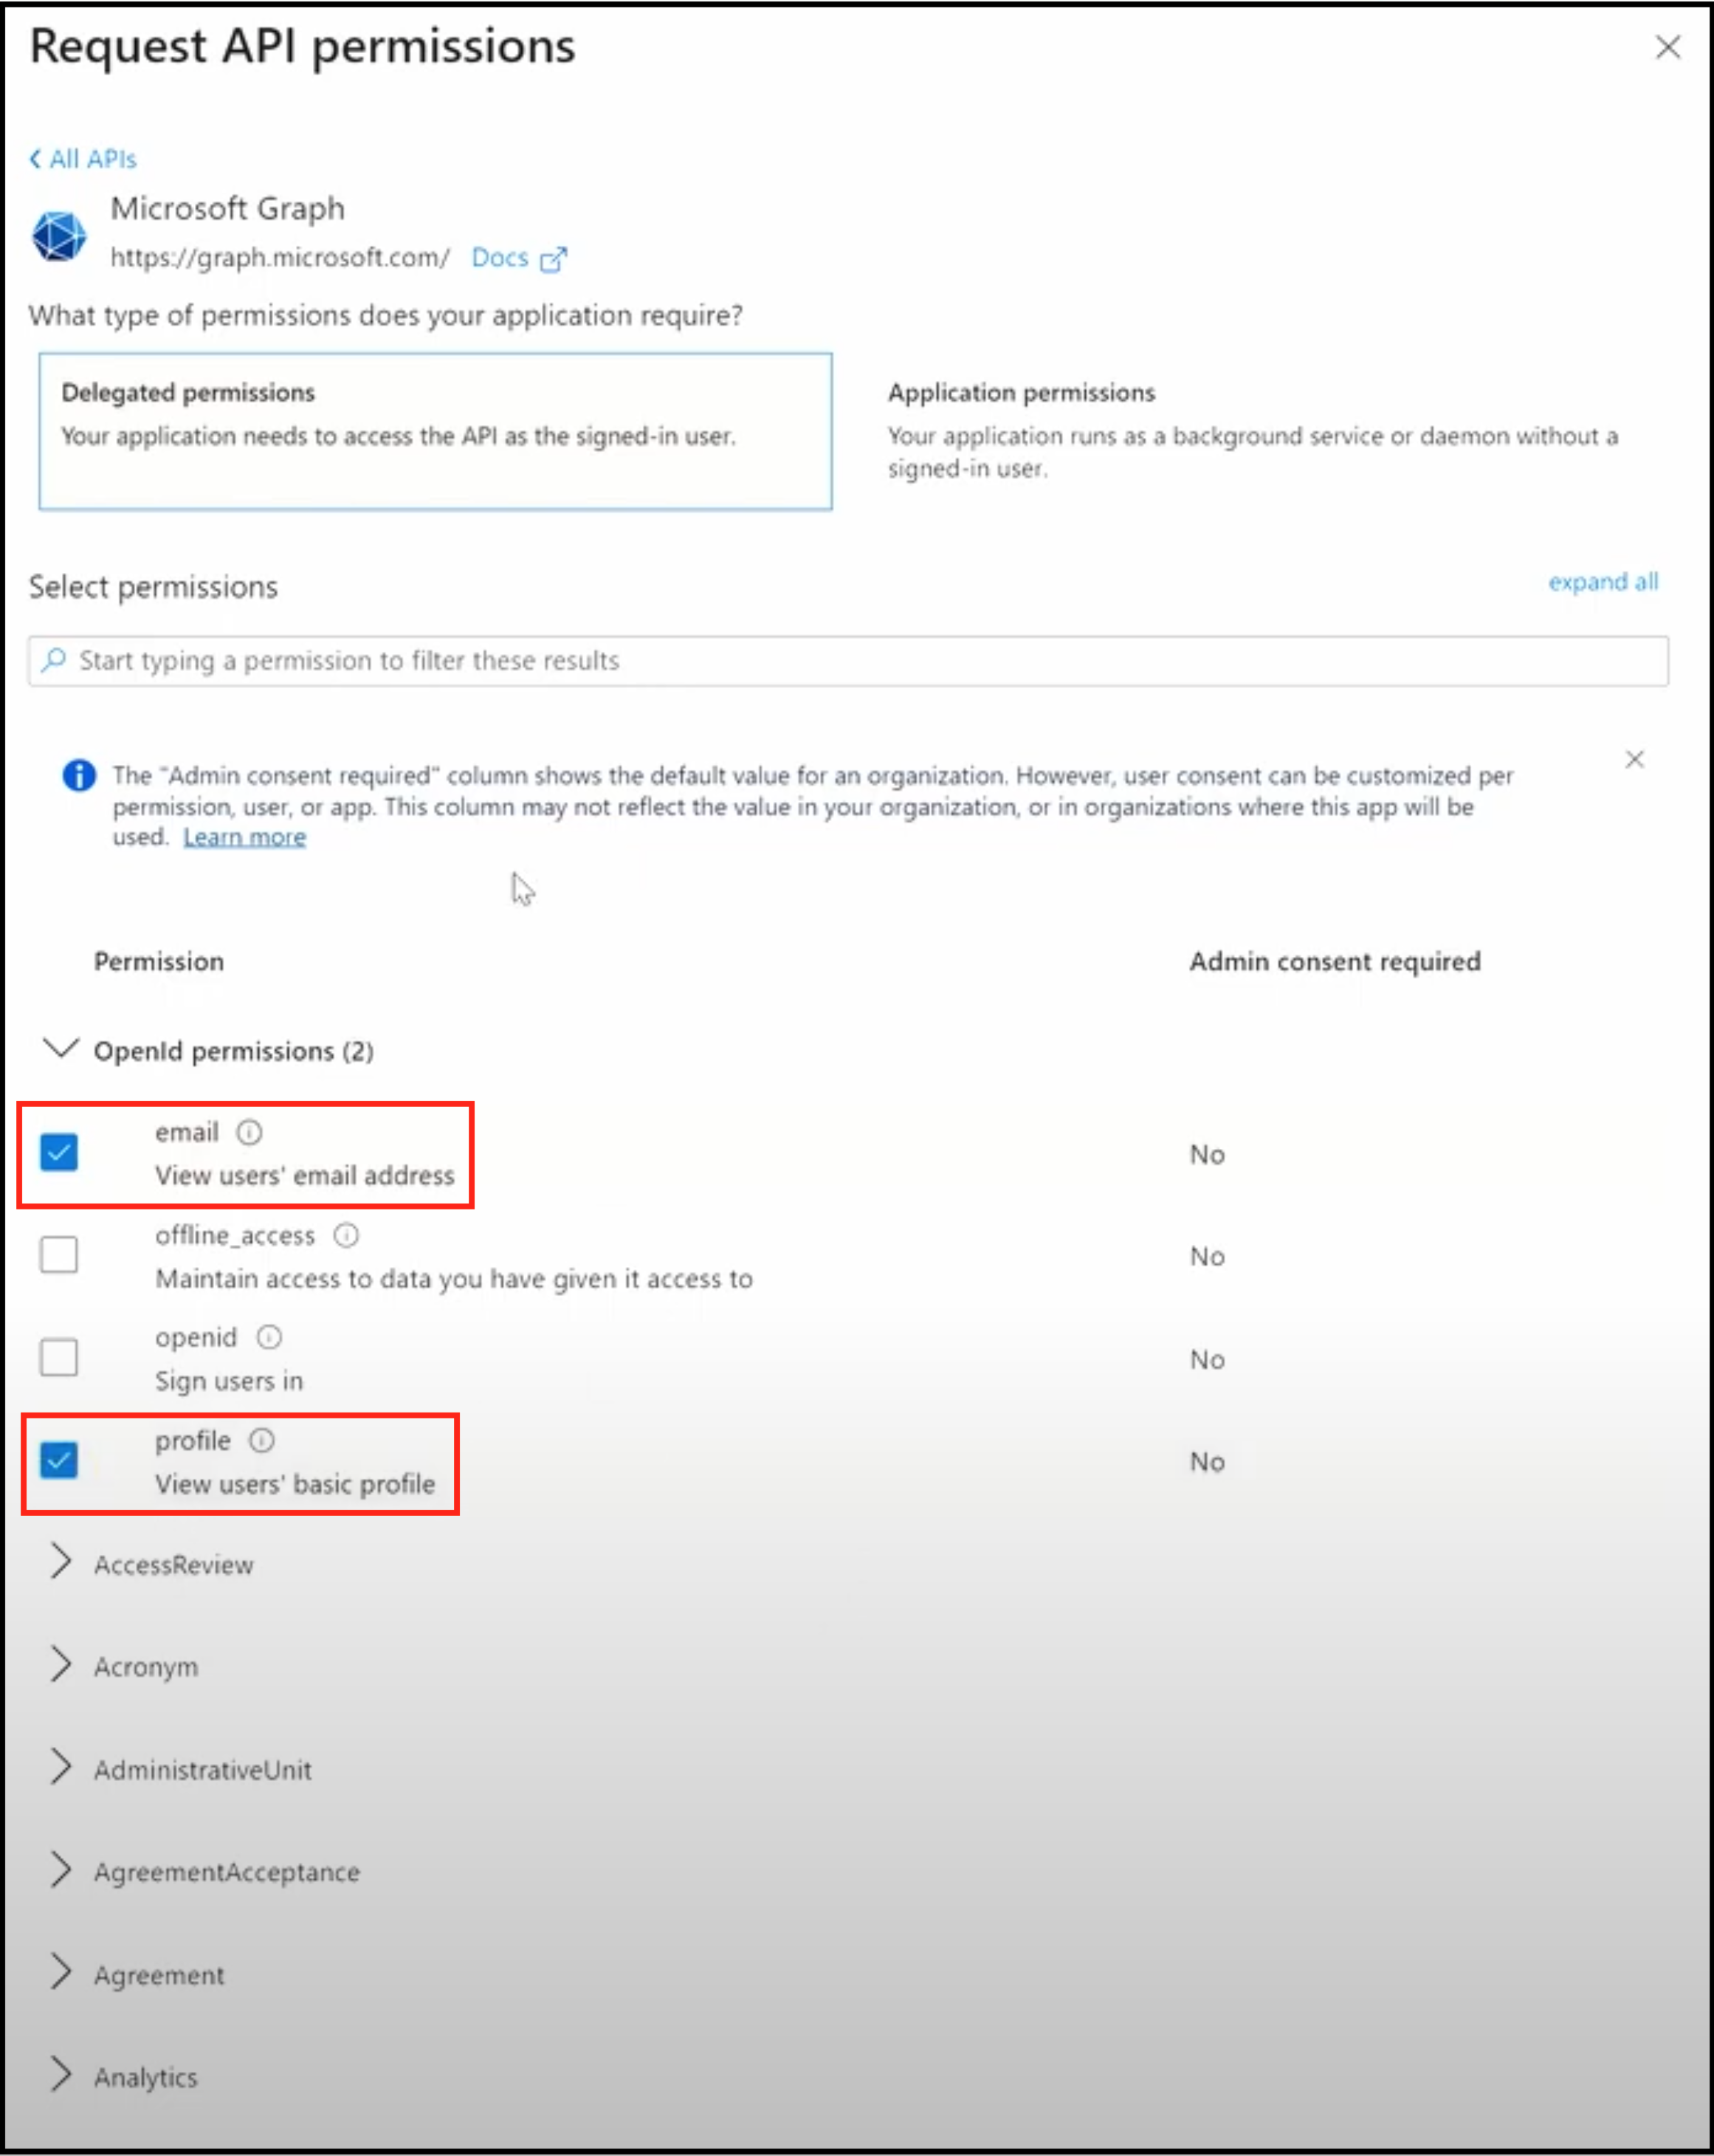
Then enter User in the search field under Select permissions.
Expand the possible User permissions and tick User.Read and User.Read.All.

Click Add permissions.
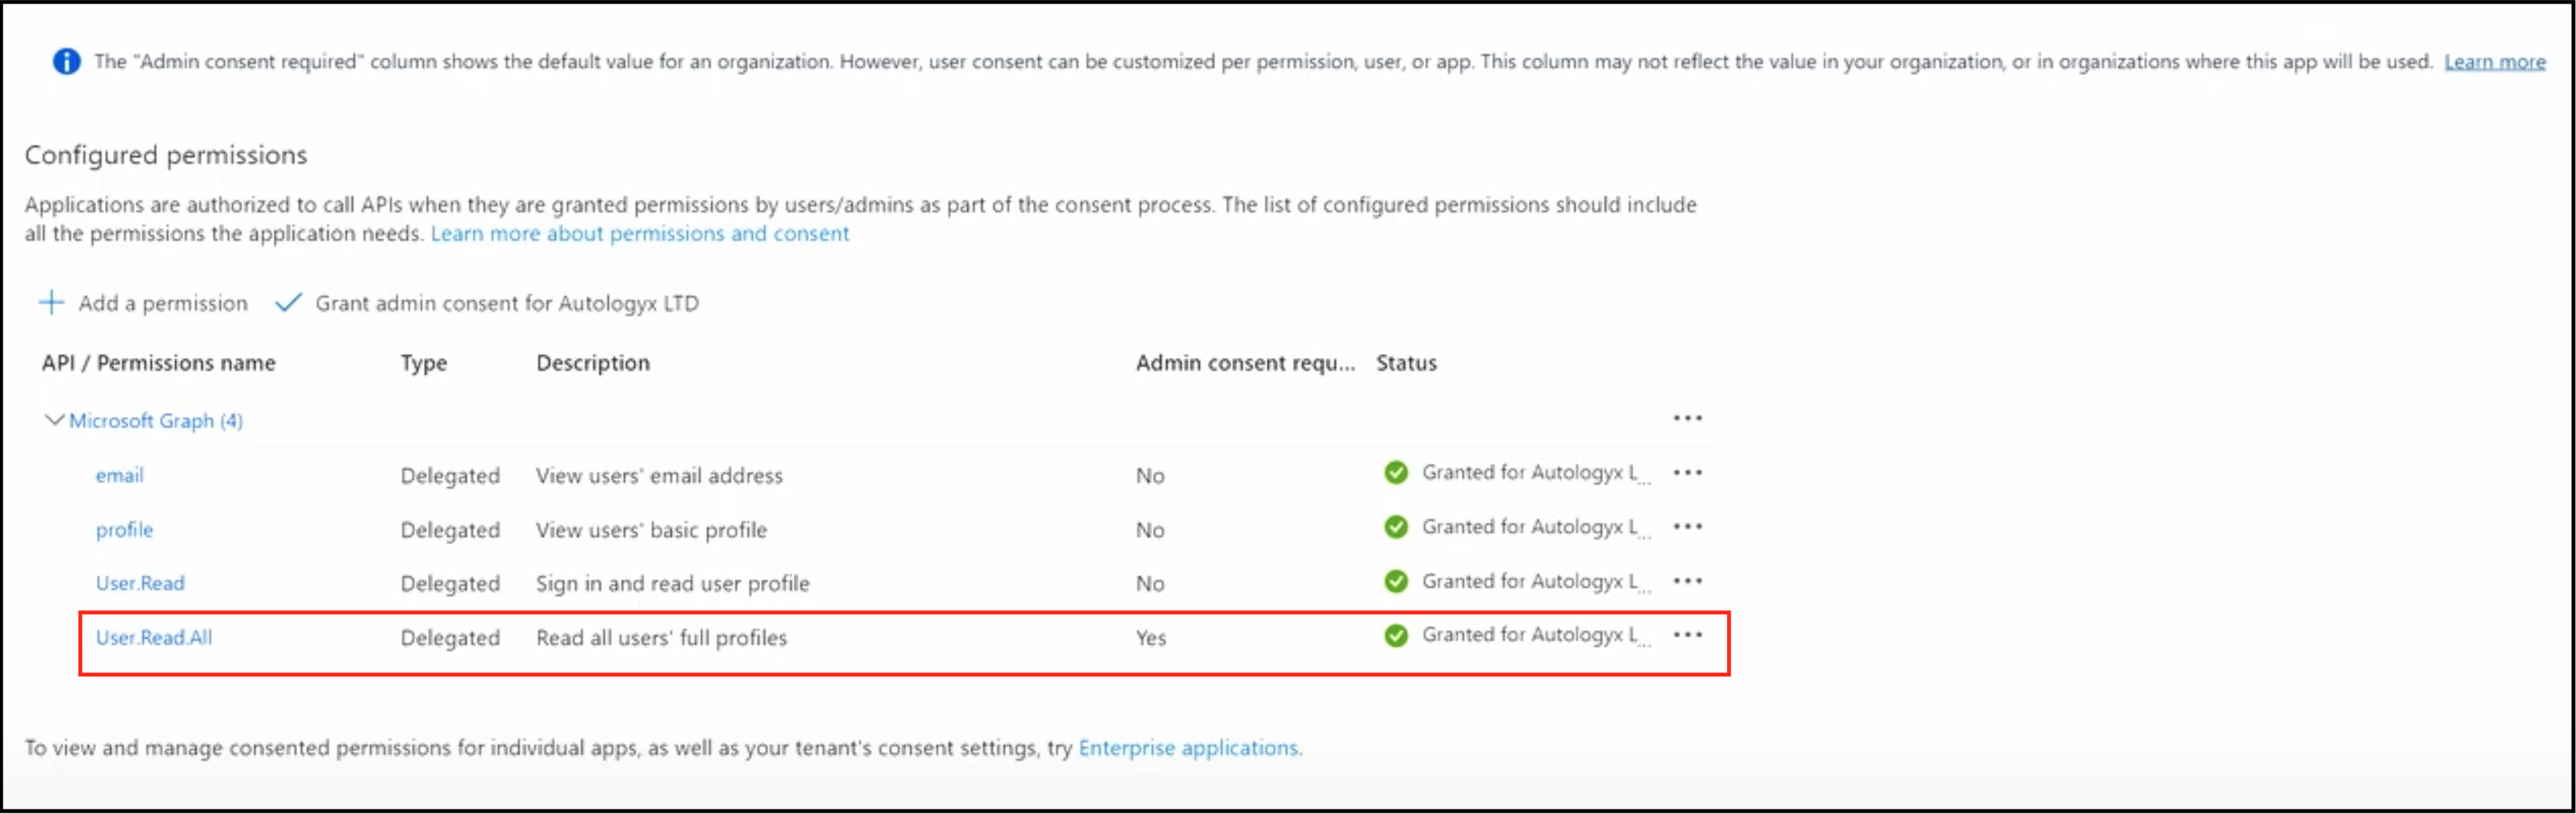
Back in the centre of the API permissions page, you need to grant access for the User.Read.All permission. You can see from the screenshot below that there is an error message informing you that this permission has not been granted. This permission needs an extra step because it has a significant capability and must be confirmed.
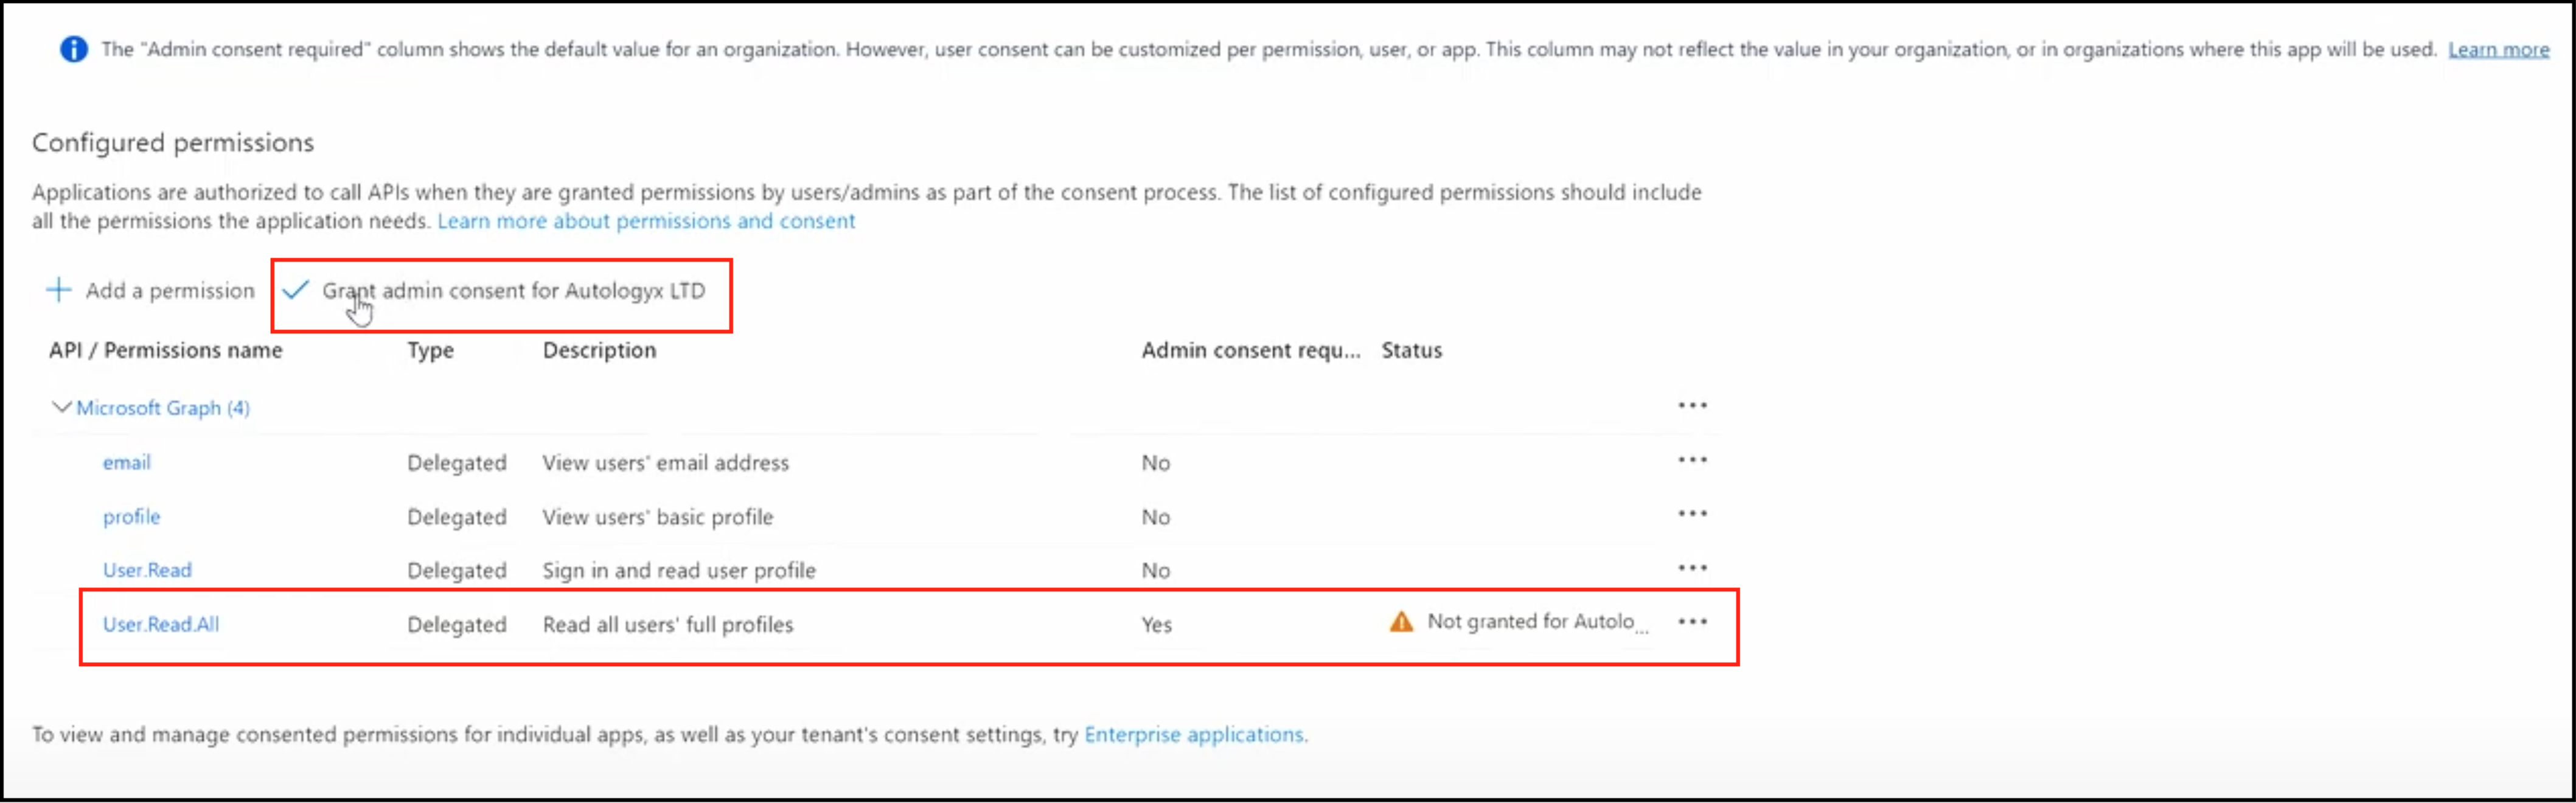
Click Grant admin consent for Autologyx LTD.
Click Yes on the admin consent confirmation.
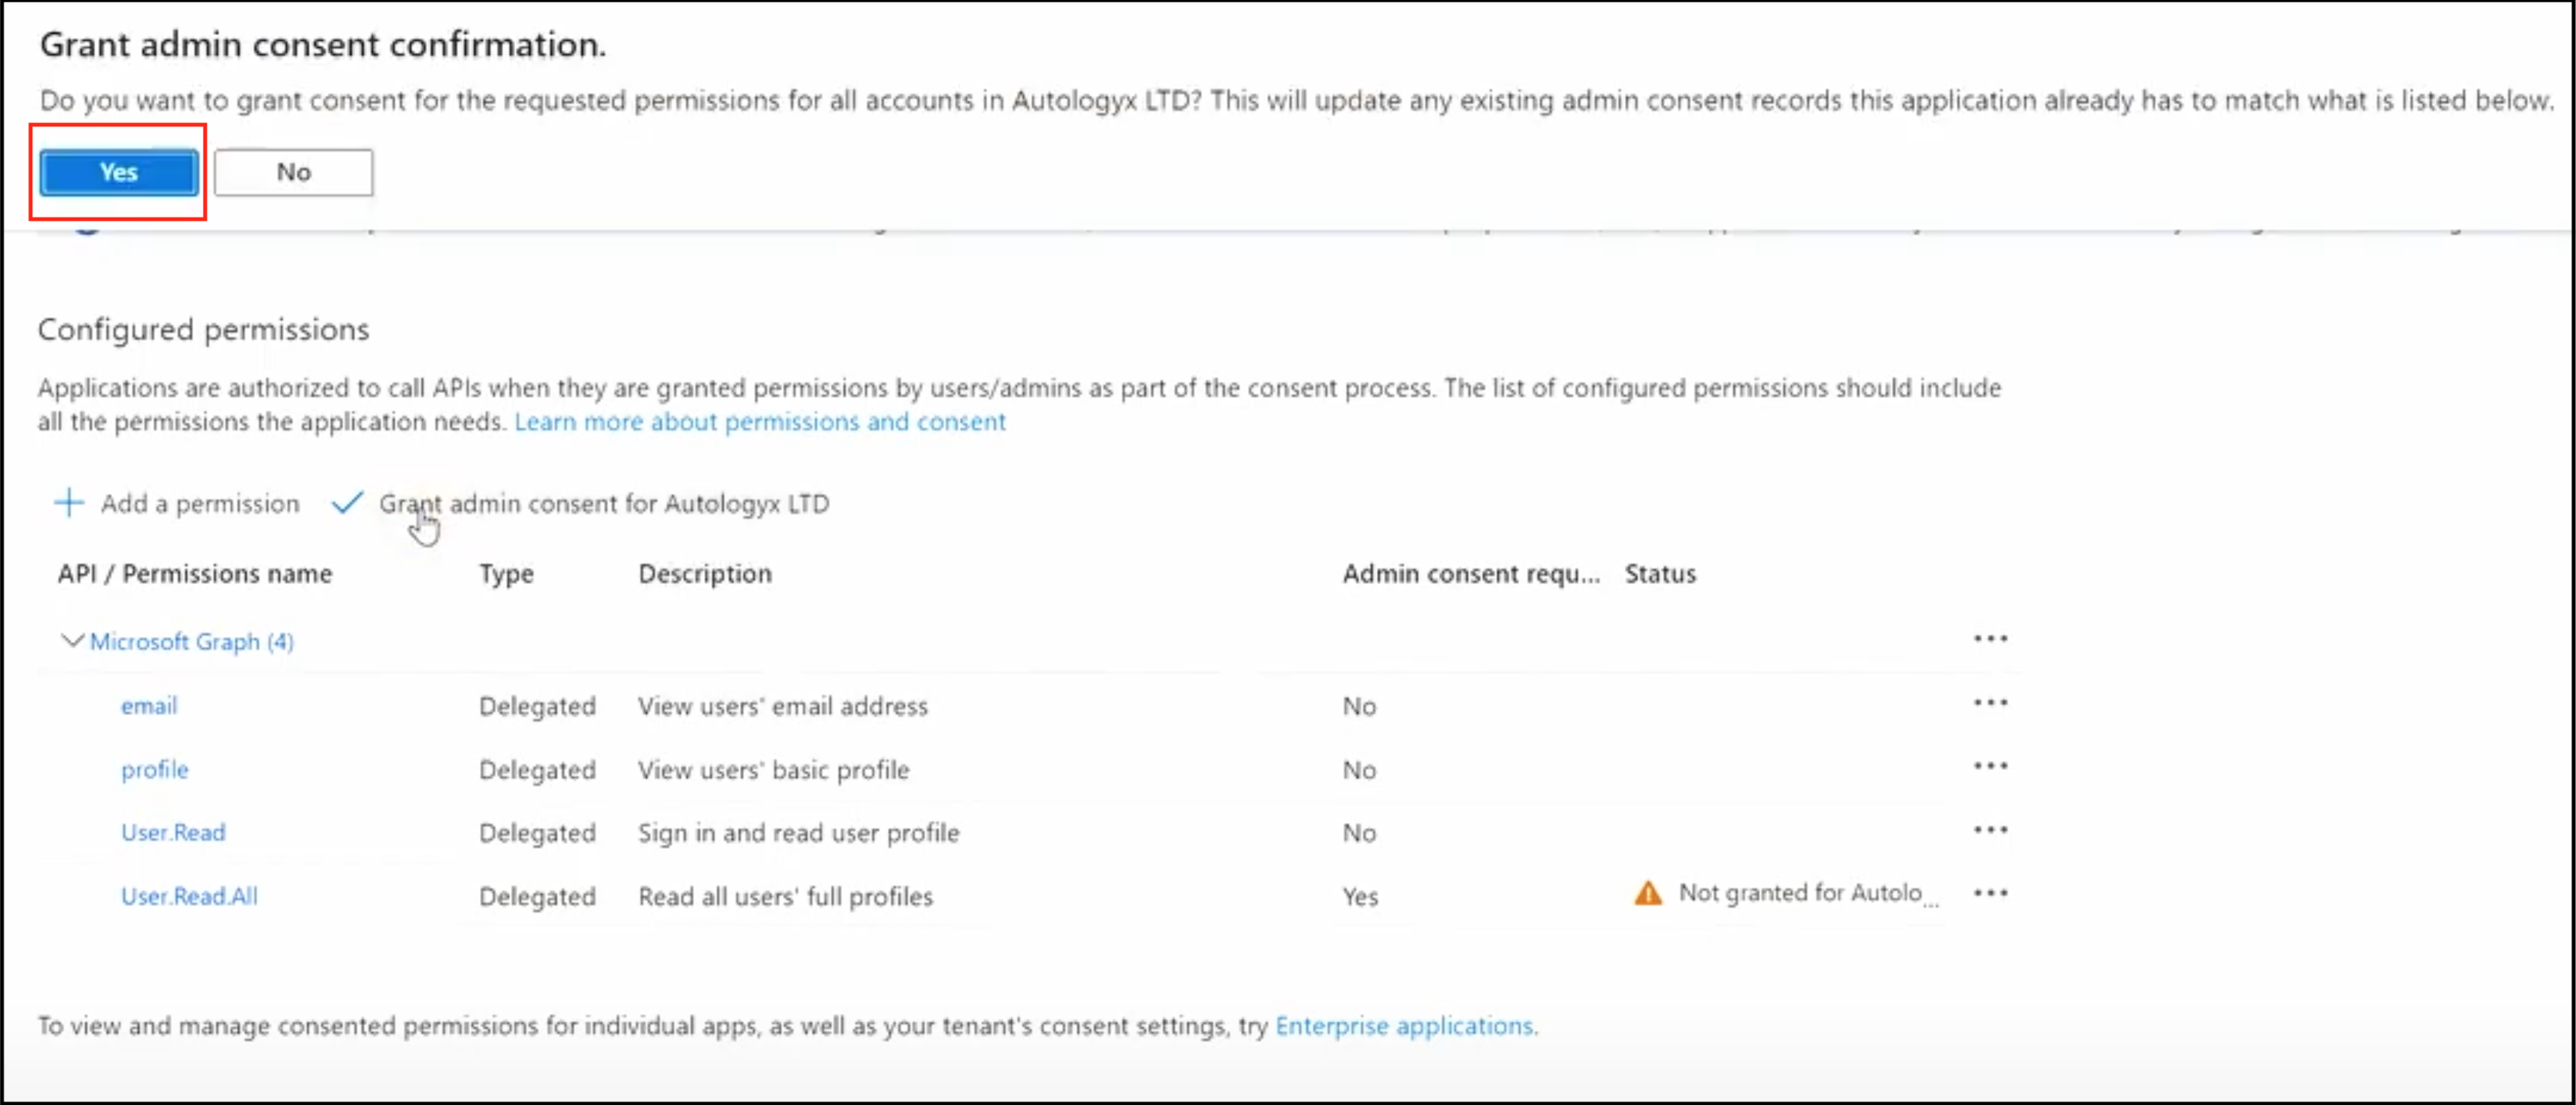
The permission is granted and the status changes accordingly.
Complete the configuration
The Azure and Catalyst configuration is now complete.
When enabled, the name given for the configuration appears in the Single sign-on list on the Catalyst system login page.
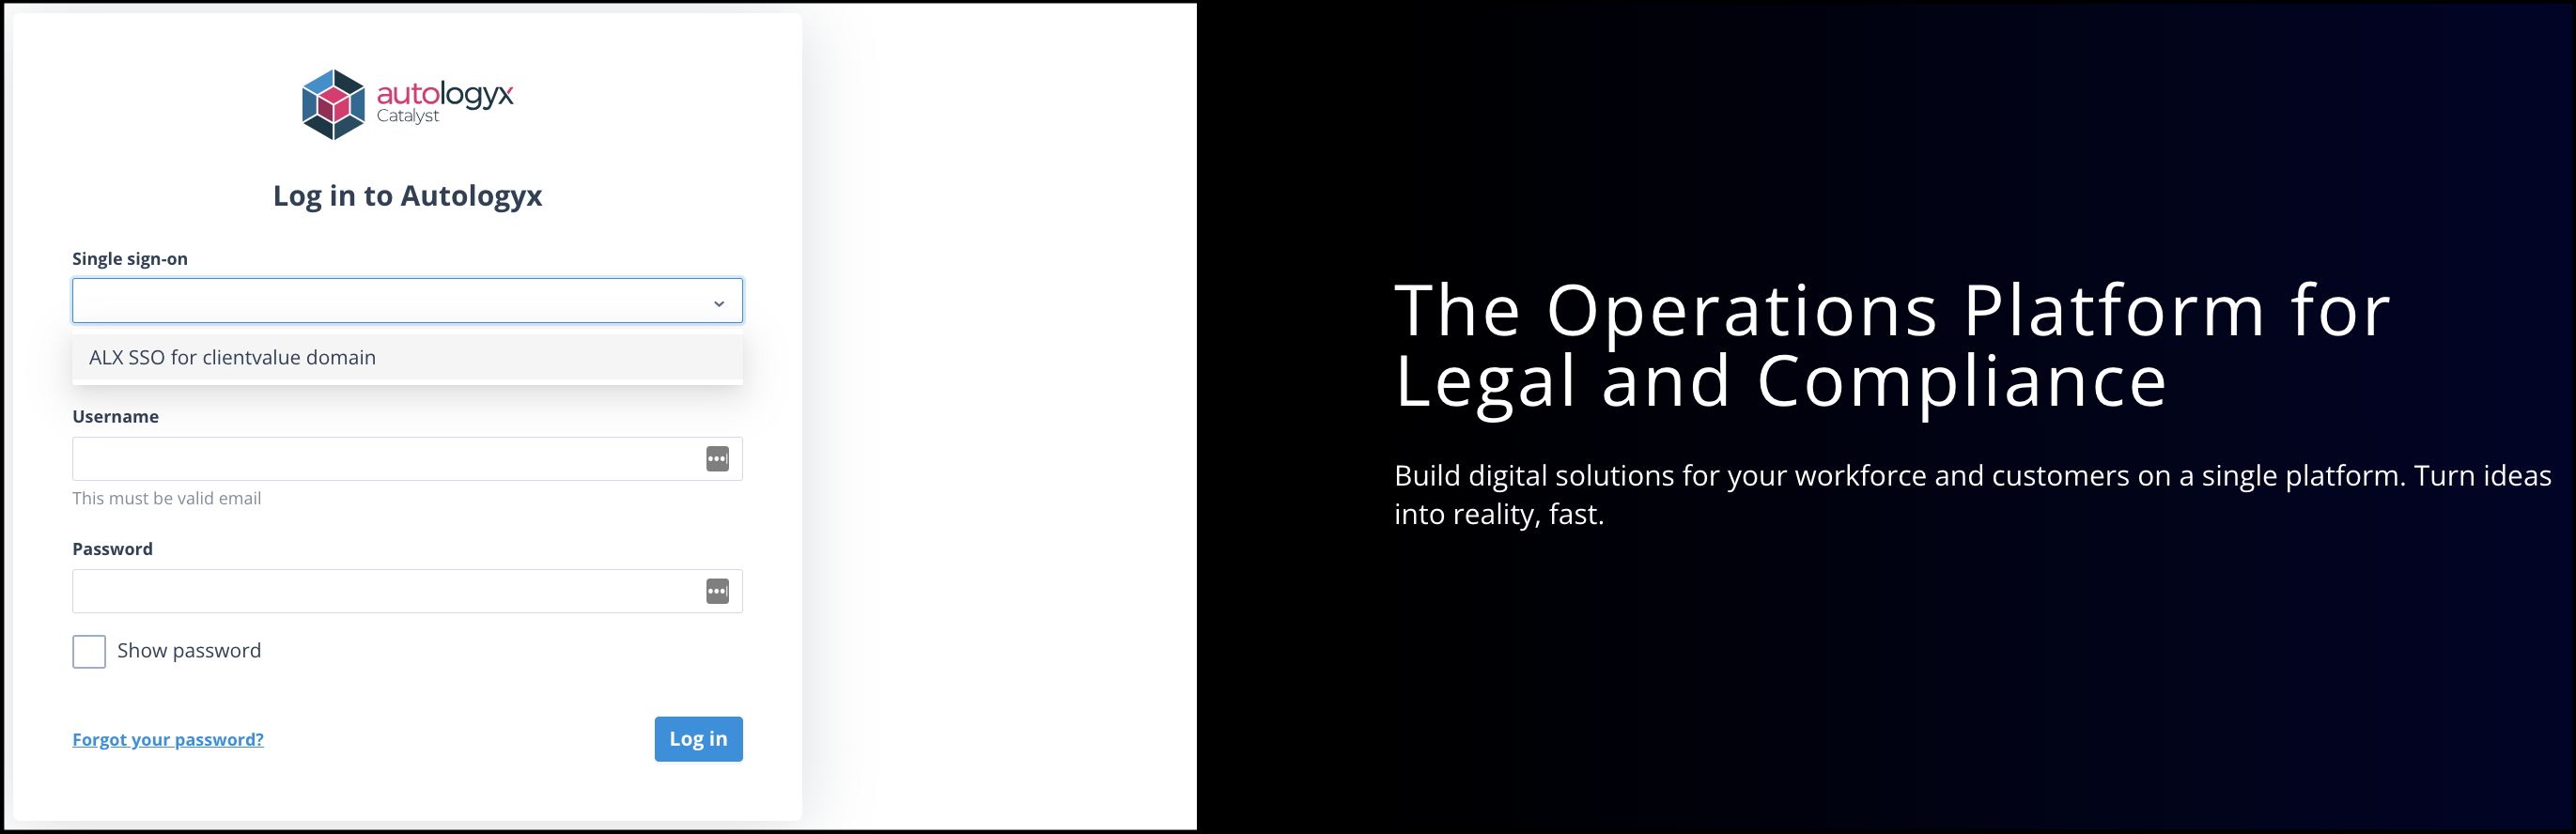
If single sign-on has not been configured and enabled, the login page does not show this option. Users must log in with a username and password.
Useful info
- The maximum number of single sign-on configurations for your system is 25.
- The name used to replace Unnamed configuration must be unique.
- See What happens when an individual uses single sign-on? for information about the user login experience.