Response Configuration - Task type - Complete self-contained form
The Response configuration tab provides the area in which the task is defined, eg what it consists of, how it will be presented to the User completing it, and how it will be created - the Task creation mechanism.
There are two Task types. The first, Complete self contained form, is highly versatile in that it lets you build a task which might consist of only one field, multiple fields or a very comprehensive form. If created using generic language, you will be able to use if to create Tasks for Records in more than one Object class.
This article takes you through the steps to create a simple claim form.
Create a response form
On the Response configuration tab, you will see a section called Response Form. Here, click onto the + Create response form button which will take you into the Form builder.
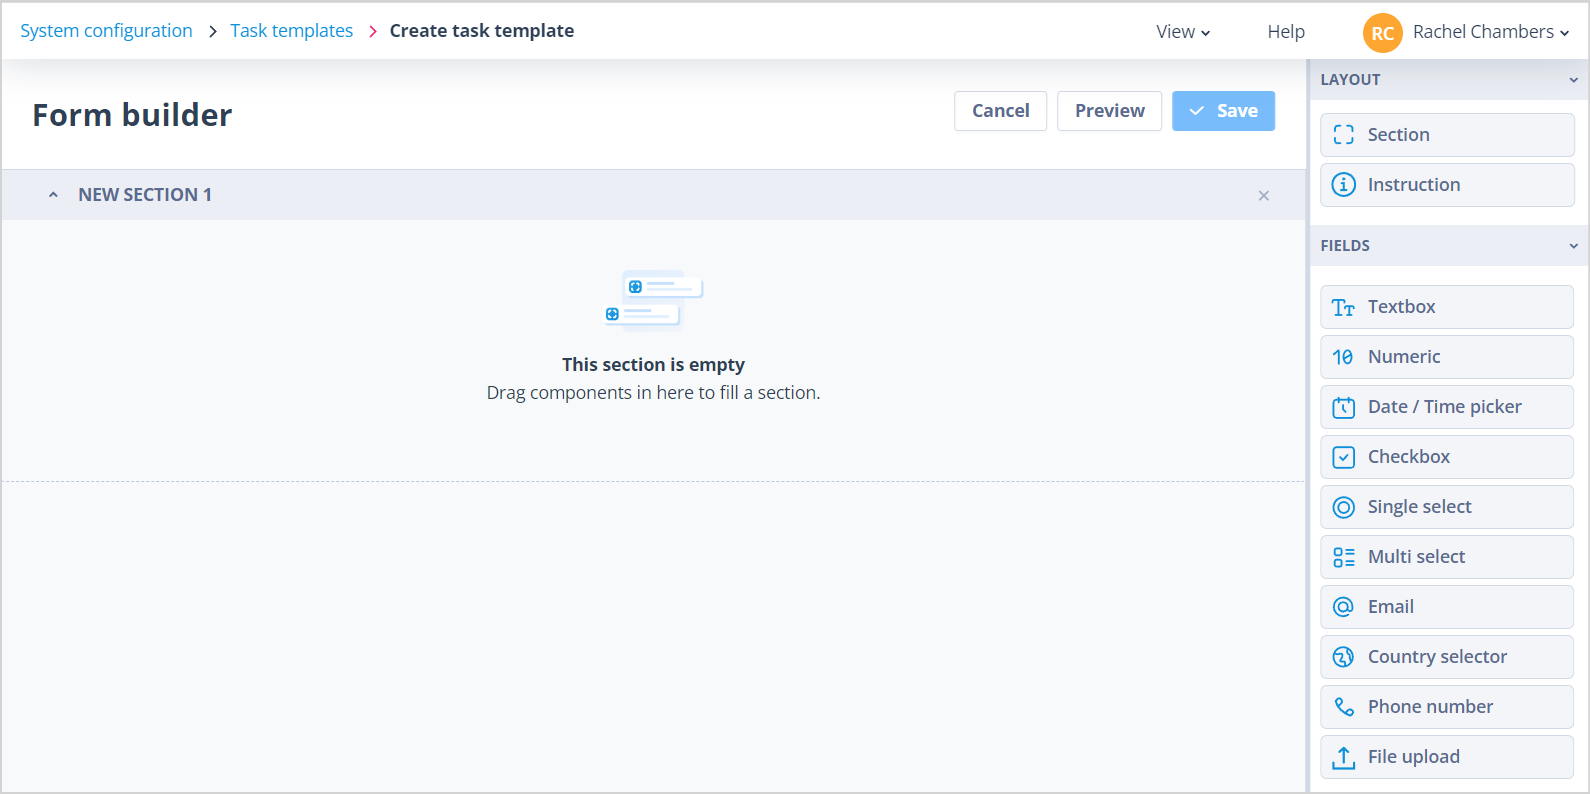
The Form builder is displayed with a section header. All other form components are in the layout panel on the right hand side.
Click on the section header. The right hand panel will now display the section properties.
You can:
- Give the section the correct name by amending the Label
- Choose whether to show the section header on the form. It's useful to be able to section parts of forms but not necessarily have a distinct division between the sections - in this case turn off the selector to Show this section header
- Select how many columns you require for this section
- Adjust the column ratios; the options will change dependent on the number of columns selected
- If appropriate, use the Conditional Visibility feature to control the display of sections. CLICK HERE for more information
The example shown has 2 columns at a ratio of 50:50.
Click into the canvas below to start populating your columns.
Each component can be dragged and dropped into position. Clicking on each component will allow you to label it and define its properties.
Field types and properties
Single Select
When using a Single Select field type you are able to have the options displayed as radio buttons or as a drop down list.
Next, list the options as shown and select a default value if appropriate.
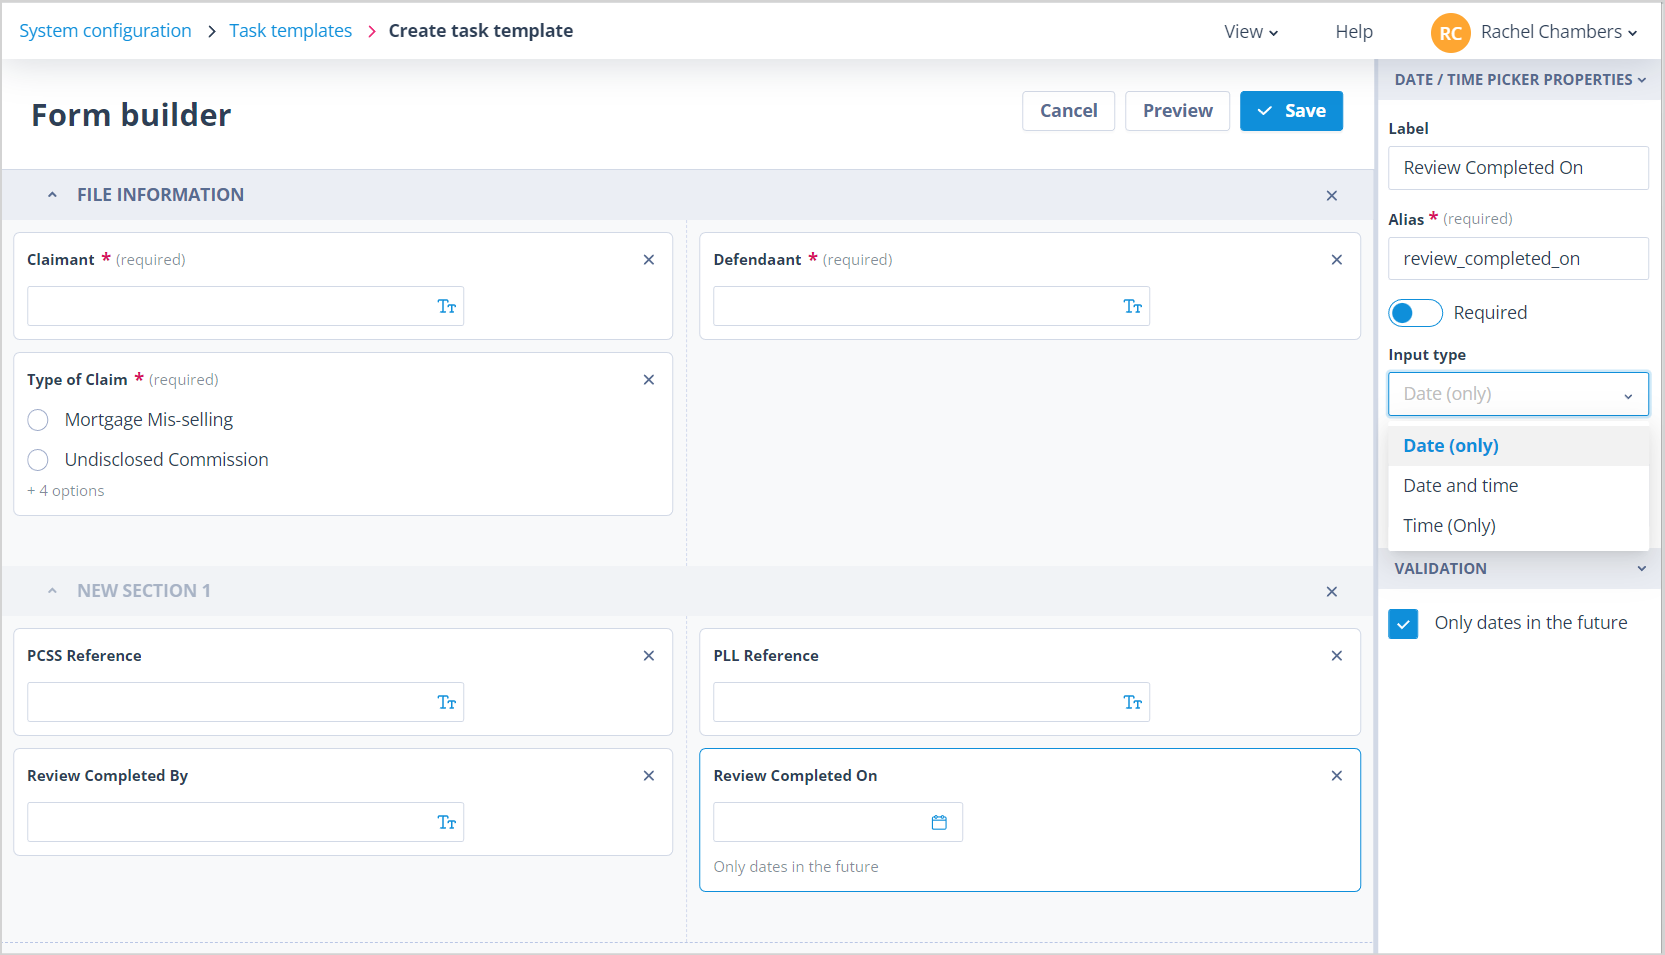
Date/Time Picker
The Date/Time Picker field type allows you to choose an input of the date, time or date and time. You can also specify that the date must be in the future.
Textbox
The Textbox field type allows you to select a single or multi line input.
Alias and labels
Irrespective of the field type being used, the alias will auto-populate from the label; this can of course be overriden if preferred. It is worth noting that the alias must be unique while the same label can be given to many fields.
CLICK HERE for more information on configuration of field types.
Instruction component
The Instruction component can be dragged anywhere onto your form in order to provide advisory text for the User who is completing the form. You can use up to 5000 characters as shown.
Preview and save
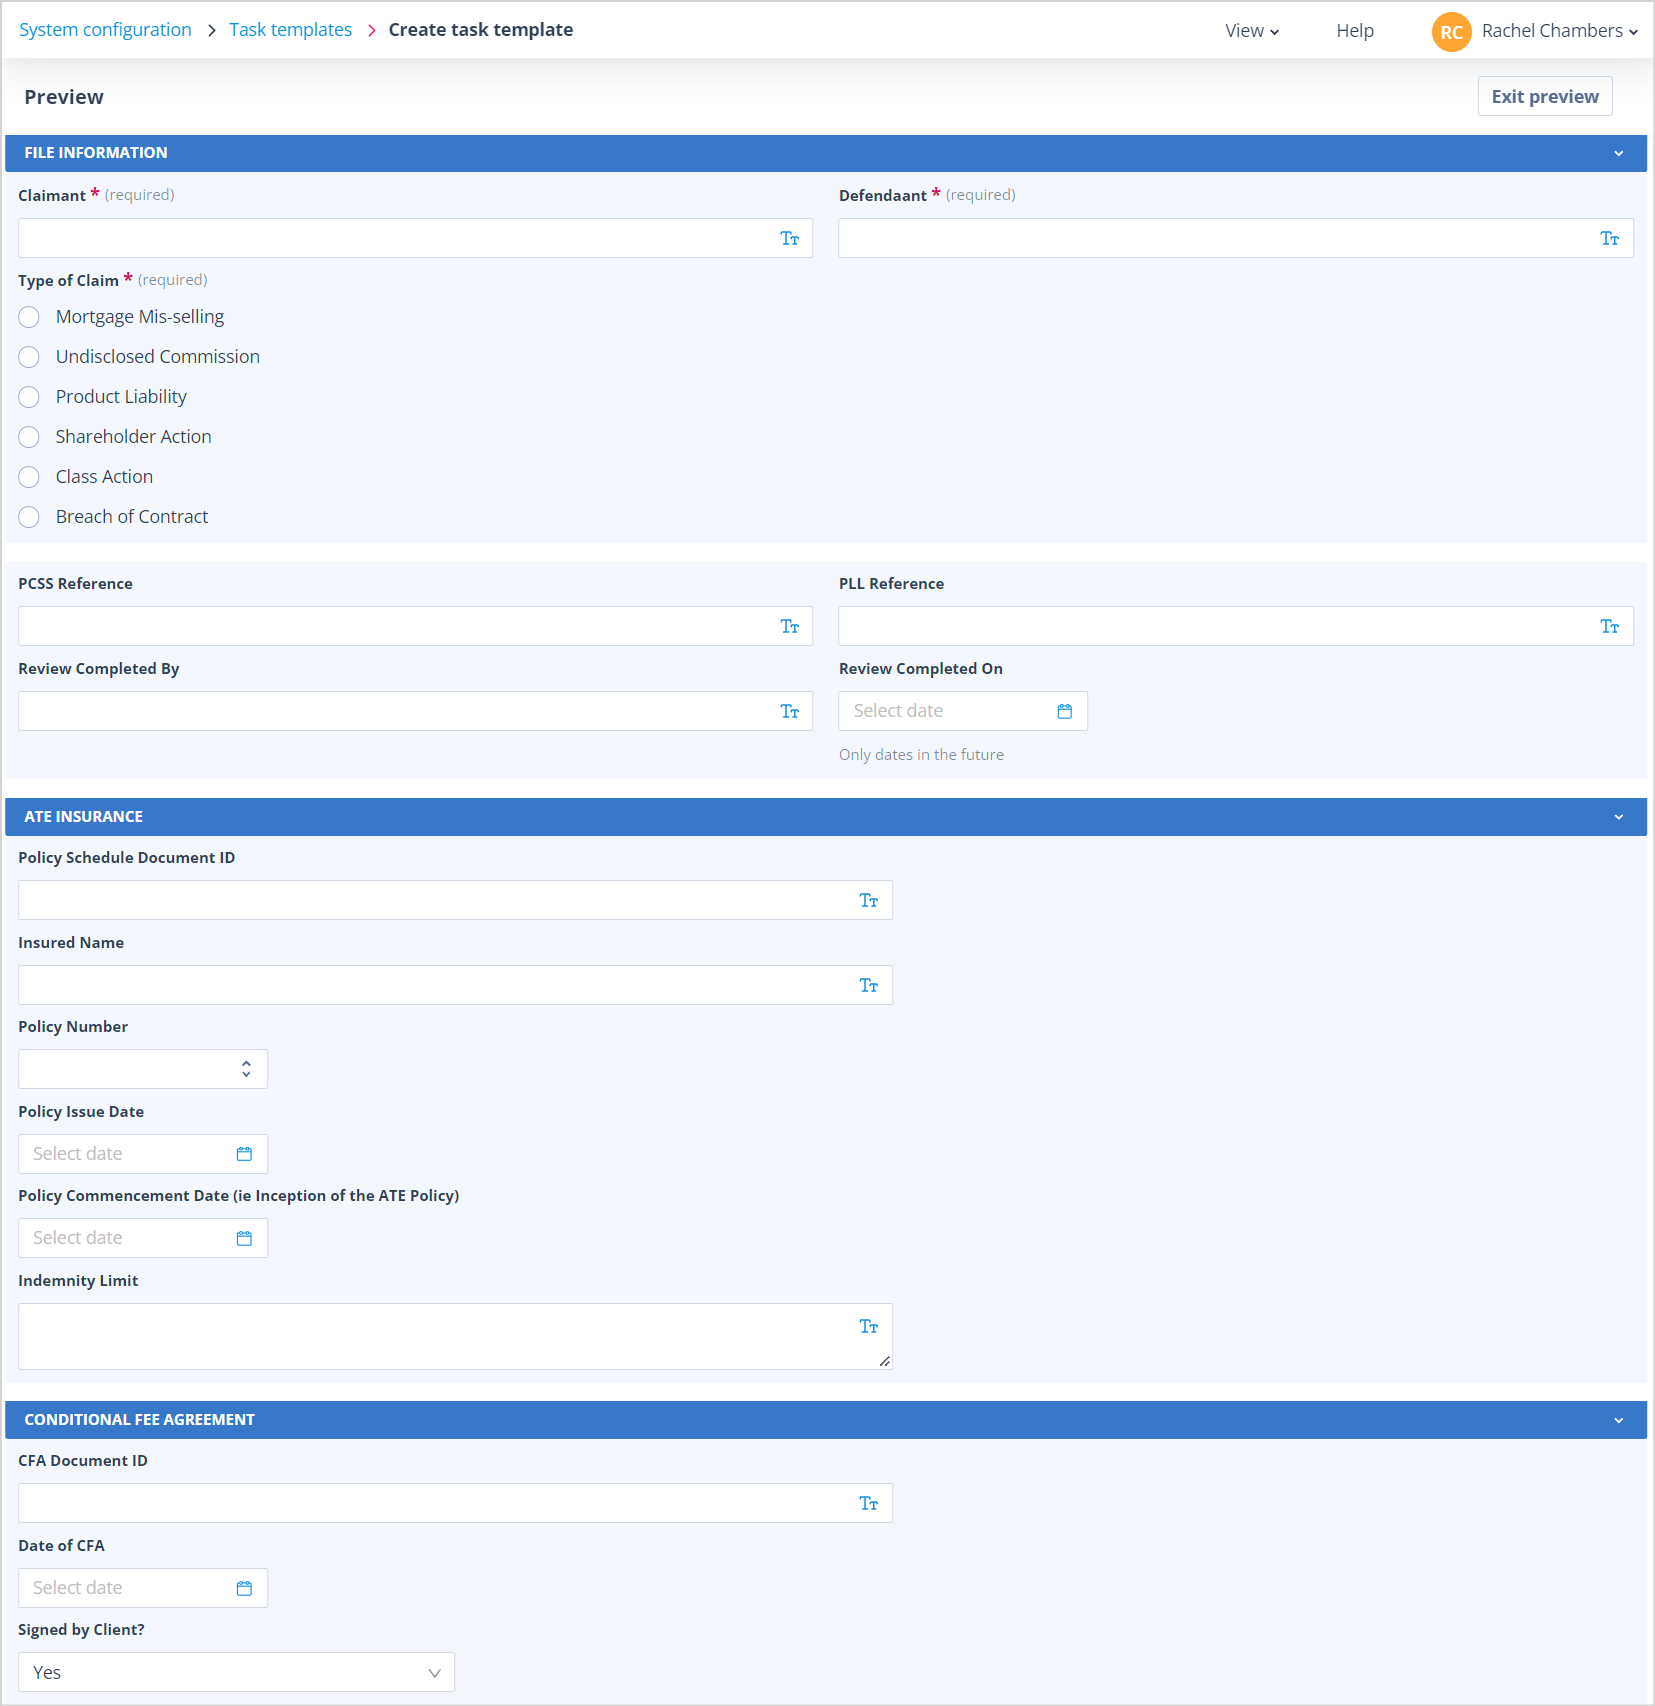
The Form builder has a Preview so that you can check at any stage how your form will look when displayed to the User responsible for completing the task.
Use the Exit preview button to return to the Form builder.
| The Cancel button can be used to abort the creation of the form. If you have unsaved changes, the Unsaved changes will be lost warning will be displayed. If you confirm Yes, you will be taken back to the Response configurationtab on the Create task template page. If you select x No, go back the Form builder will remain open so that you can continue. | mceclip0.png You will also see this warning if you navigate away from the page. |
The Save button is only enabled when you have unsaved changes. Ensure that you Save the form when you are happy with it. This will take you back to the Response configuration tab on the Create task template page. Here you can complete the configuration of the Task and Save it.
Example uses
This task type can also be used to provide a statement to a User or to get them to sign a declaration. The example shown below (in Preview mode) is a statement about how data will be used.
The form has been constructed with two sections. In the first an Instruction component has been used to provide the statement. In the second the User is presented with a Textbox in which to "sign" their name and a Date/Time Picker so that they can select today's date when giving their consent.
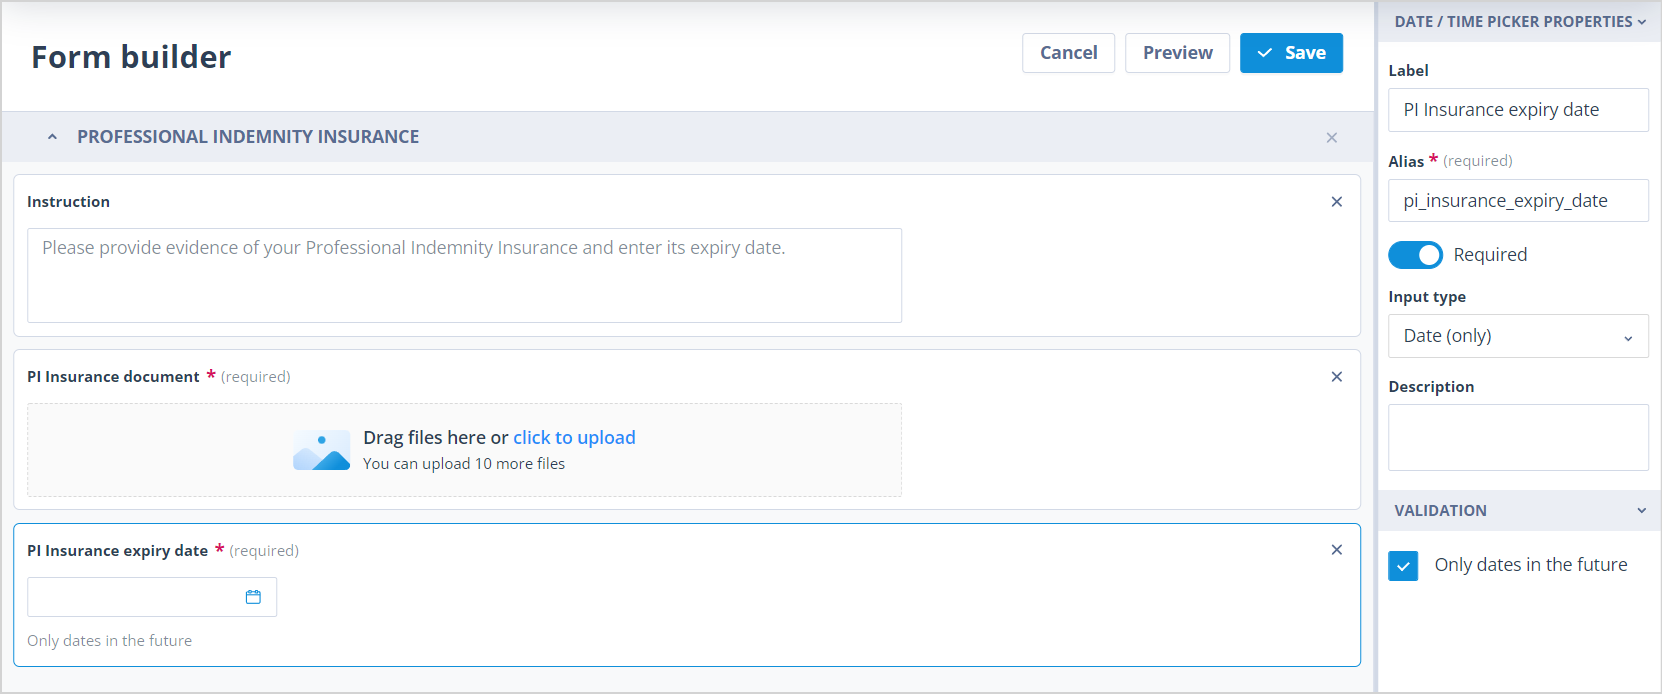
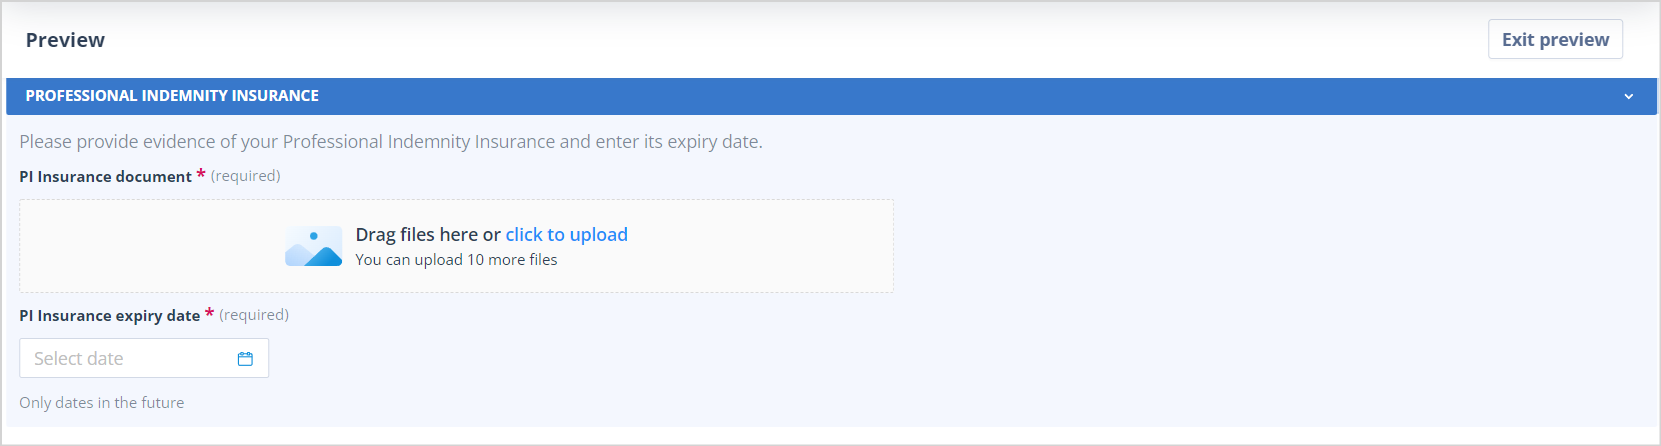
Your task may be much simpler. For example, the requirement may be for the person completing it to provide a document.
This can be done very simply with the use of a File upload field.
The example shown also includes a Date/Time picker with input type "Date (only)" so that the document expiry date can be given at the same time.
| mceclip11.png | mceclip12.png |
Availability in the Sequence designer
All Tasks of the type Complete self-contained form which have the Task creation mechanism, Automatic will be available in the Task Templates menu in the Sequence designer - for ALL Object classes.
These can be dragged and dropped onto the Workflow section as required.
| seq_task_3.jpg | seq_task_2.jpg |
| Tasks of this type which have the Task creation mechanism, Manual will be available for creation against any Record in any Object class from the Tasks tab in the side panel. | mceclip15.png |